

Installing AllStarLink on a Dell Wyse 3040
How to, plus some tips and tricks that make it easier

If you’re not familiar with installing an operating system from an ISO file, it may feel a bit daunting to consider installing AllStarLink. Just reading that sentence can cause otherwise brave humans to quail!
But it’s not really all that hard to do. You aren’t going to break anything that can’t be fixed and you’ll feel much more accomplished once you’ve accomplished this. The cost is low for a computing platform that is strong enough to run AllStarLink so you are not risking much by giving this a try.
For my step-by-step explanation, I’ll install AllStarLink on a Dell Wyse 3040 thin client computer. This computing platform is lightweight, compact, durable, and capable. I’ll use the AllStarLink ASL 2.0.0-beta images for Intel/AMD and the Raspberry Pi 2, 3, or 4.

Remember that you can always refer to the official AllStarLink.org Beginners Guide wiki page for helpful information.
Steps
1 – Select your platform
Required: a computing platform.
Dell Wyse 3040 thin client
For this install, I’ve selected a Dell Wyse 3040 thin client device. According to the system specifications, the 3040 thin client has an Intel Cherry Trail x5 Z-8350 (1.44 GHz Quad Core) processor. A simpler description is contained on the 3040 label: intel inside™, Atom x5. This relatively slow CPU is quite capable of running ASL on the Debian 10 operating system. Compared to computers with newer, faster processors, the 3040 sips power, making it an economical choice. It also costs less than a Raspberry Pi single-board computer! (Read this comparison: https://qubitsandbytes.co.uk/dell-wyse-3040-vs-raspberry-pi-4/)

I get my 3040s from eBay sellers, opting for the model with 2 Gb of RAM and 16 Gb of storage. ASL will run on less. For example, my node on a 1 Gb cloud server (link with affiliate code) is only using a touch more than 4.6 Gb of storage.
Power supply
A note of caution: please check the voltage required by your 3040 device. There are two generations of 3040 thin clients. The only external difference is the voltage and amps required, as printed on the baseplate of the device. Earlier devices require a 5V-3A power supply. Newer devices, circa 2019 or so, use a 12V-2A power supply. I have found that the 5V power supply will drive a 12V 3040 but I don’t suggest trying it the other way around! The plugs appear to be slightly different in size but don’t count on that preventing an incorrect connection; I’ve been able to push a 12V plug into a 5V power port.
The 12V supplies are a bit harder to find. I use an aftermarket alternative for my 12V 3040s. I also have a 12V regulated power supply for my vehicle so that I can run a radio-free node over a cellular hotspot.
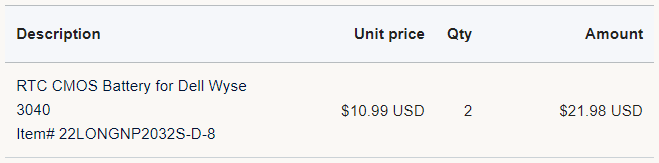
CMOS battery
You may find that the CMOS battery in your 3040 doesn’t hold the date and time. If so, you’ll need to replace the battery. A simple solution is to buy a replacement battery from Rome Tech. I bought two.
None of the 3040s circa 2019 that I’ve purchased have needed new batteries. Two 3040s from 2017 did need batteries.
Other platforms
I’ve also used a Lenovo ThinkCentre tiny PC and a Dell Wyse 5070 thin client as platforms for running ASL. On those platforms, the installation process is essentially identical. (One of these days I’ll try running ASL in a virtual machine on my Windows 11 desktop computer!)
2 – Select your software
Required: an operating system and software to run your node.
The operating system for the AllStarLink 2.0.0-beta package is Debian 10 linux.
You could, of course, choose to install AllStarLink (ASL) or HamVoIP. HamVoIP is a fork of AllStarLink. I prefer ASL simply because I lean toward open source software.

Note that installing ASL takes over the computing platform you are using. While there is some capacity to run other programs on the platform, installing ASL on a 3040 makes it a purpose-built computer.
3 – Prepare your installation medium
Required: one USB thumb drive, two recommended.
Thumb drives
I find that older thumb drives with a USB 2.0 interface work best. I use a SanDisk with 16 Gb capacity. I do find that a thumb drive that works with a USB 2.0 interface seems to work best.
Burner utility
Installing ASL involves downloading an image file (also called an ISO file) and using a burner utility to convert the image to an installable system on a USB thumb drive. I prefer balenaEtcher.


In these images, the leftmost image shows the ASL image file loaded, the middle image is after selecting a USB thumb drive as the target, and the rightmost image shows the USB thumb drive as it is flashed with the image.
If you select the Amlogic USB burning tool, please be aware that after installing and opening this tool, the Aml_USB_Burn_Tool interface will be in Chinese. Select English (it’s the third character from the left in the program menu bar), click the OK button in the popup, then close and restart the program.


You may also want to install Clonezilla on a second USB thumb drive. This is only needed if the 3040 won’t boot after installing ASL on it.
4 – Configure your installation setup
Required: a screen, a keyboard, and a mouse.
For the installation process, you can connect your existing computer monitor, keyboard, and mouse to the 3040. However, I prefer to use a separate 7-inch screen, keyboard, and mouse. I do that so I can quickly search for information using my desktop computer.
The 3040 has two Display Port monitor ports on the back. The HDMI monitor cable you probably have on hand won’t fit. An easy solution is to purchase an inexpensive DP-to-HDMI adapter.
5 – Modify the BIOS settings before installing ASL
Got your 3040 connected to a screen, keyboard, and mouse? Ready to plug in the power and push the power button? Go ahead and start it up, then press the F1 to enter the BIOS configuration utility. I press the F1 button over and over — tap tap tap tap tap — until the BIOS screen appears.
These are the things I set in the BIOS:
General
System Information — make sure you have 2 Gbs of RAM.
Boot Sequence — disable all (uncheck all). You may need to unlock this screen. The default admin password is Fireport.
Date/Time — set to your local time. If you find that the system does not keep time, you’ll need to replace the BIOS battery.
System Configuration
UEFI Network Stack — check the box
Integrated NIC — enabled
USB Configuration — make sure all ports, front and rear, are enabled
Audio — I check the box
Security
Admin Password — I remove the admin password, which requires the BIOS password. The default password is Fireport.
UEFI Capsule Firmware Update — check the box
CPU XD Support — check the box
Secure Boot
Secure Boot Enable — check the disabled box
Performance
Intel SpeedStep — check the box
C-State Control — check the box
Limit CPUID Value — uncheck the box
Intel TurboBoost — check the box
Power Management
AC Recovery — select Power Off
Auto On Time — disabled
USB Wake Support — uncheck the box
Wake on LAN — disabled
POST Behavior
Fastboot — thorough
Virtualization Support
Virtualization — check the box
Wireless
Wireless Device Enable — uncheck the box
Then click the Apply button and check the box for “Save as Custom User Settings.”
6 – Install ASL to the 3040 thin client
The Beginner’s Guide covers how to download and burn an image to your thumb drive. Essentially, you download the image, burn it to your thumb drive, then boot the 3040 from the thumb drive. I note that USB 2.0 drives seem to work better (sometimes!) than newer thumb drives. Your mileage may vary.
To boot from the thumb drive, reboot the 3040 device and press the F12 key over and over until you see a screen that lets you choose what device to boot from. Select your thumb drive and press Enter.
For more, I refer you to the Beginner’s Guide at https://wiki.allstarlink.org/wiki/Beginners_Guide.
7 – Boot to the new system
OK, you’ve made it through all the steps so far, and with a sense of excitement (or perhaps foreboding), you restart the device. You may see it boot right into a blue Debian linux screen. If so, just wait because it will finish booting in a few moments.
But you might get this dreaded screen:

David Gleason NR9V provides a solution:
Once the install finishes to the 3040 internal flash, it won't boot, but you can then boot from a UEFI clonezilla USB, select the "Local operating system (if available)" boot option and then the Debian OS option, and then do the following:
sudo mkdir /boot/efi/EFI/BOOT
sudo cp /boot/efi/EFI/debian/shimx64.efi /boot/efi/EFI/BOOT/BOOTX64.EFI
Then remove the USB drive and power cycle the PC. It will then boot fine, and the rest of the AllStar setup process is then the same as on an RPi. Refer to the AllStarLink.org Install Guide to complete the node configuration and properly provision it on the AllStarLink Web Portal.
Other notes:
On the 3040 device, you may need to hold the power button for several seconds. Wait a few moments and press it again to power up the device. To select the thumb drive as the drive to boot from, press the F12 key over and over immediately after pressing the power button. Don’t stop until you see the choice to select a boot drive or the installation screen for ASL appears.
Here’s another wrinkle that I’ve encountered: a message that says the device is missing firmware. “The missing firmware files are: rtl_nic/rt18168h-2.fw” You can find that at https://packages.debian.org/search?searchon=contents&keywords=/lib/firmware/rtl_nic/rtl8125b-2.fw However, it’s easier to skip this and later run this command: “sudo apt-get install firmware-realtek firmware-misc-nonfree”
If the BIOS is locked in your 3040, try the default admin password. What is it? Fireport
To upgrade ASL
Find instructions at https://github.com/AllStarLink/ASL-Asterisk
David Gleasan NR9V also writes:
I would also ignore the "Install the ASL Repo" steps on the ASL github "Prerequisites". If an update causes ASL to revert to an older version I can think of no other cause. And of course that would happen anytime you did any OS updates, not just when updating/installing AllScan. If you already did the above steps you should be able to undo them, eg.
# see if asl repo is in apt sources, remove if so
cat /etc/apt/sources.list.d/allstar.list
rm /etc/apt/sources.list.d/allstar.list
# same as above but for file in "Alternative" instructions
cat /etc/apt/sources.list.d/allstarlink.list
rm /etc/apt/sources.list.d/allstarlink.list
Debian should then no longer try to do update ASL (from their repo which hasn't been updated in 2 years) when doing OS updates.
Additional packages you may wish to install
Additional packages I like to install include:
xrdp for remote desktop protocol (sudo apt install xrdp) — I use RDP to manage my 3040 devices on my local network from my Windows computer (look for Remote Desktop Connection in Windows)/
MATE desktop (sudo tasksel) … a lot goes on so this takes a while to complete. You don’t need this if you aren’t going to run a desktop interface on your 3040.
Note that if the installation of MATE via tasksel fails, it is rather cumbersome to repair the problem. I’ve had this happen a few times. Now, I use apt to install MATE: https://vitux.com/debian_mate_desktop/
After installing MATE desktop and rebooting, I take a look at disk usage and at the system monitor. Both can be found in the MATE menu under Applications —> System Tools.
wicd for network management (sudo apt install wicd) — but note that while it runs nicely on Debian 10 (and that’s what the ASL image is on) it is not available for Debian 11.
i7z for occasionally checking processor temperatures (sudo apt install i7z).
rdiff-backup to help keep backups of ASL files (sudo apt install rdiff-backup).
AllScan for managing my favorites. Find it at: https://github.com/davidgsd/AllScan#readme
Upgrade Supermon if you wish, but if you are going to use AllScan and also the ASL Menu in the Debian 10 ISO, there is little need for Supermon. Find instructions in this thread: https://groups.io/g/Supermon/topic/welcome2/83794098
Also, you may need to reset the password in the supermon directory. While still in the /var/www/html/supermon directory, delete the “.htpasswd” file.
Next, you will type or copy/paste this into the terminal:
htpasswd -cB .htpasswd admin
It will then ask you to put in a password. Input whatever password you want there.
Wifi adapters are a bit challenging. If necessary determine the Linux kernel with sudo uname -r. Many devices only work with newer Linux kernels. This one works with the Debian 10 ASL image but I see that it is no longer available: https://www.amazon.com/gp/product/B003MTTJOY/
There is a newer version of that device that is available and it does work with the Debian 10 ISO: https://www.amazon.com/dp/B08F2ZNC6J
And that’s the installation process. Configuring ASL on the device is a different topic altogether. I hope this long article helps walk you through installing ASL on a computing device like the Dell Wyse 3040 thin client!
