

Random Wire 142: Building an RPi 5 AllStarLink node
August 1, 2025: I build an AllStarLink node on a Raspberry Pi 5 platform with an NVMe drive!


Fingers in the Pi: Raspberry Pi 5 + NVMe drive
I exchanged some money for a new Raspberry Pi 5 board, a case with an NVMe drive option, and a M.2 NVMe drive. I have not worked with the RPi 5 before, nor have I added an NVMe drive to an RPi system before. Lots of learning occurred!
The pieces
I splurged on the RPi 5, buying the version with 16 Gb of memory. Why so much memory? Why not! I don’t know what I’ll eventually use this for, so I chose to load it up with as much RAM as I could get:
Since the RPi 5 is known to run warm under load, I sourced a solid case with active cooling:
Argon NEO 5 Case for Raspberry Pi 5 (BRED) | Aluminum case with Built-in Fan
And I bought the NVMe base for this specific case:
Argon NEO 5 M.2 NVME Expansion Board Only | Raspberry Pi 5 NVMe PCIe Support
The quality of power supply is important. For the RPi 5 with NVMe, it needs to have 5-amp capacity at 5 volts. I prefer a shielded line since I tend to encounter a lot of radio frequency interference when I operate. The Canakit power supply meets my criteria:
CanaKit 45W USB-C Power Supply with PD for Raspberry Pi 5 (27W @ 5W)
The NVMe drive is a big one (it didn’t cost much more than a drive half as big):
Silicon Power 1TB - NVMe M.2 PCIe Gen3x4 2280 SSD (SP001TBP34A60M28)
The case came with really small black vinyl buttons for the feet on the case, but I had some larger ones so I used those. They are more substantial and raise the case a little bit higher off the desktop surface.
Assembly
When it comes to showing how I assembled the case, I’m afraid I failed you, good reader. I got so wrapped up in fitting this all together that I took no photographs! Fortunately, the user manual for the case clearly shows how to assemble the case, step by step: https://argon40.com/blogs/argon-resources/argon-neo-5-m-2-nvme-pcie-case-for-rpi-5-manual
(I actually ordered this as a combined case-plus-base assembly but two parcels were shipped, one with the case and one with the base. No worries, it all went together perfectly.)
Even if you’ve never installed an M.2 NVMe board before, the physical characteristics of the board make it pretty obvious where the ends go. Don’t try to push the connector end in with the board in the final, flat position. Instead, angle the board up about 30 degrees and it should slide easily into the connector. Then gently rotate the board down to the flat position and secure the other end with a screw.
The biggest challenge for me was routing the wiring for the cooling fan. It’s tricky, and the wires have a mind of their own. They did not want to stay in place. If I have to take the case apart again, I will use some small bits of double-sided tape to keep the wires in place. During assembly, I used a toothpick to push an errant bit of wire back into place before cleanly seating the base.
As I write this, the node has been running more than 30 hours.
Impressions
I’m always surprised at how small the Raspberry Pi platform is. I shouldn’t be, but each time I assemble a board and case, I’m just a little bit shocked and awed that I am holding a 64-bit computer in the palm of my hand.
Here are several views of the assembled Pi.


")

The RPi 5 definitely runs faster. AllStarLink audio sounds smoother to me, compared to running ASL on the RPi Zero 2 W. It must be a headroom or throughput thing. I don’t think I’ll keep the RPi 5 in service for an AllStar node. It is overkill for that duty. I’ll be assembling an RPi 4 (with 8 Gb of RAM) and case for permanent service as an AllStar node. The RPi 3B+ is plenty strong enough, but I want the extra RAM capacity the RPi 4 provides.
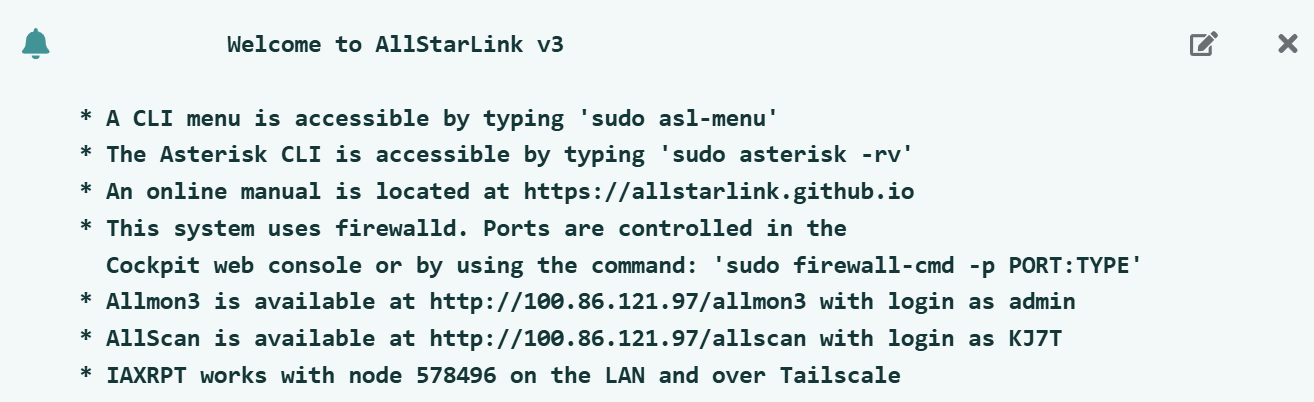
AllStarLink 3 and Cockpit installed cleanly
The “ASL3 Appliance” package from AllStarLink.org installed smoothly.
Hitting the IP address of the node brings up the Appliance interface:

Choosing the left-hand pane titled Web Admin Portal will open the Cockpit interface. Choosing the middle pane will open Allmon3. When you click the Web Admin Portal, you’ll get a login screen. Note that you can also jump directly to the login screen using the IP address of the node and port 9090, e.g.: 192.168.1.123:9090

Here’s what the Cockpit looks like when you are logged in:

I edited some of the information in the Welcome box to help me remember how to get to Allmon3 and AllScan on this node:
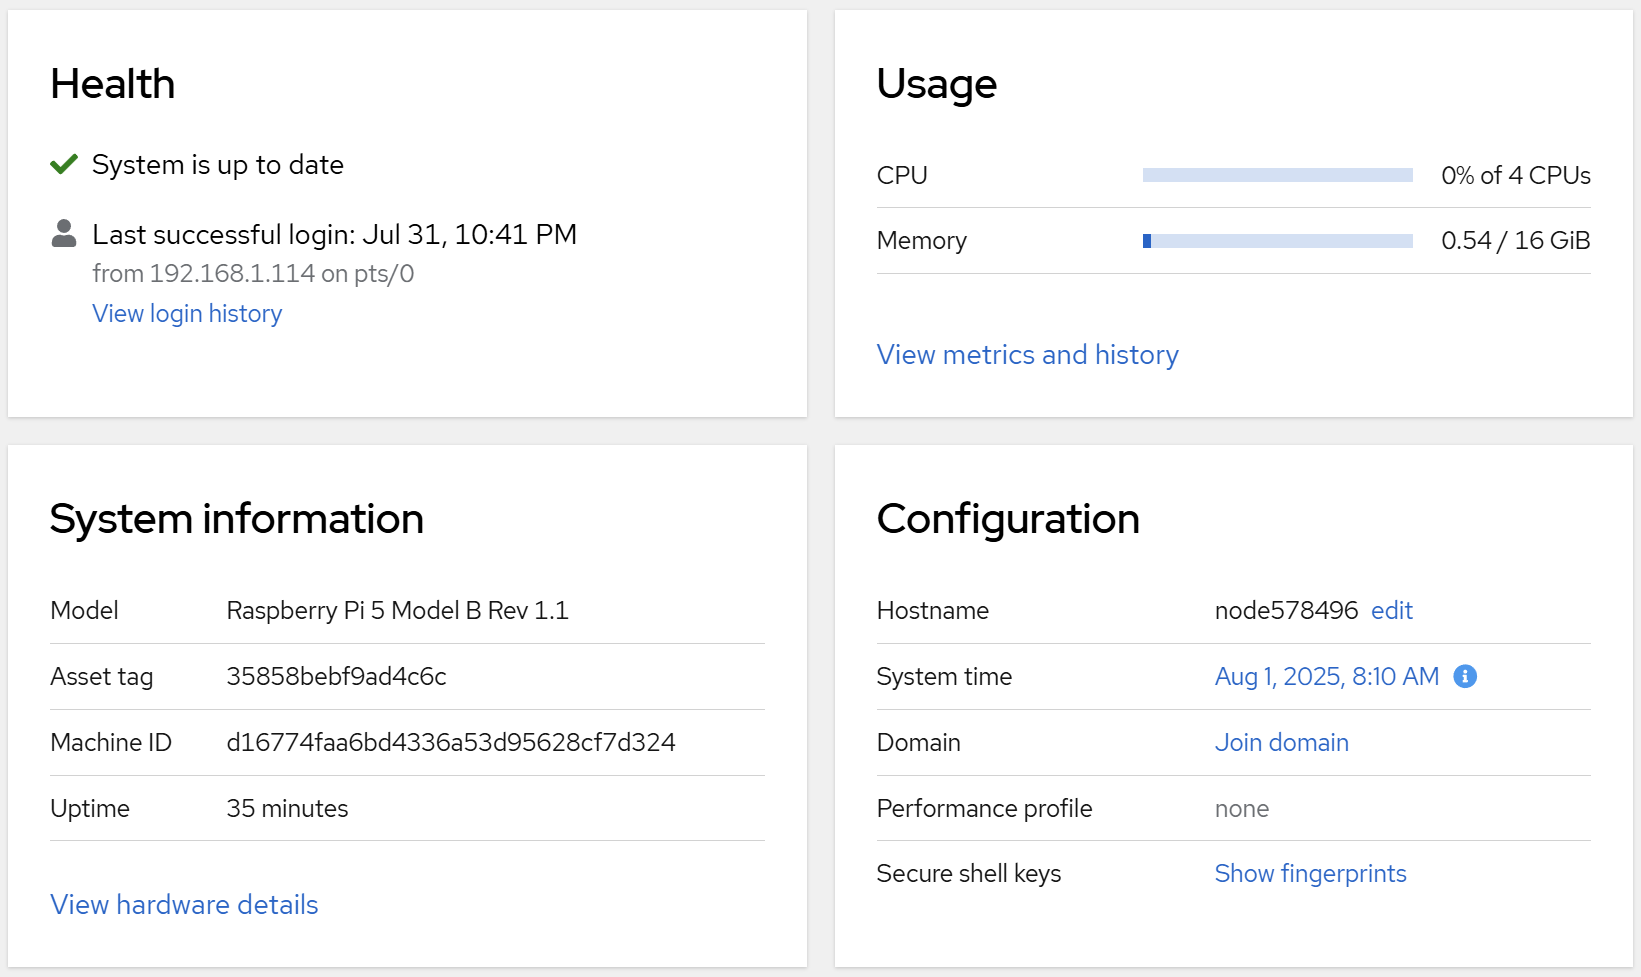
The Cockpit provides a high-level system overview:
The left-column menu has links for:
Overview
Logs
Storage
Networking
Accounts
Services
Tools
Applications
Diagnostic reports
Software updates
Terminal
WiFi manager
Some hiccups along the way
Font sizes too small when remoting to the desktop environment
Remoting to the desktop of my node 578496 uses x-server. Unfortunately, I found the fonts to be very small on my high-resolution screen. A solution is described at: https://www.reddit.com/r/debian/comments/ti8004/solved_my_font_size_is_too_small_heres_how_you/
In your home folder /home/user_name look for a file called ".Xresources" it will be hidden. If you don't already have one, create a file in your home directory named .Xresources to store your preferences for various X programs.
Append a line to the file such as:
Xft.dpi: 96
I iterated the 96 number to larger values until I was comfortable with the font size displayed on my screen.
Used DD and raspi-config to get NVMe working
The advice I found online on how to copy the working microSD card to the NVMe drive didn’t help. Most of it called for removing the microSD card or the NVMe drive, and since routing the cooling fan wires was frustrating, I really did not want to open up the base of the system again. Instead, I turned to dd, a long-established utility used to copy data to another disk.
To use dd, I needed to find the names of the resources. For that, I turned to lsblk.
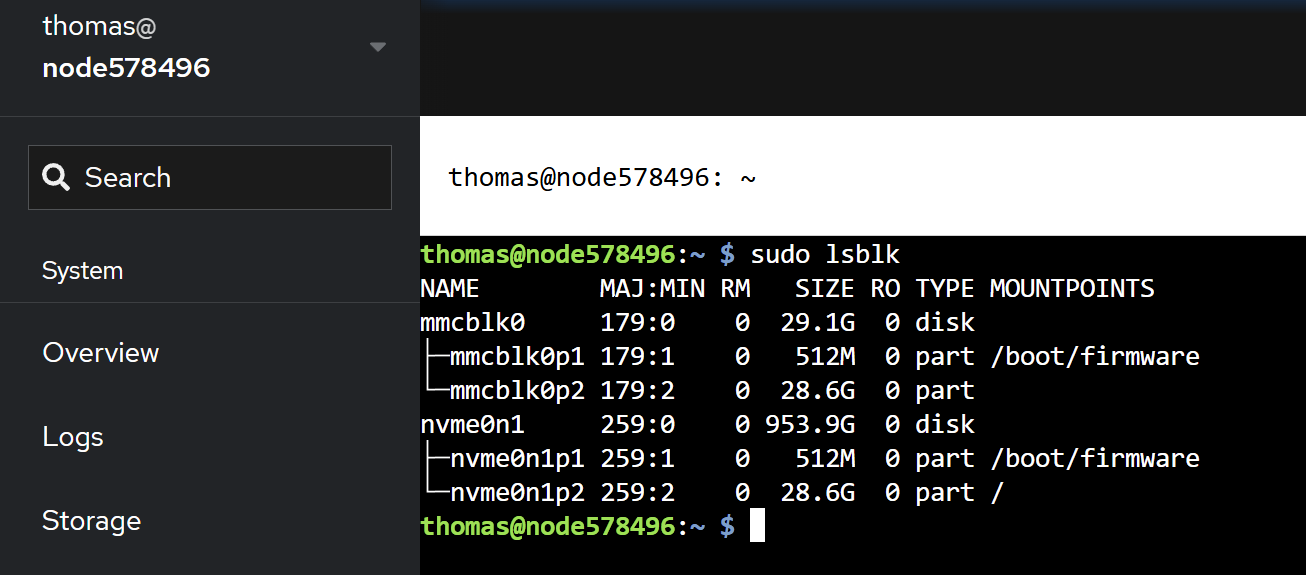
The microSD card is mmcblk0 and the NVMe drive is nvme0n1.
For dd, this command string copied the microSD to the NVMe drive:
dd if=/dev/mmcblk0 of=/dev/nvme0n1That worked perfectly.
The RPi will still boot from the microSD card unless the boot order is changed. To change the boot order so that the system would look to the NVMe drive first, I followed the advice found at https://www.raspberrypi.com/news/using-m-2-hat-with-raspberry-pi-5/ that called for running raspi-config from the command line. That worked great. I show how to do this in the screenshots below. The other thing that these screenshots demonstrate is the exceptional clarity of the terminal when called from the Cockpit. To call up raspi-config:
sudo raspi-config


DTMF codes for node 578496
I added the DTMF codes to announce the LAN and WAN IP addresses, start and stop wifi, and stop and reboot the node. The source of this information is the AllScan AllStar App & Nodes group on Facebook. (I need to collect the latest information and share it in the Random Wire because finding it isn’t as easy as it could/should be.)
Those custom DTMF codes also call a number of shell scripts. The easiest way to install them without making fumble-fingered errors is to install AllScan. The newest version of AllScan includes the shell scripts, as you can see in the screenshot below:

And that’s it for now. As noted above, the audio quality seems better with the faster, more capable Raspberry Pi. Next week, I’ll build out the RPi 4 version which will have a SATA drive instead of the RPi 5 system with an NVMe drive.

HOIP update: working and not working…yet
I have Hams Over IP working on my Groundwire softphone and my Polycom VVX-401 hard phone. That’s a win.
I’m holding off on reporting the details because I’m trying to get an IAX connection working on my AllStar node 588418 so that I can connect it to the Polycom phone. So far, no joy. This is odder than it sounds because node 578496, sitting near node 588418, connects easily over IAX (see next item).
IAXRPT with node 578496
I discovered that IAXRPT on my Windows 11 laptop will connect to my node 578496 while it is behind the firewall at my wife’s skilled nursing facility. Normally, this wouldn’t work because of the very restrictive firewall. What I did was to use a Tailscale connection to tunnel through the firewall. It worked great.
This works when I use the Tailscale IP address for node 578496. It does not work when I use the non-Tailscale URL: 578496.nodes.allstarlink.org.
Neofetch on node 588418
This is completely unnecessary software but I like it. I installed neofetch on my AllStar node 588418. For more about neofetch, see https://github.com/dylanaraps/neofetch?tab=readme-ov-file
Neofetch gives me an overview of the system. I added it to the end of my .bashrc file so every time I open a terminal window, neofetch presents an overview of the system to me. It looks like this:

Neofetch (shown above) provides a bit more information than does screenfetch (shown below running on node 578496):

Installation was easy for both packages. For example, this string installs neofetch:
sudo apt install neofetchPersonal note…
It’s been a busy week. I’ve been procuring “durable medical equipment” (that is Medicare-ese for things like wheelchairs and walkers) all week. Several items arrived last night, so instead of putting the finishing touches on this issue of the Random Wire, I was out in the garage assembling the durable medical equipment. The instructions were a cross between Ikea graphical assembly directions and poorly translated manuals. I pretty much ignored the instructions and put the things together, then looked at the instructions to make sure my results looked like the illustrations.
The other big news about my spouse is she took 40 steps yesterday. (For those new to this situation, my wife suffered a significant brain bleed on May 8th. She spent two weeks in a critical care unit in Seattle and has been in a skilled nursing facility since then. I expect to be bringing her home next week.) This was with the help of a walking assistance machine. If you have ever rock climbed, or used a bosun’s chair, you’ll understand when I describe this as a harness the patient sits in, suspended by four adjustable seatbelts (yes, with the push-button release!), all suspended from a frame on wheels that can extend vertically. (I noticed it uses a couple of small sealed lead-acid batteries for the motors.) The patient is suspended in the harness. My wife’s good leg was in full contact with the floor and bearing her weight, so she wasn’t being carried along. Her affected leg was also bearing weight, and while the steps were jerky and awkward, they were real steps. It was a great moment. We still have a long road ahead of us, but I remain hopeful that some mobility will be recovered as we continue to work on building new pathways between her brain and muscles.
73 to all. Remember to touch a radio every day!

Hey Tom. First at all, it's good to know your wife it's getting better. Best wishes to her. Thanks for sharing your experiences with Raspberry Pi 5 and all it's available accessories. I have a Raspberry Pi 5 with that same case,but didn't know that it had an expansion board for the NVMe disk. I wanted to ask how the Raspberry Pi 5 behave related to power consumption. I have one and couldn't find a power source that "pleases it" it's always saying "your power source does not have enough power" even with laptop usb-c power sources. With some medium power sources I even got it restarting due to power problems. I wish they make a 12v-powered Raspberry Pi to avoid having to deal with this "trillion-amp at 5v" power requirements. Nevertheless I really enjoy, like you said, the fact that is a 64bits, fully functional, palm-sized computer.
My best wishes to your wife, Tom. Seeing your picture of the Argon pi5 reminded me that I have an Argon pi4 sitting doing nothing in a drawer, so I’m going to build an AllstarLink node on that.