

Random Wire 148: Antennas, some HF radio time, MX Linux, and the DVMEGA Cast radio.
September 12, 2025: It was a busy week with little time for radio, but I found time to play with antennas, HF radios, and MX Linux. The DVMEGA Cast radio is on order.

Last week was a bit heavy on Linux and M17, so let’s talk about radios (and follow up on some of the issue 147 topics) in Random Wire 148.
It’s been a very busy week. My spouse was discharged from her post-stroke in-patient rehabilitation facility. I brought her to my sister’s lake house. We’ve had one emergency room visit since then and we’re still trying to find whatever our new day-to-day normal is. I’ve had little time for radio activities, so Random Wire 148 is a bit light in content this week.
Top of mind
The first ever Zero Retries Digital Conference will take place tomorrow. I had hoped to attend in person, and perhaps even be a presenter. That went out the window because of a family medical issue, but I’ll be participating (when I can) remotely via Zoom. I want ZRDC to go well, not only because I support a lot of the innovation happening around digital radio (voice and data) in our amateur radio space, but also because my friends Steve and Tina Stroh have put so much of themselves into the conference. They’ve been working on this for many months so I know the conference will be a big hit. (See their latest conference update from last week.) The Zero Retries newsletter helps me stay informed about the latest developments in the digital radio space.
And a humble thank you to Steve for including the Random Wire newsletter in his Amateur Radio Technological Innovation In the Pacific Northwest list. To quote (with a gender modification) a lyric by Ronnie Spector: “I’m just a [boy] whose intentions are good.” I feel out of place to be listed alongside so many great leaders in amateur radio who hail from the Pacific Northwest. I am grateful and honored.

Antennas
New antennas are arriving! I have to admit that it is very enjoyable to fiddle with new antenna systems. The only thing better is playing with new radios.
I managed to get one antenna tuned to a 1.33 SWR on 28.450 MHz. Then I pulled my Yaesu FT-450D out of the Pelican case and set it up on the deck overlooking the lake.

The antenna that worked for me was a simple MJF vertical system, the MFJ-2286 “Big Stick” telescoping aerial on an MFJ-1918 tripod.

(I didn’t realize I had lined up the antenna with the trunk of the tree until I downloaded images later.) Rule of thumb for telescoping antennas: open them starting at the tip (smallest diameter) and working your way to the largest sections, and when closing, do it the opposite way. This is really true when using a hollow fiberglass mast because if you start collapsing the mast from the tip, that smaller diameter section can disappear down the mast and then cause a larger section to get stuck when trying to collapse it.
I did try my new OCF antenna from Palomar Engineering (Bullet End Fed OCF Antenna System, 100 Watt, 25 Feet Wire, 20-17-15-12-10-6 meters), currently on sale for $120. However, I couldn’t get an SWR less than 4 (but see below) so I need to revisit how to configure this antenna. I played with it as a horizontal, sloper, inverted L, and vertical. The best SWR I found for 10 meters was as a horizontal wire, but at 4, that was still too high for my comfort zone. It was tunable, but it was also going to be lossy.
Similarly, I tried an MFJ-2980, a 31-foot “featherlight” fiberglass mast with a wire. With the 4:1 balun, my SWR readings were still around 4. Too high.
Hmmm…SWR readings of 4 and over…I think I’d better check the connections with those antennas. I don’t think it’s the coax because I used the same coax with the Big Stick where I achieved a much lower SWR, but I’ll check continuity of the coax anyway.
The Mason County Amateur Radio Club has a weekly net on Tuesday at 7:00 PM Pacific on 28.450 MHz USB.

Here’s a brief clip from the 10-meter net. It doesn’t sound like digital radio, does it!
Band conditions weren’t great, but we heard one station in Georgia call into the net. Most of us were located in the Grapeview-Belfair area of Washington State.
The next day, I set up again but with the Palomar OCF antenna mounted vertically on the MFJ 31-foot telescoping mast. This time, I was able to get a 1.5 SWR on 20 meters. It turns out that the location of the RF choke makes a difference. The directions call for it to be 7 feet from the feed point of the antenna. The outer braid on the coax then acts as a counterpoise of sorts for the off-center-fed antenna wire. Sounds a bit odd but it worked.
I caught several stations on 20 meters working the Route 66 contest. I heard Georgia, North Carolina, Maryland, Kansas, Illinois, Ohio, Arizona, New Mexico, and more.

You may have already connected the dots when you saw the Douglas fir branch in the image above: yes, there is a very large tree just to the right of the picture. I do intend to put the OCF antenna in the tree, but first I’m going to assemble a launcher kit. I bought the “new and improved” Launcher 2 kit ($105 with shipping). I’ve got some sandpaper, primer, and glue. I still need to get a fishing reel and some strong line.
I do know these pneumatic launchers are dangerous. I once saw an older ham look right down the barrel of one when it didn’t fire, and as he did so, his finger activated the trigger and the projectile bounced off his forehead, leaving quite a mark. That moment could have turned out much, much worse. There is also the risk of the device shattering. I don’t plan to pressurize it to more than 35 psi.
I also set up the new-to-me Kenwood TS-50S transceiver. It didn’t put out any RF the last time I tried it but this time it worked. I set up a QSO with one of my local club members (thank you, Ben!) and we connected on 10 meters. At 10 watts output, my transmission was pretty much buried, but using 50 and 100 watts brought it up quite a bit.

Interestingly, my radio friend said I sounded better with the Yaesu FT-450D I used the night before on the same frequency. Good to know!
ZUMspot-USB device
I was excited to see the ZUMspot device arrive in my mailbox. It’s just another radio gadget, but I love big capability in a small package, and the ZUMspot-USB device certainly delivers on both of those factors. This little thing (plus BlueDV software on my Windows laptop) will give me digital voice capabilities in an extremely portable package. Since I have hotspots and nodes for the modes I like to use, I view the ZUMspot as a backup and a traveling solution. If a hotspot goes down, I can fire up the ZUMspot-USB. If I’m traveling, all I need to bring is the ZUMspot-USB in my computer bag and the handheld radio that matches the mode I’ll use.

From the ZUMspot-USB user guide (PDF here):
The ZUMspot USB revision 0.6 is a low power simplex digital mode hotspot. It supports Dstar, DMR, Fusion, NXDN, P25, M17 and POCSAG. Because of the USB interface it takes up less space than the other ZUMspot products. It is made to work with a Windows/Mac/Linux PC but it can be used with a Raspberry Pi.
From the ZUMRadio website:
The ZUMspot USB is a small and efficient Multi-Mode Digital Hotspot featuring:
High performance 32-bit ARM processor
Plugs via USB to host computer such as Raspberry Pi, Windows, Linux
Supports DMR, P-25, D-Star, YSF, NXDN, POCSAG and M17
Onboard LEDs to show status (Tx, Rx, Status and Mode)
Up to 10mW RF transmit power
Includes upgraded built-in UHF antenna
The open source firmware (MMDVM) is pre-loaded
The board is commonly used with Pi-Star and BlueDV software
1 year warranty
I ran into a “gotcha” of my own making: my ARM-based Surface Laptop 7 won’t work with the ZUMspot-USB. I’ve not found drivers that work on the Surface Laptop 7. This is one of the rare times when I’ve not been able to get something to run on my non-Intel laptop. I’ll try this on a laptop with an Intel CPU, but I ran out of time to try that this week.
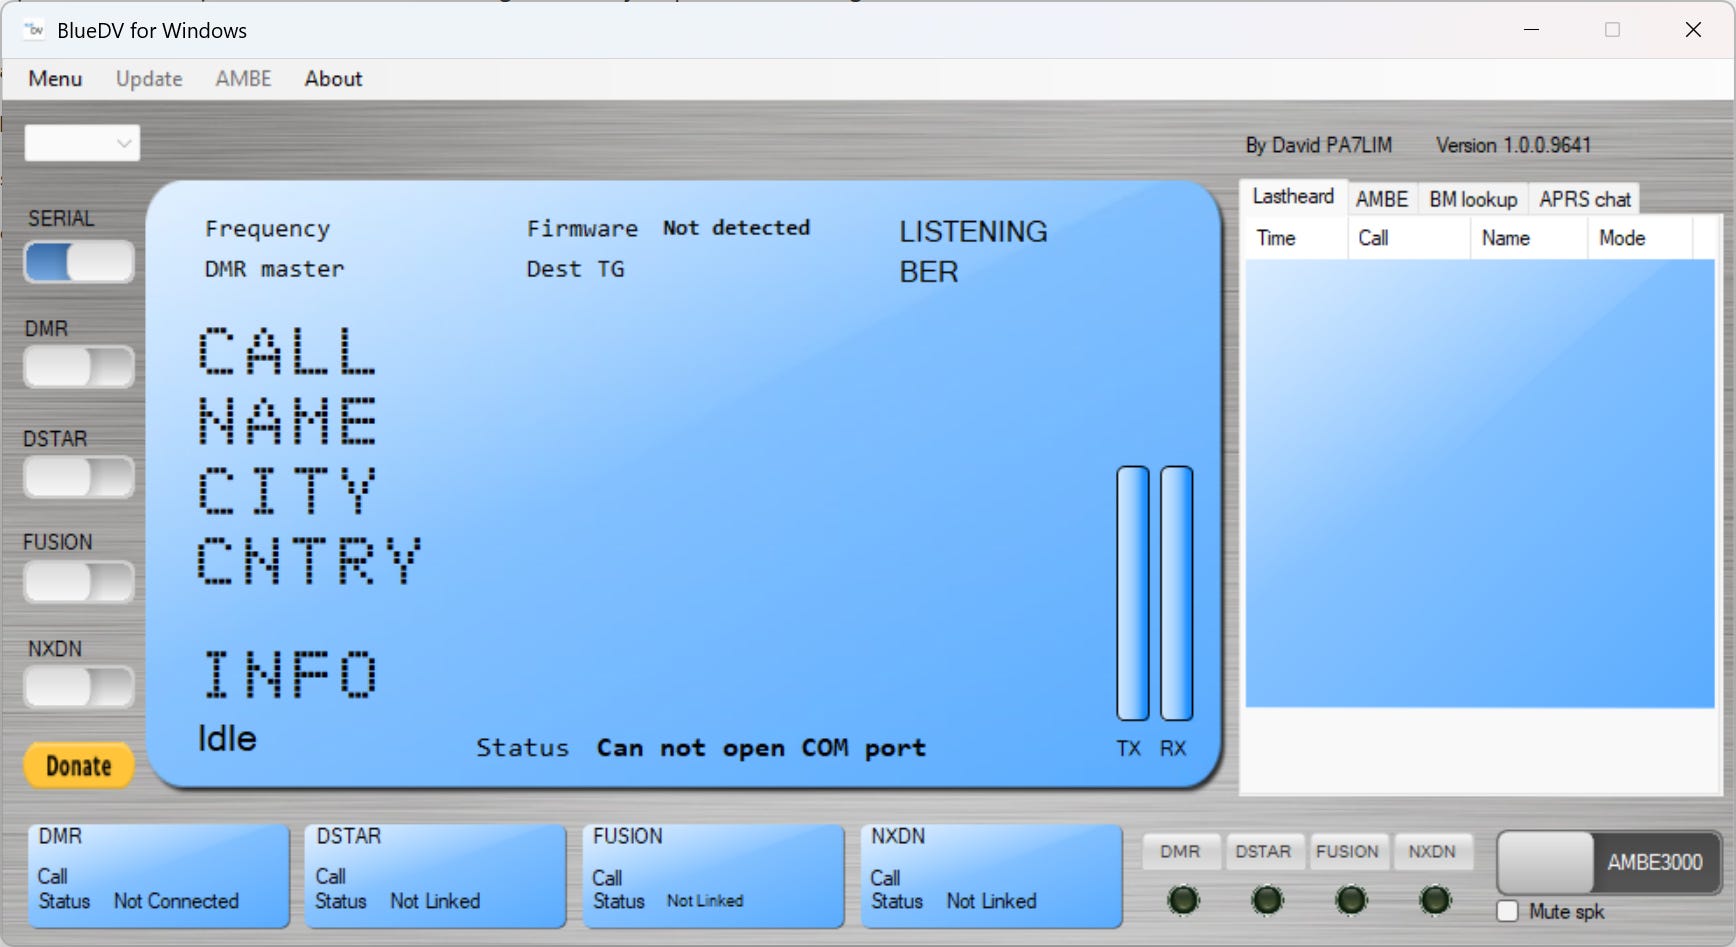
I did install BlueDV for Windows on the Surface Laptop 7 but I can’t use it without functioning ZUMspot-USB drivers. This was not a wasted effort as I noted that M17 is not present in the BlueDV interface.
MX Linux
I am playing with MX Linux. This story gets a bit convoluted so bear with me, please. Experimentation means failing, learning, and trying again. This was definitely an experimentation week.
I purchased a couple of old Lenovo 300e Chromebook computers with the intention of overcoming the Chromebook protections and installing MX Linux on them. So far, none of the recipes I’ve found online have worked for me. I did get one to run MX Linux from a USB thumbdrive…once. It ran pretty smoothly for the few minutes I had it operating.
The factors I considered when selecting a test platform were:
Durable Chromebook chassis
Major brand
CPU that runs four threads
Fast embedded storage
More than enough RAM and storage to run MX Linux
Inexpensive
The Lenovo 300e Chromebook met all of these criteria.
The 300e should have plenty of horsepower for running MX Linux. This platform has 4 Gb of LPDDR3 (Low-Power Double Data Rate)1866 MHz (Soldered) RAM. Mass storage is 32 Gb in a fast eMMC (embedded MultiMediaCard) drive. (An eMMC card has a serial interface, unlike some cards [like the Compact Flash format] that have a faster parallel interface.) The CPU is a MediaTek™ 8173C that runs at 2.10GHz and handles four threads. The 300e is certainly inexpensive.
Losing patience with this experiment, I went to eBay and bought two more 300e Chromebooks already loaded with MX Linux. However, when they arrived, I discovered they were running Mint Linux, not MX Linux. Maybe I’ll have more luck loading MX Linux on these units since the Chromebook safeguards have already been defeated.
So: two strikes so far. The first experiment has not yet been successful, and my workaround is also not working right. But I wasn’t ready to give up on MX Linux, so I tried it on a Raspberry Pi Zero 2W.
Given that it can run on a Raspberry Pi, Windows, or Linux computer, I installed it on a Raspberry Pi Zero 2 platform. (By the way, I looked for a solid copper heatsink case for the Raspberry Pi Zero but only found one offer on AliExpress, and that shop is no longer selling them. Am I the only person who likes copper?) I settled on a GeeekPi Raspberry Pi Zero 2W kit because it had a copper heatsink. I’m trying a different microSD card in this unit, the “PNY 64GB PRO Elite™ High Endurance C10 U3 V30 A2 microSDXC – Up to 17.2K Continuous Recording Hours, Up to 100MB/s Read, 4K UHD, Full HD, UHS-I, Surveillance, Home Security, Dash Cam, 3-Pack” from Amazon (affiliate link).
I pulled the microSD card out of node 578495 (the Raspberry Pi Zero 2W running in the Argon POD modular case) and put it into another RPi Zero 2W system. When I booted up that other system, the IP address had changed but I was able to log in and confirm everything was working.
I did this so that I could put MX Linux on a new microSD card and pop that into the Argon POD case. I burned the image to the microSD card with the Raspberry Pi Imager application since that already had my home wifi in the additional configuration settings.
Using the RPi respin image from MX Linux, at first boot the light on the RPi came on, flickered a few times, then went out. I found I had to remove power and then repower the RPi to get it to fully boot up after that first sequence. I also found that I had to get the system configured the first time with a keyboard, monitor, and mouse connected to it. I tried to do this headless by remotely connecting to the node but the MX Linux installation process includes configuration steps that require KVM (keyboard, video, mouse) physically connected to the computer.
But here’s the thing: On the RPi Zero 2W platform, MX Linux runs at a snails pace…and it is an extremely lethargic snail, at that. I spent an hour trying to get to the desktop, configure networking, and then correct the time setting (the install defaults to New York time). That was painful. My advice? Don’t try this on a Raspberry Pi Zero 2W. Yes, it will run…or rather, it will crawl so slowly that you’ll think it’s broken. The takeaway: don’t do this on the RPi Zero 2!
To make sure it wasn’t MX Linux that was slow, I burned a fresh microSD card and configured it for my Raspberry Pi 4 machine. What a difference that made! It is a much faster, smoother experience. In ten minutes, I had MX Linux booted, configured, and updated (326 packages!).
I also installed Tailscale (for remote access), x11vnc (to remotely use the desktop), UFW (the Uncomplicated FireWall), and duf (for simplified disk space stats).

Now that I knew it worked, I installed the MX Linux image directly to the SSD in the Argon ONE M.2 case (here’s how), removed the microSD card, and booted up the new MX Linux machine directly from the SSD. After configuration, I also installed x11vnc and then configured it to start at boot.
I found that I was not getting good responsiveness or good screen resolution when I connected over VNC from my Surface laptop to the MX Linux machine. After thinking about this a bit, I concluded that x11vnc was probably defaulting to some standard screen size, which would account for the poor resolution on my screen. I had an HDMI dummy plug in my kit, so I plugged that into the Argon ONE and rebooted. Boom. Now the system responds quickly over a VNC connection and the resolution is fine.
This is the dummy plug in my kit:
HDMI Dummy Plug(4K UHD) Headless Ghost Adapter,Virtual Monitor Display Emulator Compatible with Windows, Mac OS, Linux Support 4K/2K/1080P Multiple Resolutions (3 Pack) (this is an affiliate link)
I’m using Remote Ripple, a free VNC viewer for several operating systems, on my Windows 11 laptop.
All of this is in preparation to try installing AllStarLink 3 on an MX Linux machine. I’d prefer to do this on a platform with an Intel CPU, which is why I remain hopeful that I’ll get one of the Lenovo 300e Chromebooks loaded with MX Linux.
Why am I doing this when other solutions already exist? Why does a painter make one more brush stroke? Or an explorer travel one more mile? Or a prospector swing the pick one more time? It is the opportunity to create or discover something new. It’s not practical or logical at all. But it is absolutely enjoyable, even when such experiments fail.
TD-H3 Plus radio
I wanted to test whether Bluetooth audio devices aimed at general consumers would work with the TD-H3 Plus radio…and so far, they do. More on that in a few moments.
The “Plus” in the radio name refers to “Plus Bluetooth.”
TIDRadio lists several attributes of the TD-H3 Plus:
Bluetooth Connectivity: The TD-H3 Plus supports Bluetooth PTT (Push-to-Talk) functionality, allowing connection to wireless microphones, speaker mics, and headsets.
Firmware and Programming: The H3 Plus offers advanced programming options for radio hobbyists and professionals.
Portable Repeater Functionality: With the ODmaster app, the TD-H3 Plus can be turned into a portable repeater, enabling multi-hop global communication over virtually unlimited distances.
Multi-Language Support: To serve a global user base, the H3 Plus includes multiple language interfaces: English, German, Italian, Spanish, Turkish, and Russian.
Channel Name Customization: The H3 Plus allows full channel name customization, enabling operators to label each channel or frequency with a descriptive name (e.g., “Emergency Net,” “Ham Calling,” “Weather Station”).
Display and Themes: The TD-H3 Plus offers three user-selectable display themes on its color screen.
Improved Hardware: The H3 Plus isn’t just a name upgrade — it’s a comprehensive hardware overhaul for serious operators of ham radio and GMRS.
The TD-H3 and TD-H3 Plus share many features, including:
199 Programmable Channels
NOAA Weather Radio
Long Battery Life
Dual Customizable PTT Buttons
Wide Frequency Coverage
Scanning Function
Custom Alert Tones
Broadcast FM/AM Reception
Channel Cloning
Built-In LED Flashlight
Voice-Activated Transmit (VOX)
Dual-Tone Multi-Frequency (DTMF)
Emergency Alert Function
Dual Watch / Dual Display
Voice Scrambler (optional)
Roger Beep
Microphone Gain Control
CTCSS/DCS Privacy Codes
No time this week to put the radio through it’s paces, but it charged up and powered up, so fingers crossed that it works well.
RTL-SDR
I could not get my new RTL-SDR dongle to work with the SDR# (“SDR sharp”) software. (Instructions for set up at https://www.rtl-sdr.com/rtl-sdr-quick-start-guide/.) However, the SDR++ (“SDR plus plus”) application does work, so I’ll learn that app to get started.
DVMEGA Cast radio
I’ve been considering the DVMEGA Cast digital platform for many months. And I have to say that one voice was influential in his strong support for it:
Andreas M0FXB is effusive in his praise of this radio. He covers it in other videos, too, including a way to add Bluetooth capabilities to both the TX and RX sides of the radio.
DVMEGA casts itself as “the Swiss army knife for Digital voice.”
For someone who spends a lot of time with digital radio systems, the DVMEGA Cast is almost a must-have platform. Think of it like a digital hotspot with a microphone and a built-in speaker. It’s pretty much an all-in-one platform for most of the popular digital modes.
There is also an upgrade option (link is to a PDF) that I did not spring for…yet.
With this kit you can install a pi-radio inside of the DVMEGA-Cast, enabling the hotspot mode. This way you can also use the DVMEGA-Cast as your portable-radio-hotspot!
Andreas M0FXB opens up his DVMEGA-Cast and shows how to install the upgrade kit to turn the Cast into a full-blown hotspot:
I don’t think I’m interested in adding hotspot capabilities, but I’m not completely closing my mind to it.
If it sounds like I sold myself on the DVMEGA Cast: I did. I ordered one this week. It doesn’t come with the required Yaesu DTMF handheld microphone or the power adapter but I found an accessories package with those items on eBay for $40.
I prefer the WPSD software over Pi-Star, and Chip W0CHP does have a custom image made just for the DVMEGA Cast.
This is a somewhat expensive experiment. To me, it is essentially a DVMega stick and a Raspberry Pi in a box with a microphone interface and a speaker. I want to see how the pieces are integrated. That doesn’t seem quite worth it, but I think there is added value created by combining these elements into a single system. David NR9V has brilliantly done this with his AllScan nodes, creating platforms that combine high-quality audio with interfaces supporting traditional microphones. Even though these systems don’t necessarily look like what we think of as radios, they feel like it when you pick up the hand mic and begin transmitting. The very pleasant surprise when you start using this kind of system is the wonderfully clear audio entering your ears.
It was nice to get on the HF bands this week and great to fiddle with antennas. I’m looking forward to more HF time as well as more exploration of digital radios and modes.
But it wasn’t all smooth sailing. We had an emergency trip to the hospital this week with, fortunately, a good outcome.
I am fortunate that we are minutes away from two fire stations that provide emergency medical service.
73 to all. Remember to touch a radio every day!
