

Random Wire 149: The DVMEGA Cast digital voice appliance
September 19, 2025: Featured this week is the DVMEGA Cast all-in-one radio appliance for D-STAR, DMR, and Yaesu System Fusion.

Top of mind…
I hope you didn’t miss the first-ever Zero Retries Digital Conference (ZRDC). This was an informative gathering, but what I found more invigorating was the number of hams who are deeply exploring digital radio.
What is GNU radio? “GNU Radio is a free & open-source software development toolkit that provides signal processing blocks to implement software radios.”
Welcome to the IP 400 Project. “The goal of the IP400 Network Project is to develop a next generation data communications system by Amateur Radio for Amateur Radio. Features include higher speeds (min100 kbps), robust modulation and forward error correction, and the ability to transport widely varying data types, from short text messages, through digital voice and video, including AX.25 and TCP/IP. IP400 is in very active development by the Society.”
14 Most Searched Raspberry Pi Project Ideas This Year. From building a smart home hub to blocking ads, there are plenty of great project ideas to consider for your spare Raspberry Pi devices.
AIOC - Ham Radio All-in-one-Cable by Nigel NA6D. I’ve not tried this but I want to.
Help me test. I have a 44net email address that I’d like to test. I thought it was webmail only, but I see at https://www.44net.email/ that mail server settings are published. Good stuff. Send an email at kj7t@44net.email
APRS Foundation. “Dedicated to the preservation and advancement of the Automatic Packet Reporting System* (APRS) digital communications protocol.”
YAAC: Yet Another APRS Client. “YAAC is a (mostly) platform-independent Java application written by Andrew Pavlin, KA2DDO, for monitoring and contributing to the Automatic Packet Reporting System (APRS) network (invented and trademarked by Bob Bruninga, WB4APR).”
Maidenhead Grid Squares: how named, and how many? Lest you think this is some kind of sexist label, here is what the ARRL says: “An instrument of the Maidenhead Locator System (named after the town outside London where it was first conceived by a meeting of European VHF managers in 1980), a grid square measures 1° latitude by 2° longitude and measures approximately 70 × 100 miles in the continental US. A grid square is indicated by two letters (the field) and two numbers (the square), as in FN31, the grid square within which W1AW, ARRL's Maxim Memorial Station, resides. Each subsquare is designated by the addition of two letters after the grid square, as FN44ig. These more precise locators are used as part of the exchange in the 10-GHz contest. They measure 2.5 minutes latitude by 5 minutes longitude, roughly corresponding to 3 × 4 miles in the continental US. The Lab Notes column in April 1994 QST covered grid squares in particular and geographical coordinates in general.” How many grid squares cover the planet? 32,400, says W8BH: “In the Maidenhead grid system, longitude and latitude are divided into 18 bands, creating a world grid of 324 zones called Fields. Each field is divided into 100 smaller units, called Squares. Therefore, there are 32,400 grid squares in all.”

Feature: The DVMEGA Cast arrived!

TL;DR
The DVMEGA Cast is all-in-one device for D-STAR, DMR, and Yaesu System Fusion that may look like a simple, plug-and-play appliance, but it has some rough edges that require additional user interaction. It does not come with the required power adapter or the Yaesu microphone. It does come with a wifi dongle, but depending on wifi appears to sometimes cause the device to not boot up completely. (When this happens to me, I find I must connect to the wired Ethernet connection and then power cycle the device to break out of the stuck booting behavior.) You must connect it first with an Ethernet cable before you can configure wifi on the device.
There is no hardware button that initiates a graceful shutdown so you run the risk of damaging the programming on the microSD card if you don’t (or can’t) power down through the embedded WPSD software. (Suggestion: keep a spare microSD card already loaded and ready to insert into the machine…which requires removing the top cover.)
The user manual is not very old but several URLs in the manual no longer work.
DG ID numbers for Fusion connections now work but only by using the device’s touch screen.
Audio quality is very good for a device that uses the AMBE3000 vocoder.
If you enjoy a bit of tinkering, the DVMEGA Cast is an excellent all-in-one device. It is small, fits nicely on a desktop corner or on a shelf, and the use of a Yaesu handheld microphone helps make it feel more like a traditional radio.
DVMEGA Cast has arrived
GigaParts surprised me. I ordered the DVMEGA Cast device on September 10, just a few minutes before noon. I specified standard shipping. The package arrived around 4 pm on September 12. That’s right: Alabama to western Washington in two days.
The Rig Expert Stick 500 antenna analyzer was ordered on August 8. It shipped on August 9 and arrived August 11.
This is shocking to me, because in years past, the time lapse between placing an order and receiving it was often more than a week. So kudos to GigaParts! I don’t know what they did to speed things up but the turnaround seems much quicker now.
Let’s open the box

I’m going to abbreviate “DVMEGA Cast” to DVMC in this article.

DVMEGA describes itself as the Swiss Army knife for digital voice:

Here is the radio
The face of the radio is quite nondescript: a speaker, a small touchscreen, a microphone jack, and a rotary encoder (also functions as a push button). The simplicity of this interface will likely be quite appealing to some folks.

The rear panel of the radio is similarly quite simple. From left to right, an audio out jack, the power jack, an Ethernet jack, a USB port for the wifi dongle, and a spare USB port.

And that is all you get in the box: the DVMC device and a USB wifi dongle. No directions. No power cord. No microphone. I did find a user manual at: https://www.dvmega.nl/wp-content/uploads/2021/03/ManCASTV103.pdf
Accessories
I thought my eBay order with the microphone and other bits would arrive before the DVMC. I ordered it on September 10. As of September 12, all I have is an acknowledgement that the order was placed. I’ve not received a notice of shipment. Hopefully, the accessories will arrive early next week, in time for me to stand up the DVMC and do some testing. UPDATE: The accessory kit arrived a few days ago.
Registration
The label on the rear of the DVMC provides a URL where the owner can register the device. The registration URL is not a secure address, but once there, I found that refreshing my browser yielded an HTTPS connection: https://www.dvmega.nl/registration/

Once submitted, a success notice replaces the input form. That notice includes a link to updates.

The update server is an HTTPS connection: https://www.dvmega.nl/update/. You need your device serial number and service code.

There are defunct URLs in the user manual
Other than the first item below about getting your Radio ID, the other bad URLs in the user manual probably won’t affect you. The user manual available online is dated December 3, 2021. That isn’t very old, but nevertheless, some URLs in the manual are incorrect.
Radio ID
Working my way through the manual, the first hiccup was the URL provided for the required Radio ID number: https://register.ham-digital.org/
However, that URL resolves to a web page with just two lines of text:

After a bit, this page transitioned to this message:

What this means is the internet world has moved on and the DVMEGA Cast user manual hasn’t been updated to match those changes.
To get your Radio ID, visit RadioID.net: https://radioid.net/register
Playing with Pi-Star
At the bottom of page 10 in the manual, this link is also old: https://amateurradionotes.com/images/1-Playing_with_Pi-Star.pdf

The Legacy PDFs link takes you to https://amateurradionotes.com/standalone.htm where many older files are still available.
Pi-Star Brandmeister Hotspot Security
On page 12 is http://wiki.pistar.uk/Pi-Star_Brandmeister_Hotspot_Security which also goes to a defunct page.

To set up wifi on the DVMC, you must first connect it to a network with an Ethernet cable. After getting the device configured, you can then add a wifi connection. I note that the “scan for networks” utility did not work for me. Although there are at least four wifi networks within range, the DVMC saw none. Since I know the SSID and password for my network, I simply added it manually.
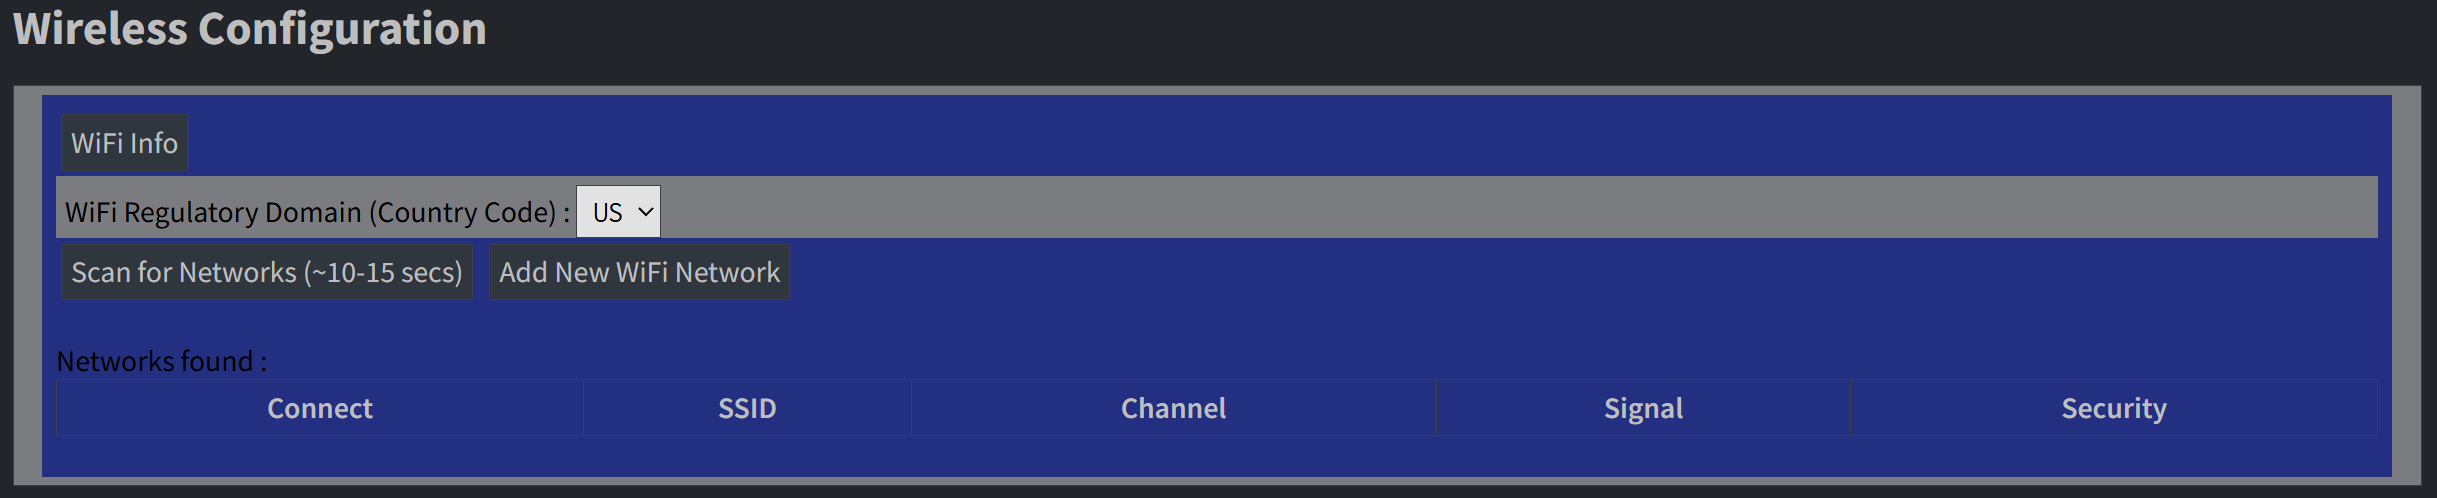
The interface says that once you’ve configured your wifi network, you can go to http://dvmega-cast.local/ to access the dashboard. That did not work on my network. I found the wifi IP address in my router’s admin screens. You can also find it in the WPSD dashboard under Admin —> Configuration —> Wireless Configuration.
The manual says to put the wifi dongle in the USB port next to the Ethernet port. That did not work for me. However, once I put the dongle in the other USB port, the system saw it and I could configure wifi. But…after letting the system run overnight, the wifi dongle was immediately detected in the correct port by the Ethernet port, so maybe I was jumping the gun a bit in my first few attempts. I will say that rebooting the system takes quite a while, much longer than rebooting a Raspberry Pi normally takes. I imagine there is some back-and-forth with the embedded subsystems in the device; that would take more time to negotiate those connections during boot up.
Once wifi is configured and the device has rebooted, you can disconnect the Ethernet cable.
I note, too, that the WPSD interface often works in my browser even though the DVMC is stuck on “Starting System.” I wonder if it is a Nextion display issue, because the underlying system is working but the screen is not.
There are some settings you need to set up through the touch screen. One item that was not answered for me in my searches was: how do you configure a DG-ID number for a Fusion reflector? The easiest way I’ve found is to tap the DG-IG number 00 on the touch screen. This brings up a screen where you can backspace to remove the 00 and then replace it with the DG-ID number you wish to use. The ability to specify a Fusion DG-ID value was added to firmware in July 2023. I do not find a way to change the DG-ID in software (WPSD for DVMEGA CAST).

To my ears, the audio quality is fine. With the cover off, audio is noticeably tinny, but with the cover on, the tone is deeper and richer. It seems the case provides some welcome resonance. I find the audio pleasant to listen to.
While I mainly use Yaesu System Fusion, I did configure the DVMC for DMR. It worked fine.
Where I ran into issues
If you are expecting a turn-key appliance — meaning you just plug it in and it works — you may be disappointed. Like most amateur radio gear, some configuration and fiddling will likely be necessary. Below, I describe some of the issues I ran into.
microSD card corrupted
I managed to corrupt the microSD card more than once. I think the thing about the DVMC is it sometimes takes a very long time to start, with the “system starting” message staying on the screen for tens of minutes.

Some reports indicate this could have to do with networking. I found that if I reconnect the Ethernet cable and then boot, it usually goes faster than trying to boot with only a wifi connection.
The problem here is there does not appear to be a graceful shutdown capability in hardware/firmware. If you are fully booted and have access to the WPSD dashboard, then you can initiate a clean shutdown. But if that interface never comes up, you are forced to pull the plug, and I think that’s where I was corrupting the microSD card. I now have a spare, loaded card taped to the back panel of the DVMC.
If that happens to you, you’ll need to remove the top cover to get to the microSD card. And it’s rather hidden inside the device, underneath one of the boards. Find it on the underside of the small blue board where just a little bit of the microSD card sticks out. The port is spring loaded, so give the microSD card a small push to release it.

I now keep a spare microSD card taped to the back panel of the DVMC. The spare card is already imaged with the special WPSD software for the device.
No LED lights
The DVMC is advertised as having different colored LED lights in the speaker space: “Colorfull [sic] speaker indictor for status.” The colors that are supposed to be shown are:
Light Blue: When the unit is first powered on, the speaker lights up in a light blue color.
Blue-Green: The color changes to blue-green as soon as you touch the display.
Blue: After the device is booted and communicating with the Pi-Star software, the speaker is solid blue, indicating it is idle and waiting to receive or transmit.
Green: The light turns green when the unit is receiving audio from the network.
Red: When you are transmitting, the LED turns red.
Unfortunately, I get no LED colors, even with the LED setting turned up to the brightest level. When I investigated, I found that the wiring harness from the speaker assembly was not connected to one of the boards.

In the image below, you see the four-wire connector not connected to anything, and a row of four pins in the approximate center of the image.

While schematics are not readily available, I did see how the connector attaches in the upgrade manual. The wiring colors are different than in the upgrade manual so I guessed which way the connector attaches. It looks like I guessed correctly.

Fusion DG ID seems…wonky
A friend’s repeater is connected to an XLX system. A DG ID number of 12 is required to utilize the repeater over the internet, and that is exactly how it works when I use one of my hotspots. However, when I use the DVMC, I don’t hear traffic with the DG ID set to 12 — I hear it with the DG ID set to 00. I’m still trying to understand this behavior.
Additions in the works
Magnetic mic holder
The Yaesu MH-48 handheld microphone was constantly trying to reach the floor. It seemed possessed. I bought a simple magnetic microphone holder (affiliate link) for less than $7 and stuck it to the top of the DVMC case. That solved the problem of the escaping microphone.
Bluetooth microphone
A Bluetooth microphone that is compatible with Yaesu mobile radios also works with the DVMC. Search for: BT-85 Bluetooth Mobile Radio Handheld Microphone For YAESU VHF UHF MH-48 SSM-85D. You can buy this thing on eBay but the shipping adds quite a bit to the cost. I purchased mine directly through AliExpress which might be a bit slower but the shipping cost was much, much less.
Power bank
I ordered a couple of different 12V power banks and a few 2.5mm-to-2.1mm barrel connector converters. One bank has 3,000 mAh capacity, the other 6,000 mAh. I’ll use one with my zBitx QRP transceiver and the other with the DVMC as some protection against a power interruption. My belief is that by reducing the sudden interruptions in power, I’ll reduce the times I corrupt the microSD card, too.
See the TL;DR summary at the beginning of this section for a short list of observations, issues, and recommendations.
Coming up
Old Mac Mini computers
I’ve had a few Mac Mini devices over the years and have fond memories of working with them. I got to wondering: can I install Linux on an old Mac Mini computer? The answer is yes, within some limitations. I think the Mini’s with the more recent M-type processors have security (Apple T2 Security Chip) built into the CPU, so I’m not sure installing Linux in that structure works well. There is a site/service that focuses on how to do this, if you’re interested: https://t2linux.org/
Using Linux on a T2 Mac comes with compromises as well as advantages compared to macOS. You will need to decide for yourself if [it is] worth it.
I focused instead on Intel-based Mini’s, i.e., those produced before 2018. These do not have the T2 chip and the operating system is more easily replaced with various flavors of Linux. There are quite a few 2014 units available on eBay so I sourced two, both with 8 Gb of RAM and SSD drives for mass storage.
Interestingly, while the 2014 devices do not have replaceable RAM chips (memory is soldered to the main board), the 2012 devices do have upgradeable RAM. However, the 2012 platforms have slower CPUs, so I opted for the 2014-era devices for this test.
The T2Linux folks strongly recommend dual-booting machines, so I’ll probably try that rather than replace the Mini’s OS. One reason for this is the proprietary wifi drivers aren’t available in Linux distributions, at least not by default. Installing wifi drivers requires an Ethernet connection and the manual installation of the driver(s).
These two devices will likely arrive after this issue of the Random Wire goes to press so I’ll feature them in a future issue.
UPDATE: One Mac Mini arrived yesterday. I have it set up and running in the corner of the room. I’ve enabled screen sharing so that I can remotely access the device, but to run it headless (what does that mean?) I’m going to have to use one of my HDMI dummy dongles to fool the system into thinking a monitor is attached. An alternative would be to convert it to a server, but I’m not quite ready to do that yet. I had forgotten that these older models (2014) are the size of a small dinner plate!
I had just enough time to boot up the Mini with MX Linux (64-bit version) and found that the live version running on the USB stick ran pretty well.

I note that MX Linux connected just fine with my home wifi, without having to resort to any special drivers or routines.
AliExpress
I have a couple of small items on the way from across the Pacific. One is a small receiver. The other is a 7” 1080p LCD screen that looks to be a bit more polished than the one I’ve been using.
Joplin ARC Mark 2 Launcher Kit
I didn’t make a video of putting the pieces together but I have still shots. Where I got hung up is on the electrical wiring. I didn’t get instructions in my package. The JARC folks sent me a link to a YouTube video showing the launcher being assembled, but when it got to the wiring part, I couldn’t make out what went where.
Following another inquiry, they sent written instructions. That will help, once I get some free time to finish soldering the wires and switches.
I also bought a Zebco open-face spinning reel, some 30-pound braided line, 500 feet of 300-pound Dacron kite string, and some stainless steel hose clamps (these are all affiliate links). I don’t need to shoot a line very high — 80 feet would be plenty — so the heavy braided line should work okay. I thought about a spin casting reel, but I’ve had those tangle up on the cast and I really don’t want the projectile rubber-banding back at me. I trust a good spinning reel more. I just need to always remember to open the bail and double check that it is open!
Closing…
Busy busy
It’s been another busy week. I had a board of directors meeting on Monday for the statewide nonprofit I run. My spouse had a physical therapy evaluation that was informative and exhausting. We signed some legal documents, visited the dentist, and did a little bit of driving. At work, we are ramping up to many regional meetings scheduled in October and putting the final touches on our annual conference for our members and partners.
Zero Retries Digital Conference
I really wanted to be an in-person attendee of the Zero Retries Digital Conference. I had content about AllStar to share and was looking forward to rubbing elbows with folks who have similar interests. However, caring for my spouse took precedence, so I stayed home and participated through Zoom.
It was, nevertheless, a fulfilling experience.
One of the most exciting things I picked up at ZRDC was learning about the KK7NQN Transcription Service Node (TSN) for AllStar nodes.
The TSN captures audio from AllStar hub connections, transcribes it using Whisper, and logs results into a MySQL database. Optional support is included for callsign extraction with QRZ XML API validation.
Take a look at Hunter’s (KK7NQN) dashboard to get an idea of what the TSN does. His “how to” page is a brief guide to the many ways to use the TSN. If you run a net and want an automatic transcription of the conversations, visit https://kk7nqn.net/netcontrol_instructions.html to get started.
That’s enough for the channel this week. 73 to all. Remember to touch a radio every day!
