Random Wire 150: Running MX Linux on a Mac Mini 2014
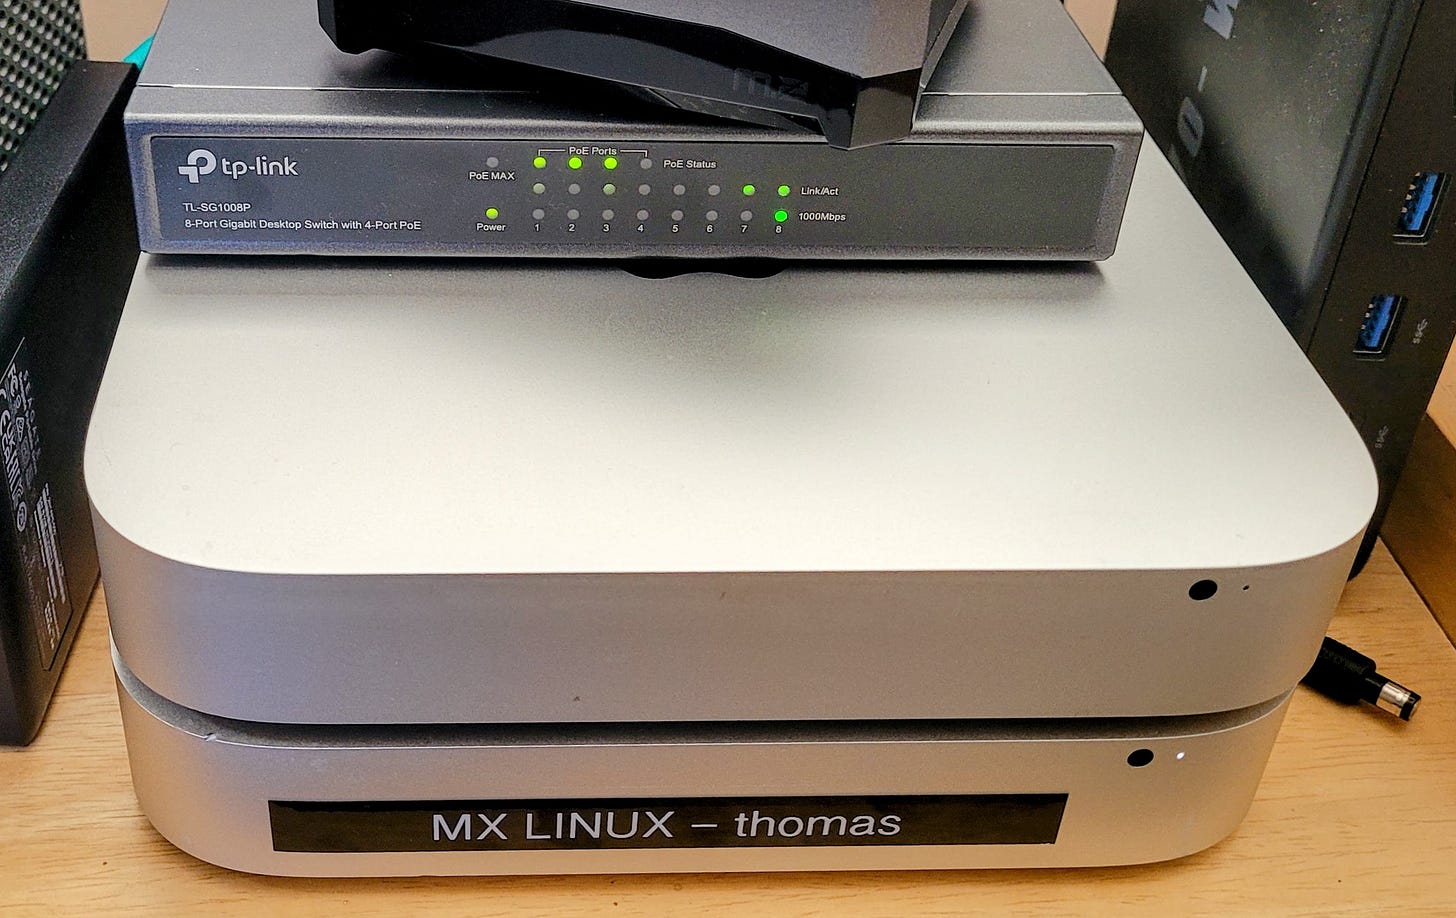
September 26, 2025: Featured is my new "Mac Stack" consisting of two old Mac Mini 2014 computers, one running macOS Monterey and one running MX Linux Libretto.
Short stack
Featured this week is loading MX Linux on a Mac mini. So far, converting this “almost vintage” computer to a modern Linux flavor is going very well.
Debian 13 “Trixie” is out! If you are running a machine with Debian 12 “Bookworm” and wish to upgrade, instructions are here. I’ve not tried this yet. My general rule of thumb for significant version upgrades is to wait and see how it goes for others. However, I’m less hesitant when it comes to Debian since the developers seem a bit more conservative than with other flavors of Linux.
The latest WPSD for Raspberry Pi runs on Trixie, as announced by Chip W0CHP.
Still fiddling with loading Linux on a Chromebook. The posts here and here look like they will be most helpful. I’m going to try a different hardware platform, a used-but-like-new ASUS CR1100 with an N5100 processor and 8 Gb of memory. The Intel Celeron N5100 processor has four cores and a burst frequency of up to 2.80 GHz. The greater-than-usual amount of RAM will give the operating system some breathing room. That should make for a pretty speedy machine for this type of computer.
M17 is now a linked mode in the Sunflower Linked System run by my friend Lloyd KC5FM. Read more about it at http://sunflowernet.us/ and check out the calendar of nets. You can connect in many ways, including:
Allstar 28848
Echolink KC5FM-R 906281
Hams Over IP 15154
DMR TGIF 31207
P25 31207
DSTAR XLXOKL C
Yaesu Fusion 31207
M17-SUN module A
Read the wrap-up about the Zero Retries Digital Conference. A couple of pieces in Zero Retries #220 tie a ribbon around the great ZRDC conference held a few weeks ago. I’m happy for Steve and Tina that it went well. I enjoyed it very much, even though I had to attend remotely.
Happy birthday, Michael Faraday (22 September 1791 – 25 August 1867). For a long and fascinating overview of Faraday’s accomplishments, visit the Wikipedia page about him. If you’re interested in those who broke new ground in the fields of electricity and radio, I think you’ll enjoy Faraday’s Wikipedia page.
The new Yaesu FTM-310DRASP looks interesting but it is still a little too pricey for my taste. Isn’t there a fall sale coming up at HRO? I’ll wait and see if the price drops a bit. “Super-DX + ASP (Audio Digital Signal Processor): In both C4FM digital and FM analog modes, the sensitivity of the RF amplifier can be increased by activating the Super-DX function.” The FTM-310DR without the ASP circuit is $50 less, so $499.95 at Ham Radio Outlet. If you’re interested in a radio like this right now, the Yaesu FTM-510DRASP is on sale for just $50 more than the FTM-310DRASP. Still rather pricey, I think.
Speaking of new radios, Icom has one. ICOM announced the ID-5200 at the Tokyo Ham Fair 2025. DXEngineering is taking reservations for this radio now.
The most popular Linux text editors. There are more good choices than you might think! I prefer nano and Geany due to their simplicity, but there are other great, free options available.
New hotspot on order. I was listening to the YSF XLX303 (YSF30300) reflector a few days ago when Robert W9EGL mentioned the HamSpot 5 in a QSO with Bucky W0SUN. I looked that up and immediately ordered one. This device is made by Collin K0NNK. While the display isn’t large, the underlying Raspberry Pi 5 is going to make this hotspot a screamer. The Hamspot 5 (stock is low) is $10 more than the Hamspot 4 (out of stock). The Hamspot 5 seems like a great deal.
Digital hams with a Raspberry Pi might be interested in the DigiPi. “DigiPi is an easy-to-use amateur radio data transceiver hotspot for Raspberry Pi. All radio data modes are easily accessible over wifi via your phone or web browser.” Created by Craig KM6LYW, this looks like just the ticket for those of us who enjoy digital modes and the Raspberry Pi computing platform. Learn more at https://craiger.org/digipi/. Note that it looks like this requires a regular amateur radio with a USB port. Lacking a USB port, an additional PTT circuit will be needed.
HamCon Colorado 2025 is October 23-26, 2025. Find more at
Help pass legislation removing HOA antenna restrictions. Send-A-Letter is sponsored by the Texas HAM PAC as a donation to the ARRL.
Mac Mini: running headless and loading Linux
Running a Mac Mini headless
I figured out a simple way to run a 2014 Mac Mini “headless,” meaning without a keyboard, monitor, or mouse attached. Normally, the Mini requires a monitor to be connected. Remember the HDMI dummy plug I had? Well, I had more than one, so after getting the device set up (translation: booted up with a keyboard, monitor, and mouse, then configured the computer), I pulled the HDMI cable and plugged in the dummy plug. No keyboard. No mouse.
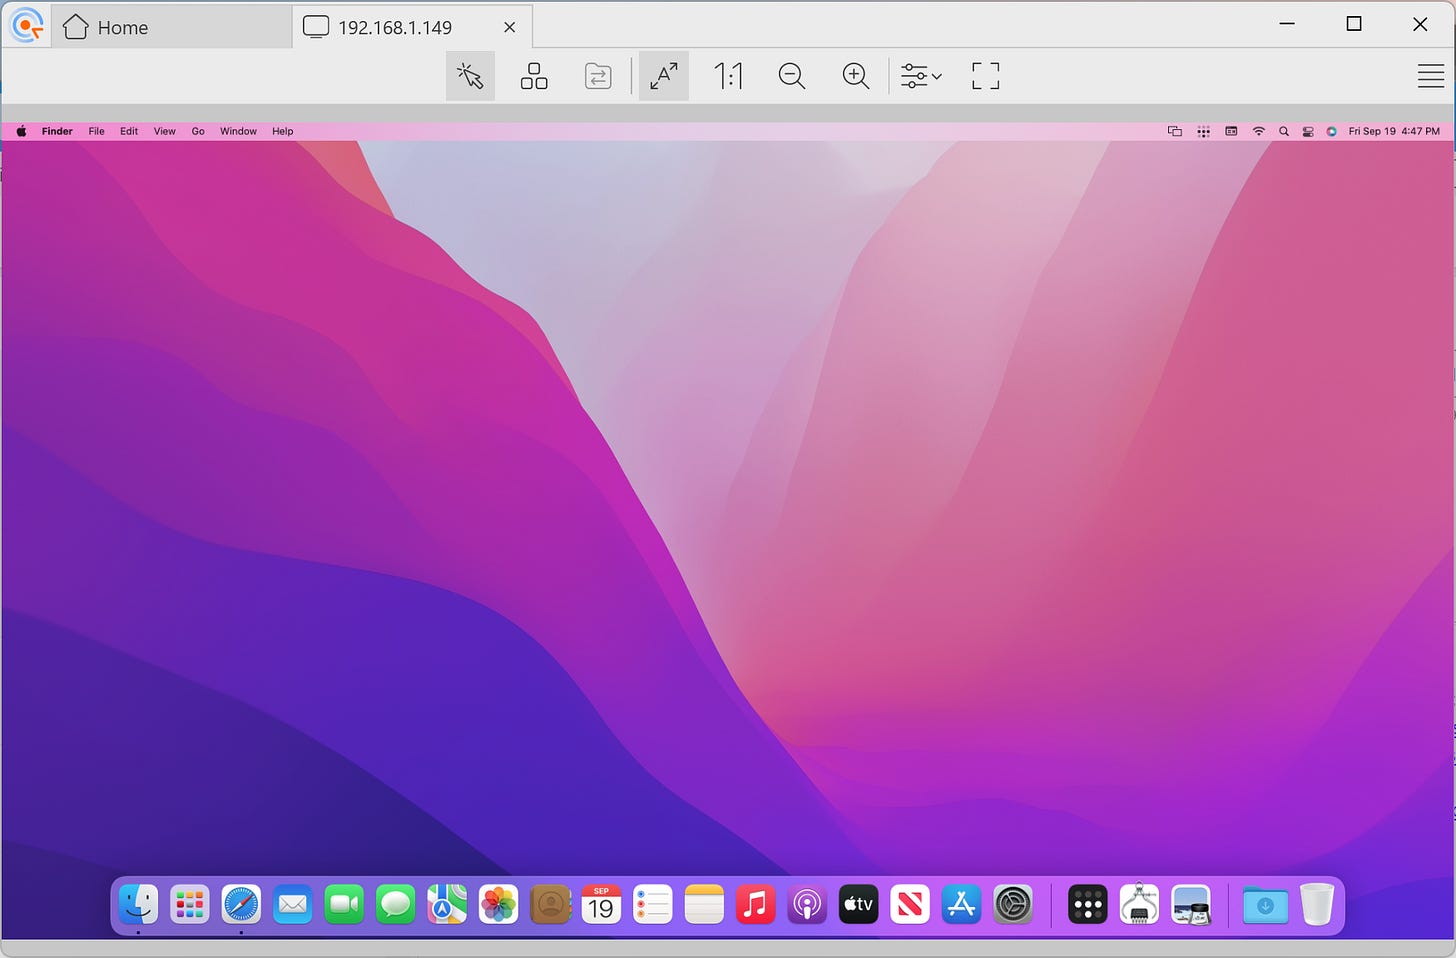
Then I rebooted the machine connected to it on my LAN with a VNC viewer. I saw a brief warning about a missing mouse (true, it’s missing). And then I got the Mac Mini desktop:
This Mini is running macOS Monterey. It’s been a while since I operated a Mac and the first thing I noticed was the desktop changes based on the time of day. That’s a nice touch. I’ll let this system run for a week and see how it fares.
UPDATE: I had to adjust a few power saving settings, like turning off the display (there is no display in my headless configuration), but that only took moments. The system has been running smoothly 24x7 for several days.
Discerning eyes will see the Tailscale symbol in the upper right menu bar of the Mini desktop screen. Yes, I installed Tailscale, which means I can access the Mini from virtually anywhere.
Here is the system information screen on the Mac Mini desktop, as seen over a VNC connection (and yes, I changed the desktop background because those bright colors were just too bright!):
Installing MX Linux on a Mini
Let me cut to the chase and start with the end: why am I fiddling with Mac Mini computers? The answer is: why not? I want to see if I can get Linux running smoothly on the 2014-era Mini platform. These boxes are not expensive (this one was $65) and have plenty of power for running Linux. If my experimentation goes well, then we’ll know of another way for hobbyists to use this platform. I also enjoy repurposing old equipment, and at 11 years old, the 2014 Mac Mini almost falls into the vintage category in the computer universe.
Powerful enough for Linux
The 2014 Mac Mini is a capable machine with a good range of ports, only lacking a USB-C port to be similar to more modern computers:
Four USB 3.0 ports: These are the standard, rectangular USB-A ports found on the back of the computer. (The 2018 Mac has USB 3.1 ports.)
Two Thunderbolt 2 ports: While not USB ports, these provide high-speed data transfer and can function as Mini DisplayPort outputs for displays. (The 2018 Mac Mini has faster Thunderbolt 3 ports.)
HDMI port: For connecting a display.
SDXC card slot: For reading SD cards.
Gigabit Ethernet port: For a wired network connection.
Audio in/out: A 3.5mm headphone jack.
IR receiver: For remote control functionality.
The CPU is an Intel Core i5-4278U with 2 cores, 4 threads, 3.0 Mb cache, and a burst speed of up to 3.10 GHz. (The 2018 has a “Coffee Lake” CPU with either four or six cores. This is a much faster machine and prices on the used market are accordingly substantially higher than the older/slower 2014 platform. For my intended use, the i5 CPU in the 2014 architecture is fast enough.)
The Mac Mini can hold up to 16 Gb of DDR3 RAM memory. I did look for used 16 Gb machines but found the prices to be too high for this experiment, so I purchased units with 8 Gb of memory. Unfortunately, in this model of the Mac Mini, memory is soldered to the motherboard so it is not expandable by the user. (2018 models have expandable RAM up to 64 Gb total, so if RAM is your jam, the 2018 will be the better choice.)
By the way, if you want to be able to upgrade storage, choose the late 2014 Mac Mini. If you want to upgrade RAM in a Mac Mini, choose a late 2018 model. Says EveryMac.com:
…the "Late 2014" Mac mini has soldered RAM, but upgradable storage whereas the "Late 2018" Mac mini has upgradable RAM, but soldered storage.
The power supply is rated to 85 watts, which is a pretty hefty amount for a small computer. One thing I like is the power supply is internal to the computer — that’s right, no big brick on the shelf or the floor.
Second Mac Mini arrived dirty
While I was getting familiar with the first Mac Mini, the second Mac Mini showed up. The first one was said to be in good condition. I would call it very good, with only a few very small scratches on the case and those in places not easily seen. The second device was also classed as good but I would call it something less than that. There were coffee drips on it, old sticker residue, and lots of nicks along the side of the case.
This second device looked so dirty that I removed the bottom of the case to see how much filth had accumulated inside. Here’s how to do that:
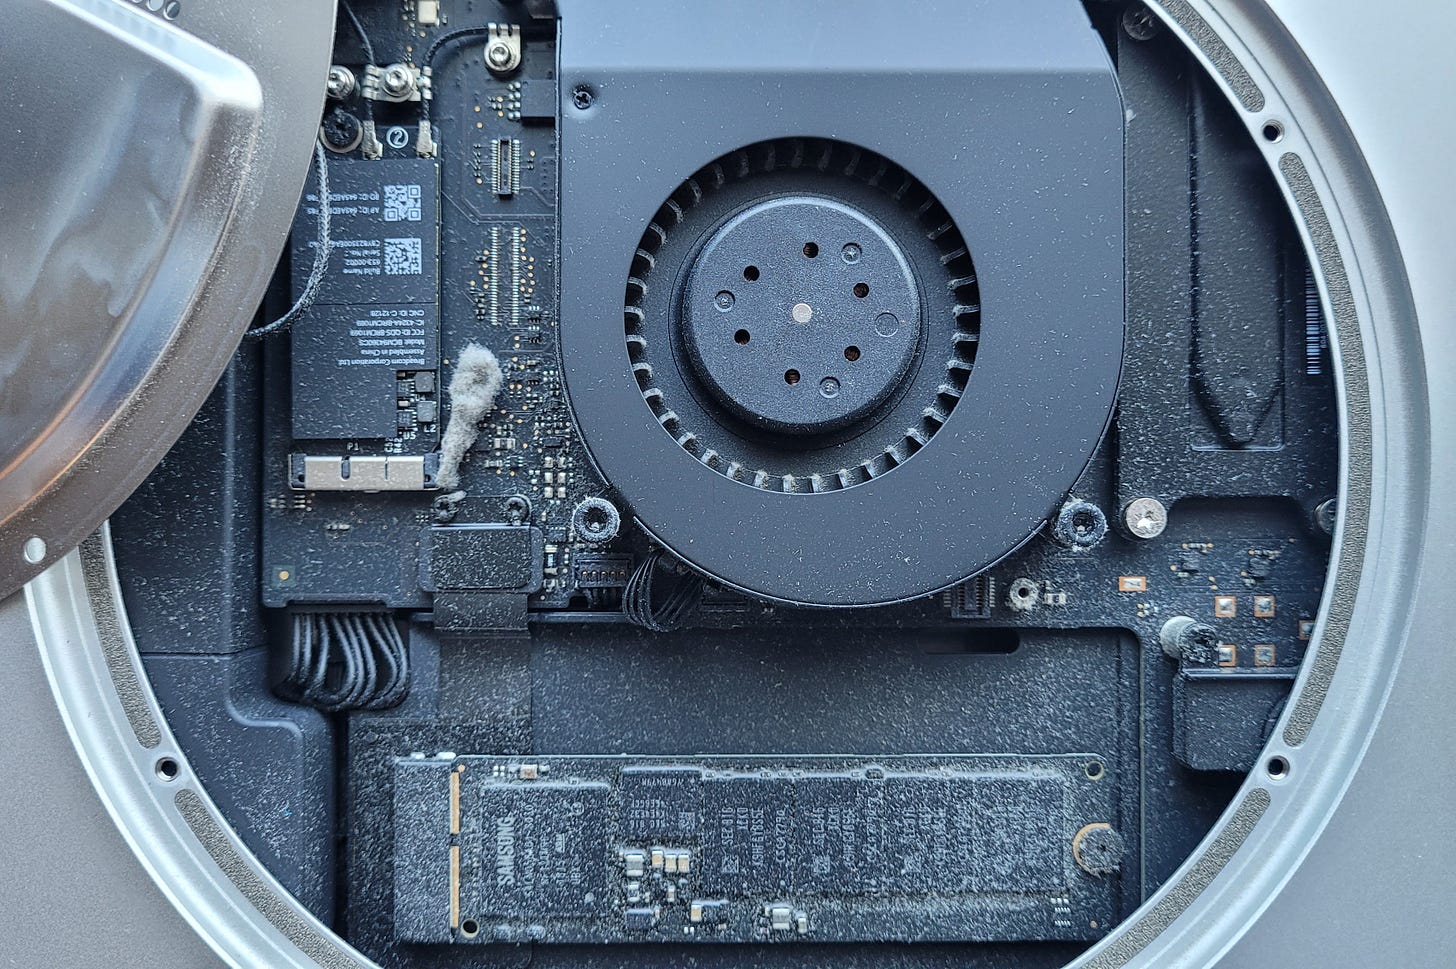
I found dust balls inside and a coating of dust on everything. The good news is this probably means nobody has ever opened the bottom of this Mini. The bad news is it was just plain dirty. I used a brush and some compressed air to blow the system clean.
I think we can all agree this is a dirty computer:
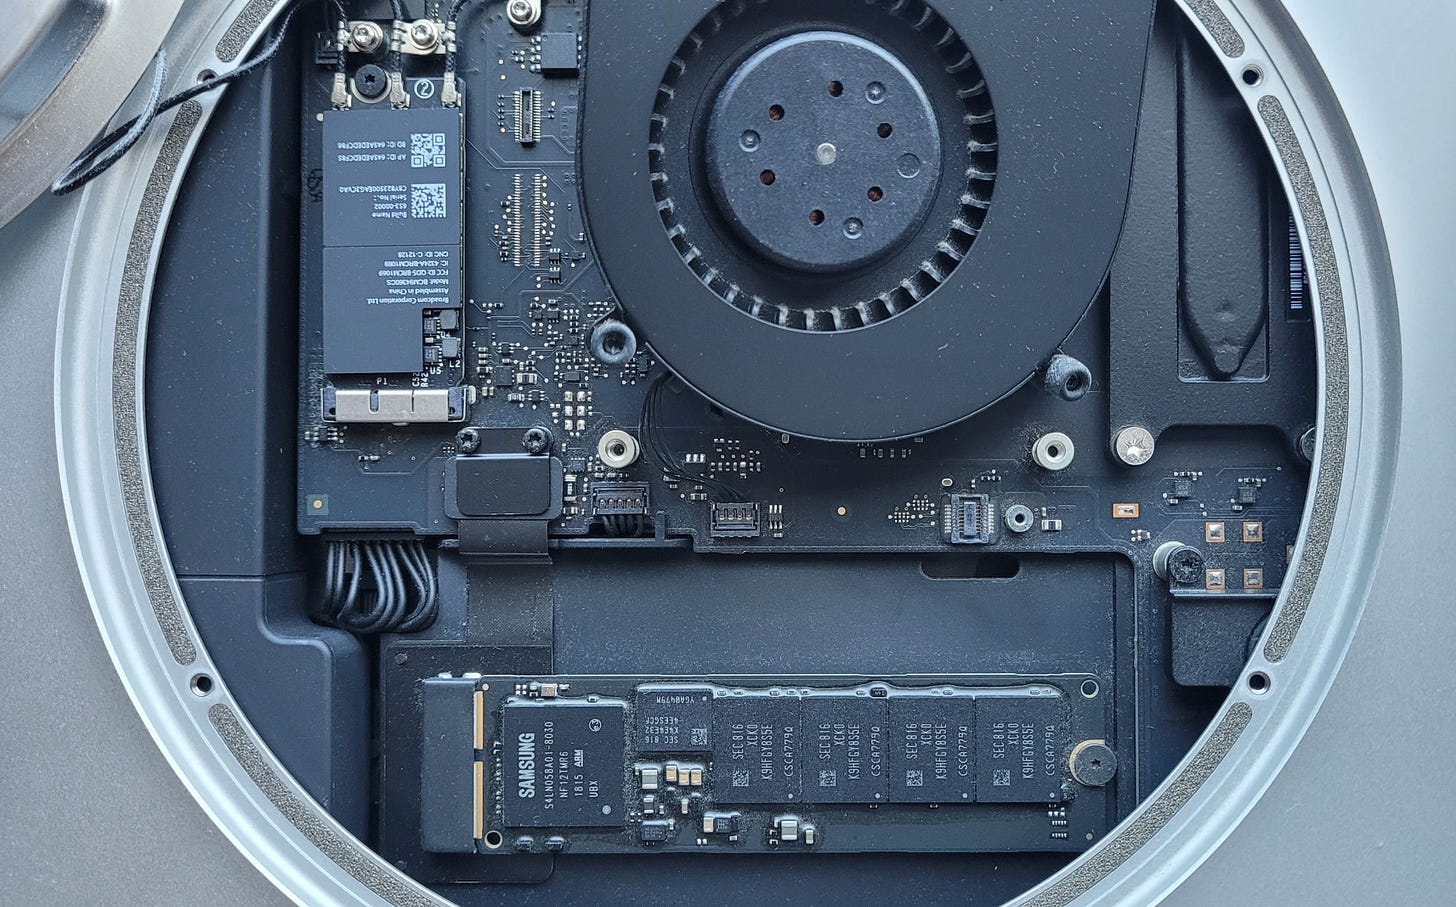
After brushing (I use a soft paintbrush [that has never touched paint] for cleaning keyboards and computers) and blowing, it looks better — not perfect, but much cleaner:
I reinstalled the base and rebooted the Mini to make sure everything was fine. All good.
Booted and installed MX Linux
Then I powered it down so I could make a cold start. After pushing the power button, pressing and holding the Alt key on my Windows keyboard brought up the Apple boot manager. I selected the USB drive I had inserted that had the 64-bit MX Linux image on it and booted the machine from that image.
And it booted up quickly and cleanly! Encouraged, I hit the “install MX Linux” link on the desktop and walked through a handful of steps. The install was easy and went smoothly. (Note: I installed MX Linux to the entire SSD drive, replacing macOS.) When I rebooted, MX Linux came up without a hitch. This will be the machine I’ll later try installing AllStarLink 3 on.
Since the 2014 Mac mini doesn’t have the Apple T2 security chip, I avoided all the shenanigans of trying to overcome that hardware.
Some difficulty with remotely accessing the Mini
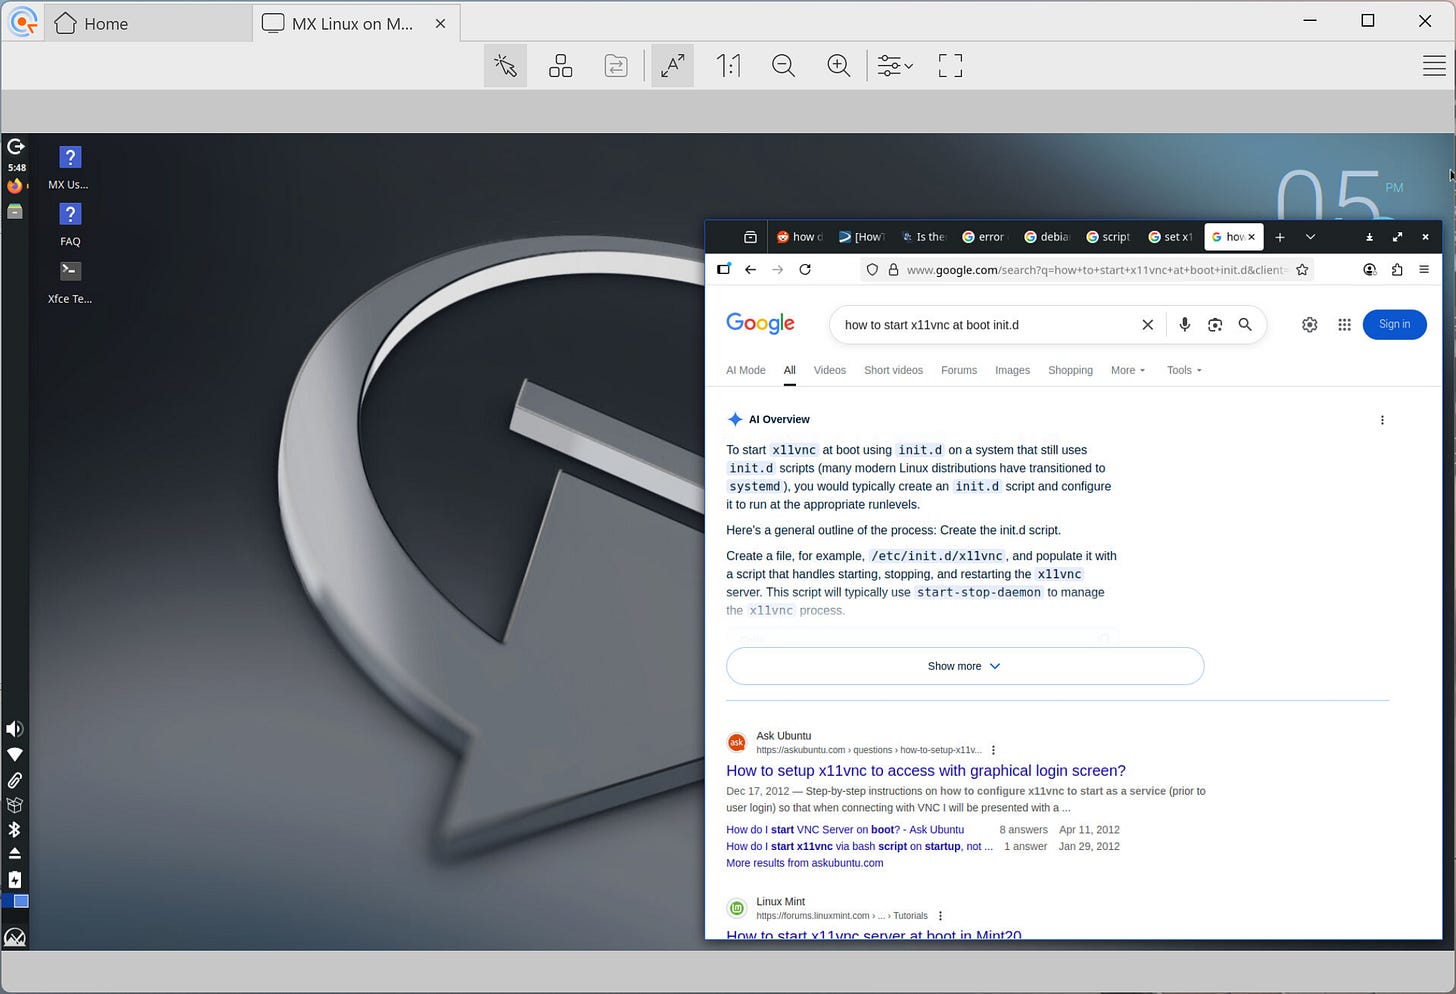
What didn’t go without a hitch was remotely accessing the graphical desktop of the MX Linux machine. I tried a few methods and finally resorted to running x11vnc server on the MX device. That didn’t go immediately well because I had installed and configured some software as root but the program was actually running under my user name. Thus, it wouldn’t read or write the log file, it couldn’t find the password I set, etc. Once I figured out that I needed to change ownership of several files, and change some of the automatic configuration settings to point to my user space, I was able to get it working.
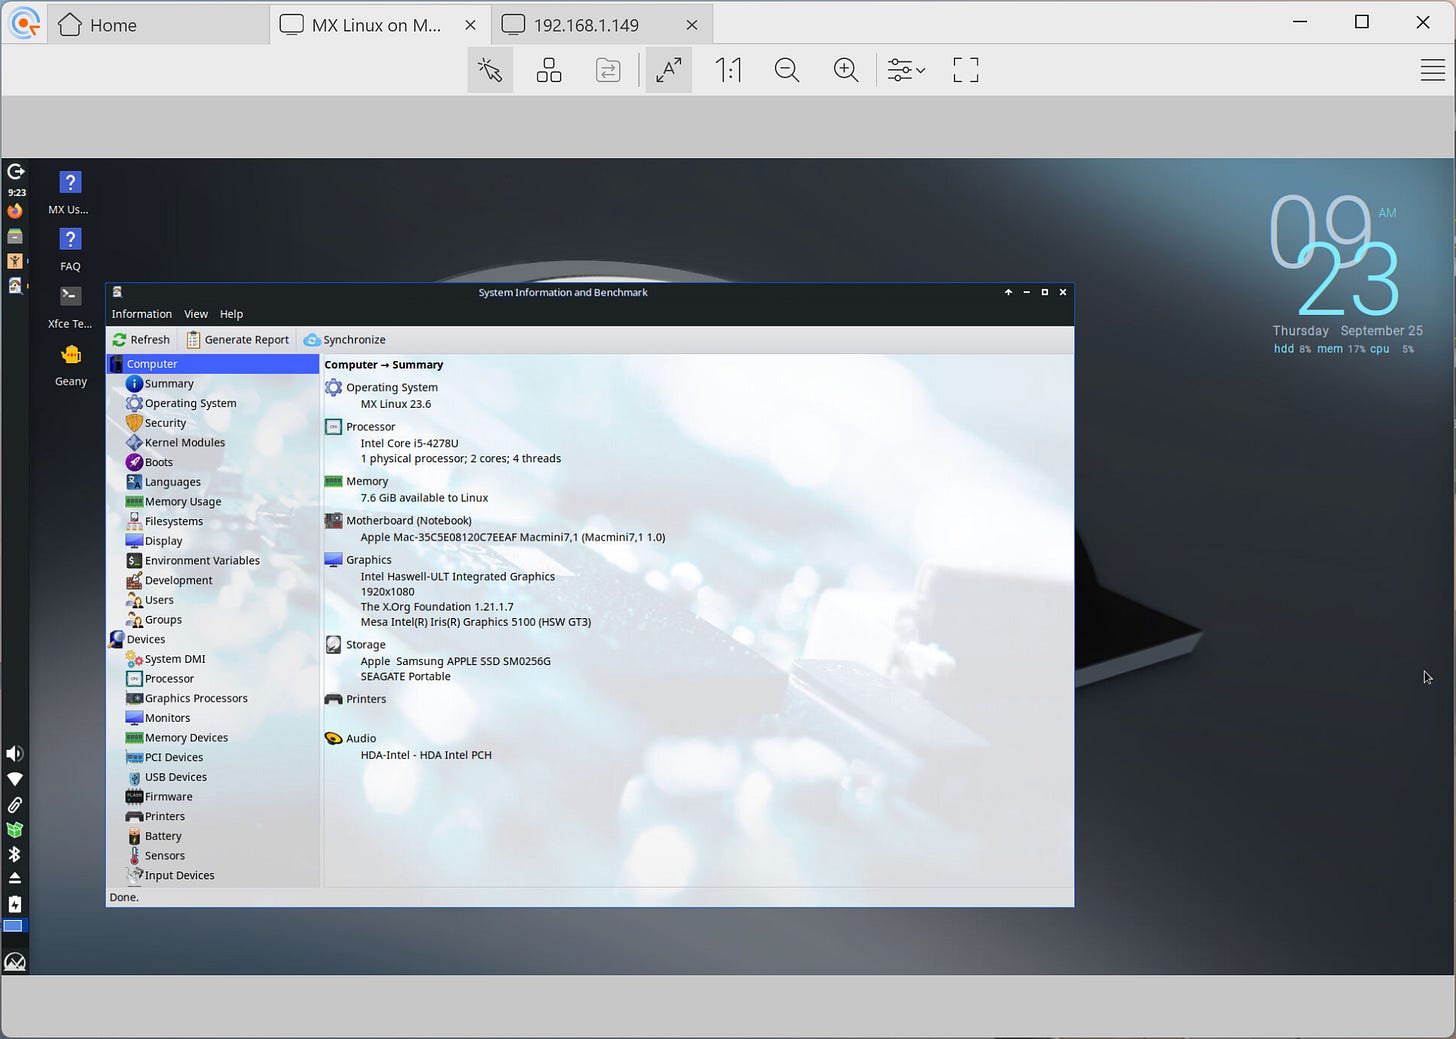
In the screenshot below, I’ve remoted into the MX Linux machine over a VNC connection. The MX machine is networked over my LAN wifi. A standard Ethernet connection worked perfectly when I first booted up the machine, but unlike some stories I had read, I did not need to do anything extra to get wifi working, too.
I’ve also installed Tailscale for easier remote access. It turns out the Tailscale installer for Debian Linux is based on the assumption you are using systemd to manage the operating system, but MX Linux uses init. That required a bit more web searching to find a set of steps that would work, and even then, I had to change one of the scripts so that Tailscale would find the configuration file. But I got there and the system works fine over Tailscale.
(I’m reminded of a thought I had a few years ago when I was thinking about how we learn. Those of us who were in high school before this thing called the Internet blossomed into existence remember having to memorize facts, use fat tomes called encyclopedias as authoritative references, and write reports by hand [or sometimes with a manual typewriter]. We spent a lot of time reading, listening, and maybe even reciting. We made flash cards and had our parents or friends quiz us. Looking back, I’m not sure when we had time to actually integrate the knowledge that was packed into our minds. Learning looks different to me today as now you don’t need to know facts as much as you need to be able to find them. Complicating this is that today, there are many sources of information, but relatively few are likely viewed as authoritative on a particular topic. Maybe this idea that one only needs to know how to find information has resulted in my other observation: that there seems to be more self-styled experts on any particular topic than ever before. I suspect there is an increase in the percentage of the population that overestimates their ability to do some things. This is called the Dunning-Kruger effect. I run into this all the time. It’s a challenge to work with someone who honestly believes they know more than you do despite a 30-year difference in experience. My takeaway from this line of thinking is when I am certain I know something, I try to slow down and ask myself some testing questions about the topic. Often, I find I know relatively little. This look in the mirror allows me to find references and examples that may support my belief in myself…or identify that I really don’t know it as much as I think I do, so there is another topic for me to learn more about.)
Here’s the basic system information reported by MX Linux for this system:
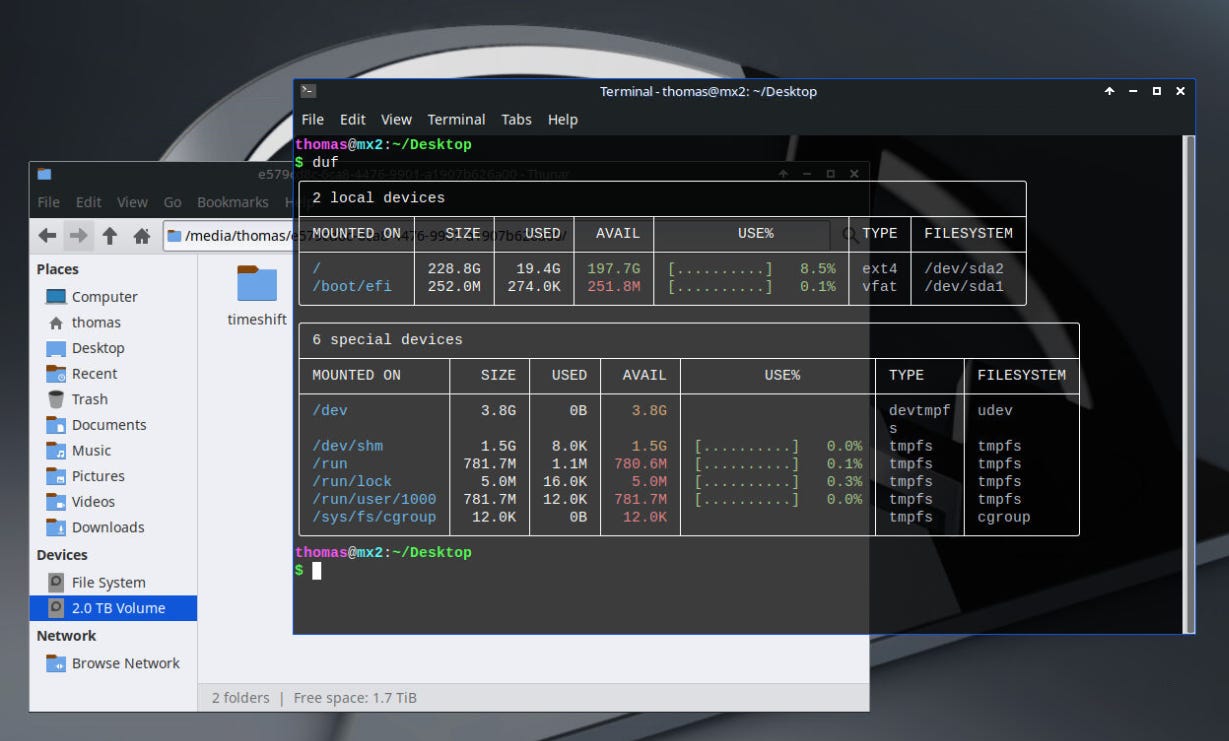
I also installed duf (Disk Usage/Free Utility) which, interestingly, does not see my external drive that I’m using for Timeshift backups.
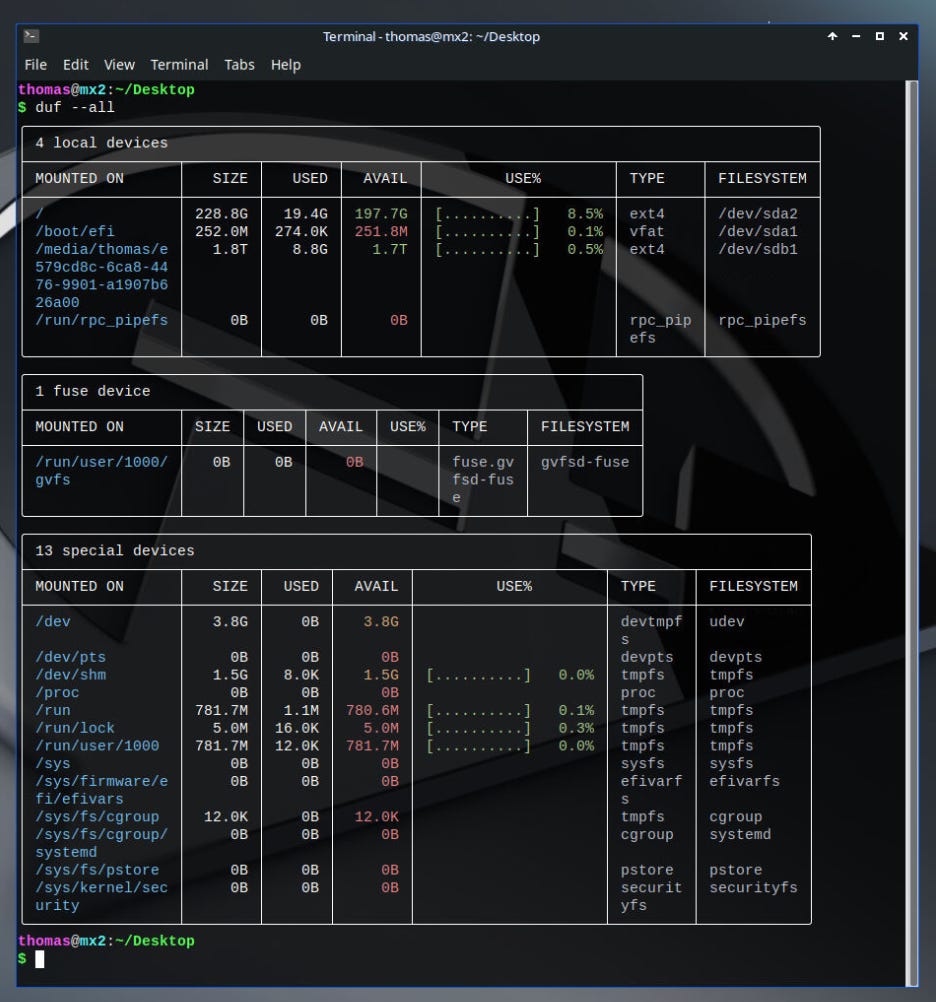
However, this command does report all storage, even the inaccessible bits:
duf --allEasy start for new MX Linux users
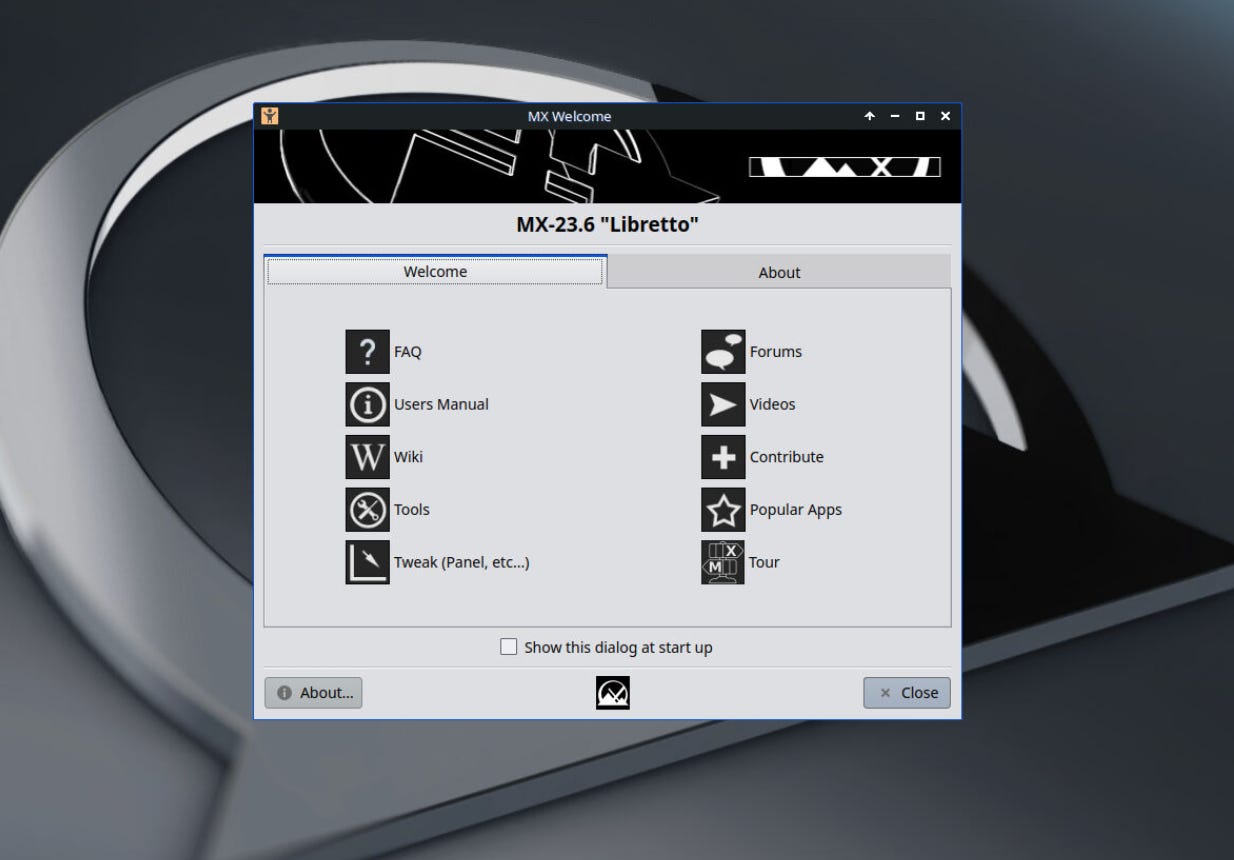
The opening screen also has helpful links. Of particular interest is the one in the lower right: the tour. The tour link provides a simple, welcome introduction to key aspects of MX Linux. I found it very helpful.
Running headless
That all happened with a keyboard, monitor, and mouse attached. Next, I wanted to run this computer headless. I used an HDMI dummy plug to simulate having a monitor attached and unplugged the keyboard and mouse. When I rebooted, I was able to connect over VNC and see the MX Linux desktop on the Mini. That was easy.
Backing up the machine
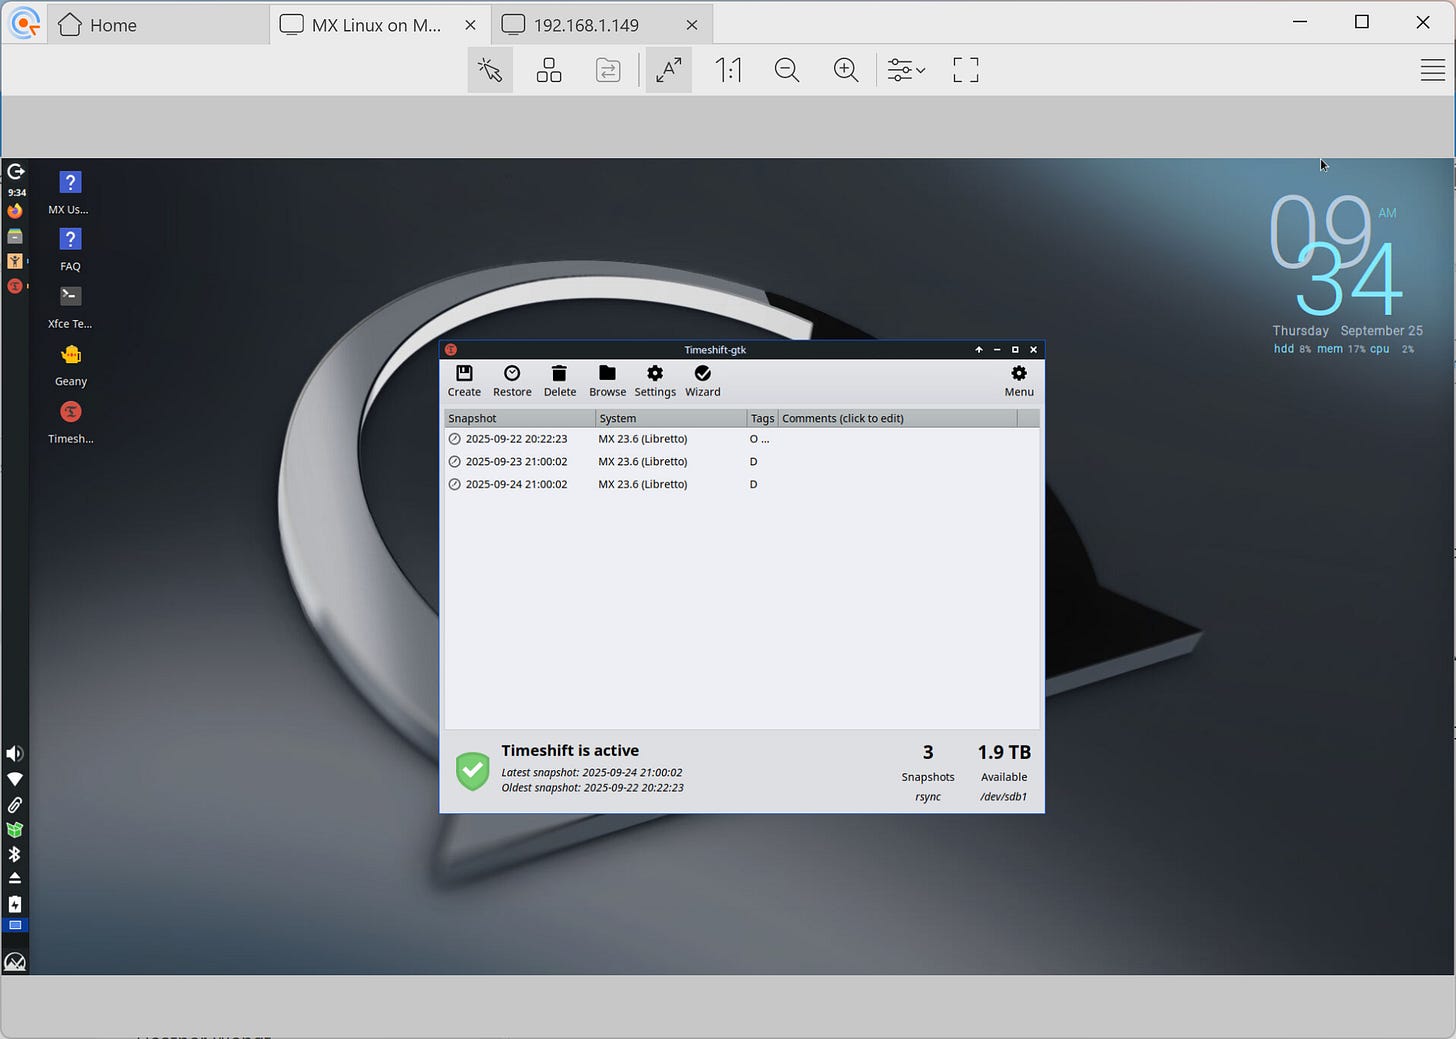
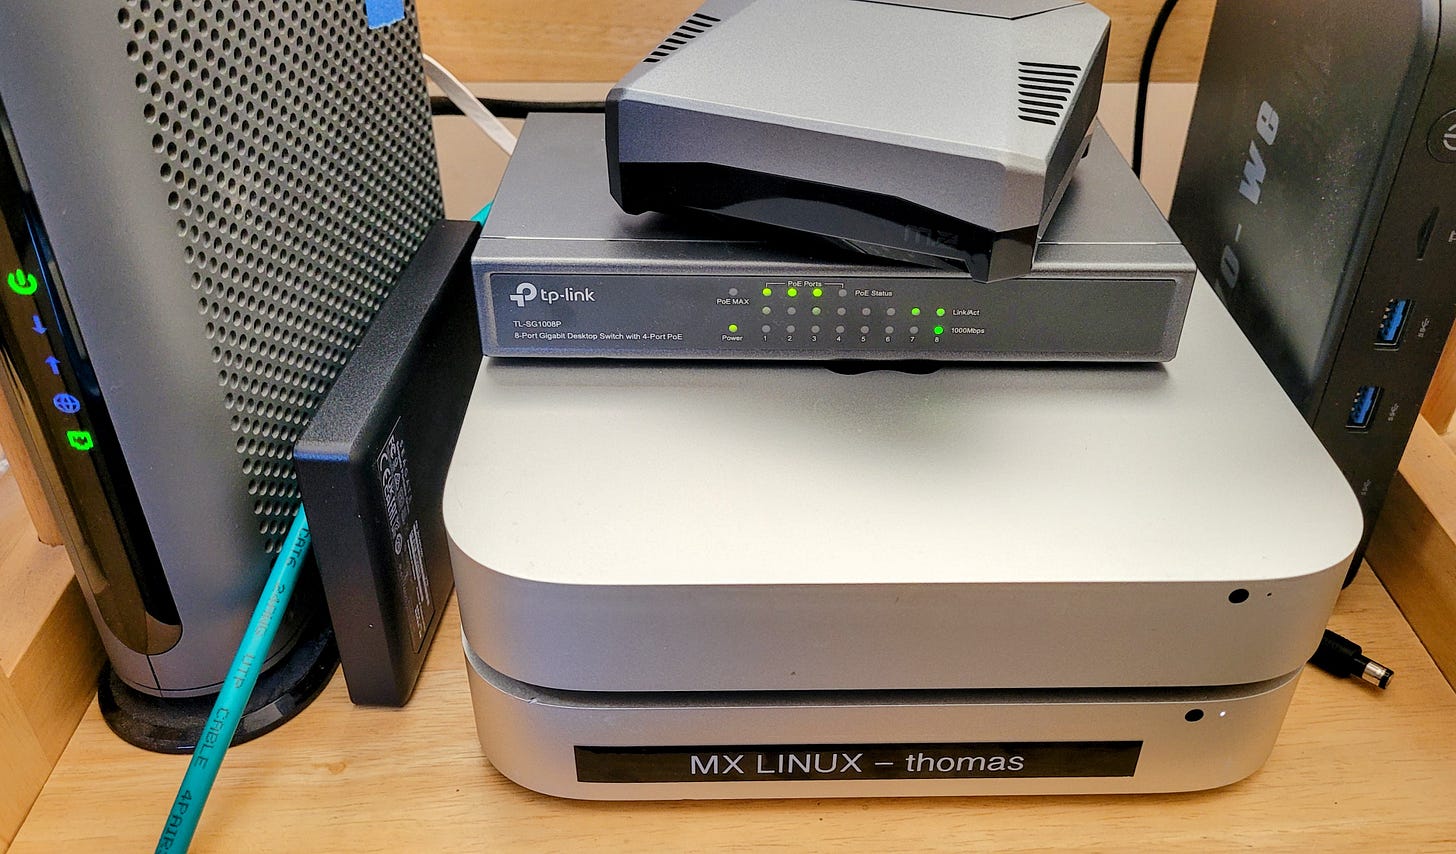
I also had on hand a spare Seagate portable drive with 2 Tb capacity. I plugged that in, reformatted it to EXT4 format, and implemented the Timeshift app in MX Linux to take automated backups of the system. The incremental snapshots are saved externally on the Seagate drive. I have Timeshift configured to take daily, weekly, and monthly backups. I don’t use the system so frequently that I need hourly backups!
Here it shows three daily snapshots:
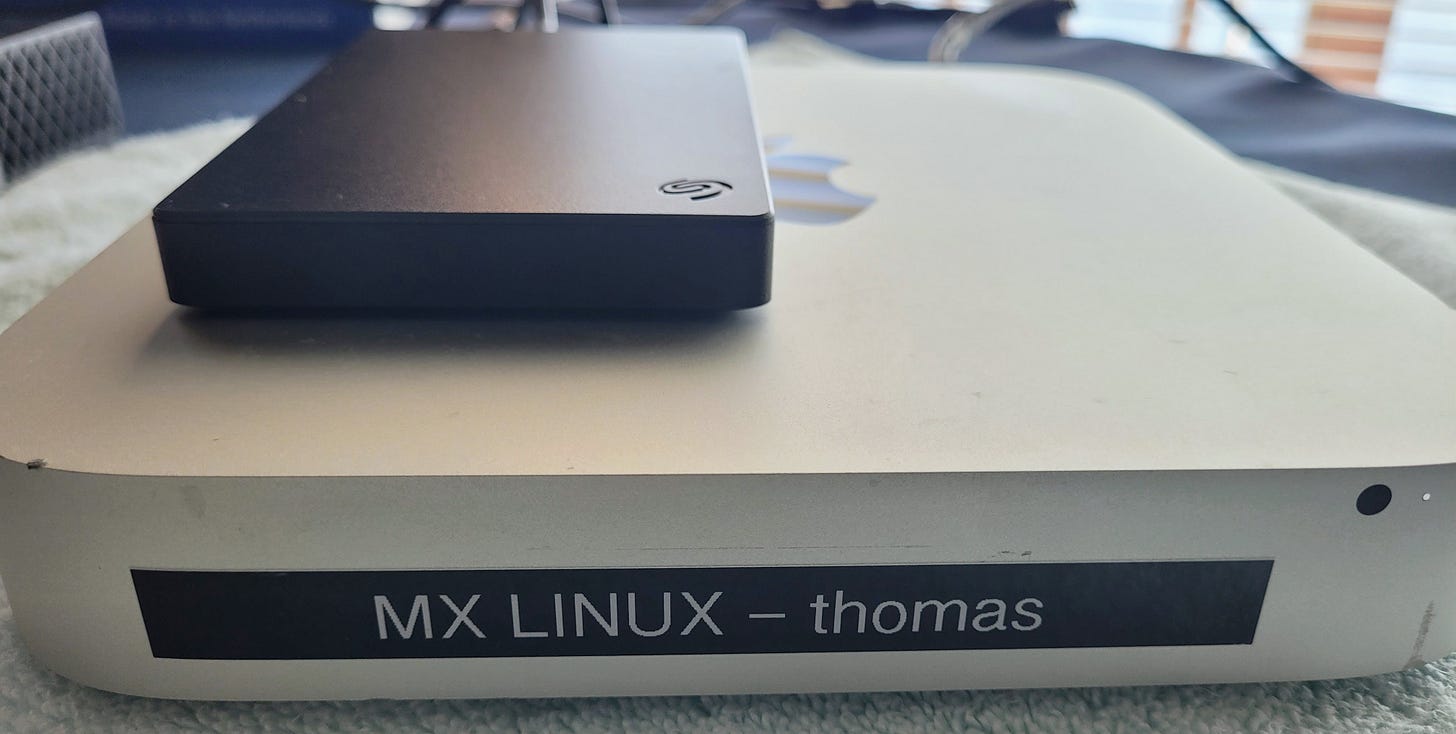
The label I put on the front of the device covers a two-inch-long gouge in the plastic case. You can see the small Seagate drive sitting on top of the Mini:
Physical size and configuration
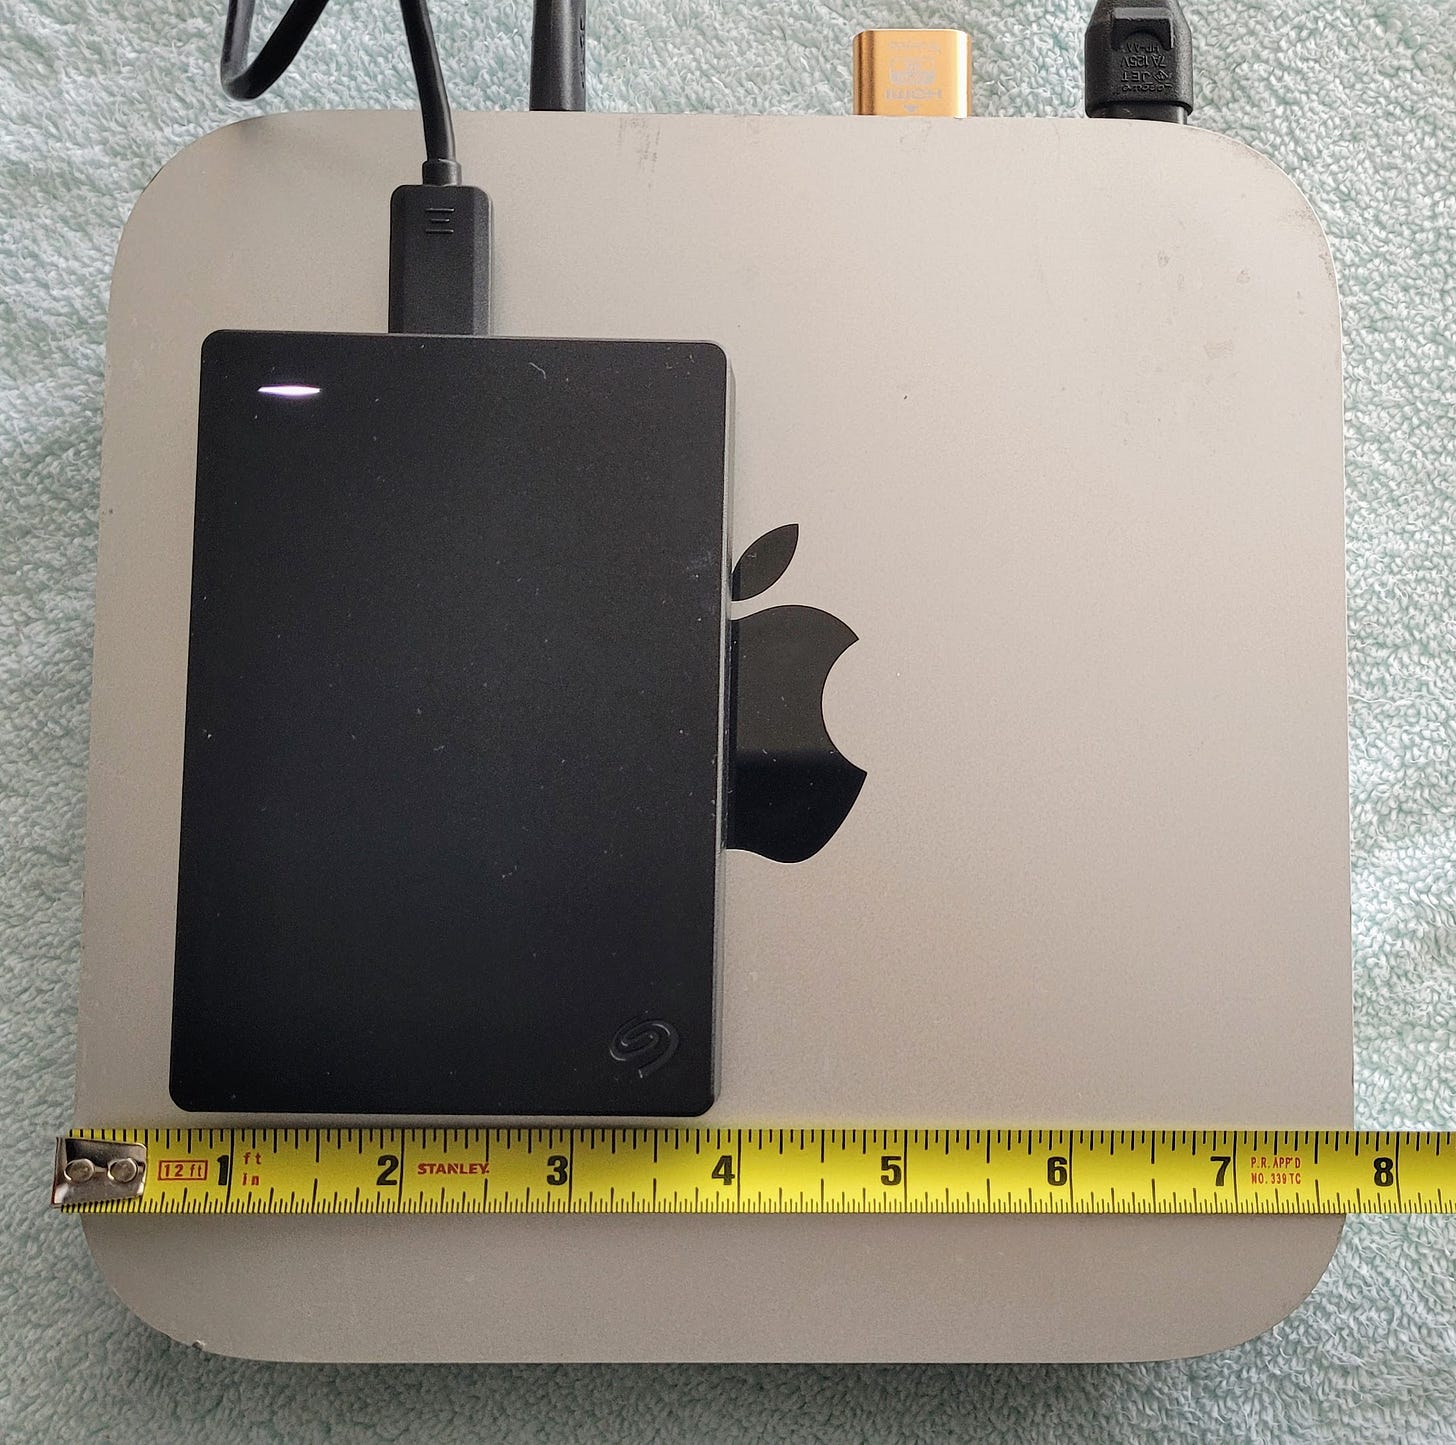
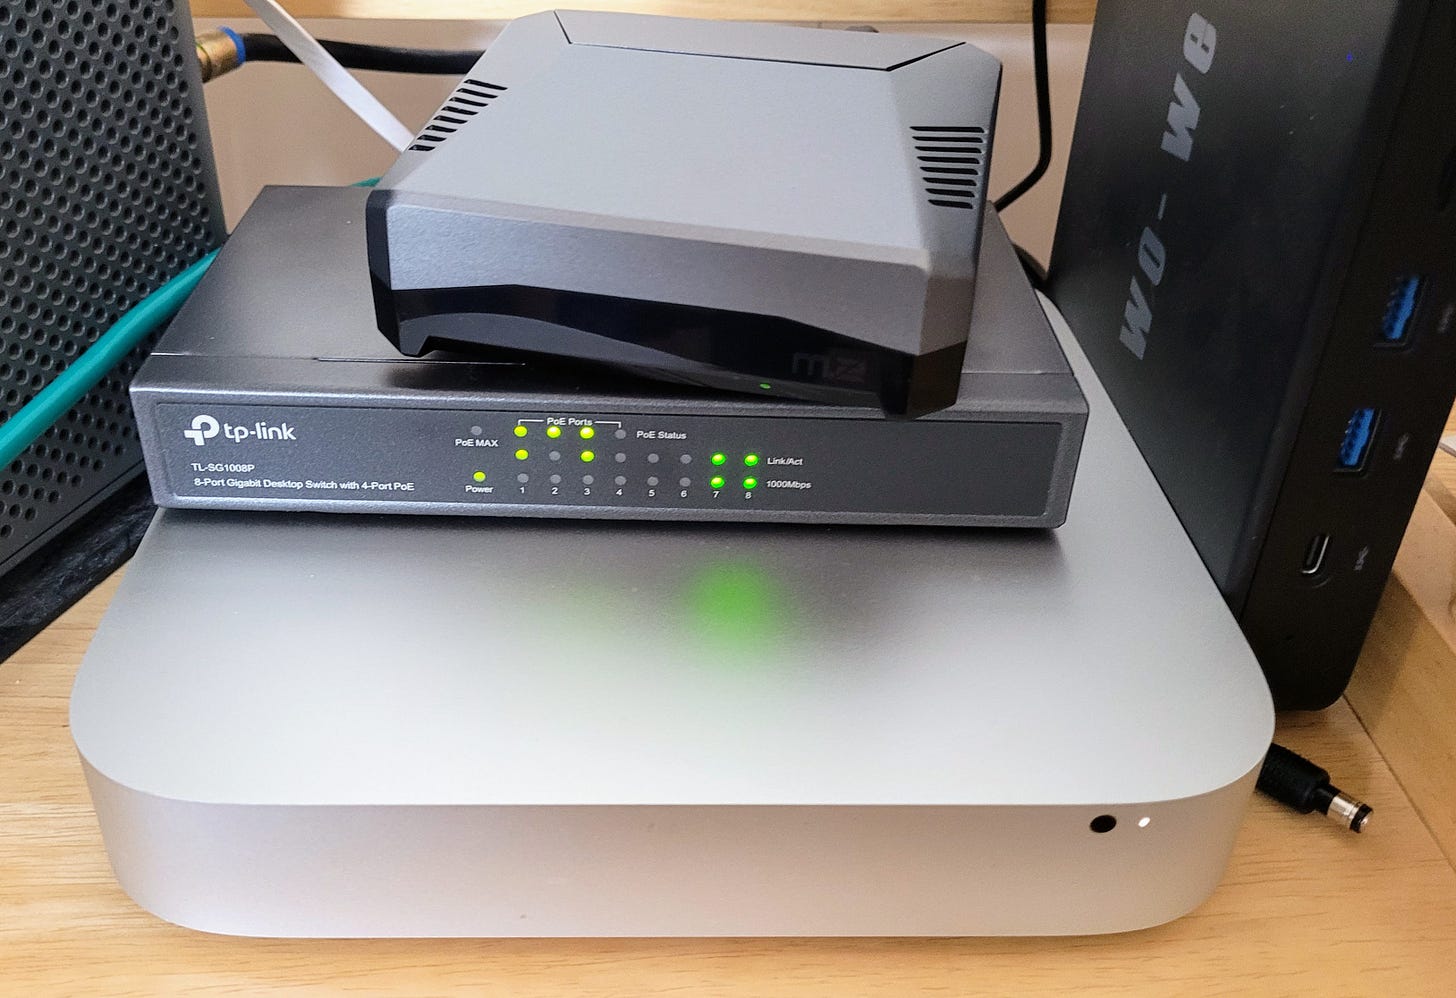
The 2014 Mac Mini is not a small device at 7-3/4 inches square by 1-1/2 inches tall. It’s almost the size of small dinner plate. (You can see the gold-colored HDMI dummy plug sticking out of the back panel.)
On the other hand, my power-over-Ethernet switch sits on top of the first Mac Mini quite nicely.
MX Linux uses init for system management
In this process of putting MX Linux on a 2014 Mac Mini, I was surprised by one thing: MX Linux uses init instead of systemd for system management. I’m used to systemd in Debian Linux, and since MX Linux is based on Debian, I expected to see systemd used there, too. It didn’t take long for me to adjust to the simpler nature of init, but out of habit, I keep trying to use systemd commands.
Still to do
To do: Capture a complete image of the working MX Linux system as implemented on the Mac Mini so I can restore it if the next part of the experiment breaks the system. I’ve used Clonezilla for this in the past, but I think I’ll try Rescuezilla, described as: “Rescuezilla is an open-source easy-to-use disk imaging app that's fully compatible with Clonezilla — the industry-standard trusted by tens of millions. Yes, Rescuezilla is the Clonezilla GUI (graphical user interface) that you might have been looking for. But Rescuezilla is more than a Clonezilla GUI!”
I’ve made a bootable Rescuezilla USB stick. (A key consideration for me is that Rescuezilla has a version available for ARM-based devices like my Surface Laptop 7.) To proceed, I’ll need to move the Mac Mini to a table and reconnect it to a keyboard, video monitor, and mouse.
And I may need to shrink the partition, but that doesn’t look too hard:
To do: Try installing and configuring AllStarLink 3 to the MX Linux-on-Mini system after making a recovery backup of the computer.
Takeaways
The 2014-era Mac Mini running an Intel processor has the horsepower to run Linux.
These systems are not expensive. In fact, units with ample RAM and storage can be had for about the cost of a Raspberry Pi 4 Model B.
The Mac Mini is not tall and not small. It needs some desk or shelf space — more than a Raspberry Pi, but less than a traditional computer.
It can be operated remotely with no keyboard, video, or mouse directly attached.
There are still some useful accessories available for this platform, but not nearly as much as for the M-series of Mac Minis.
A few M17 meanderings
I try to catch the M17 Net every Saturday at noon Central Time, hosted by Jeff AE5ME on the Kansas City Wide network. Why? Because I always learn something new.
One of the most interesting things to emerge this week did not come through the M17 Net, instead being published by Jerry at Connect Systems. Jerry notes that “one of the developers of the firmware for M17 has just released a new version for testing.” That developer — Silvano Seva — has released “experimental firmware for both the CS7000 and CS7000-PLUS with an implementation of a noise gate for M17, addressing the ‘frying pan’ effect reported by many users.” Jerry posted the new version at https://www.connectsystems.com/amateur-software/CS7000_m17_plus_software.html. Look for “openrtx_cs7000p_noise_gate.bin” at the bottom of that page.
Since I have these radios, I expect I’ll be trying the new firmware on one of them. It’s important to note that Silvano’s firmware implements a noise gate on the TX side of the radio, so if you are receiving transmissions from a radio without the noise gate fix, you may continue to hear some of the odd noise artifacts some users (including me) have experienced.
If you need a bit of a primer on M17, a thorough introduction is available in a post titled What’s the deal with this M17:
Let’s start with the basics: M17 is the new standard in digital radio. What makes this mode different from existing solutions? First of all, openness – M17 is a free specification of the digital communication mode: codec, protocol stack, modulation parameters, hardware documentation – all this is 100% open source.
How to get on the air with M17? Visit https://wiki.m17foundation.org/index.php?title=How_to_get_on_the_Air_-_Part_I:_Radio for a solid walk-through of several ways to join the M17 experience.
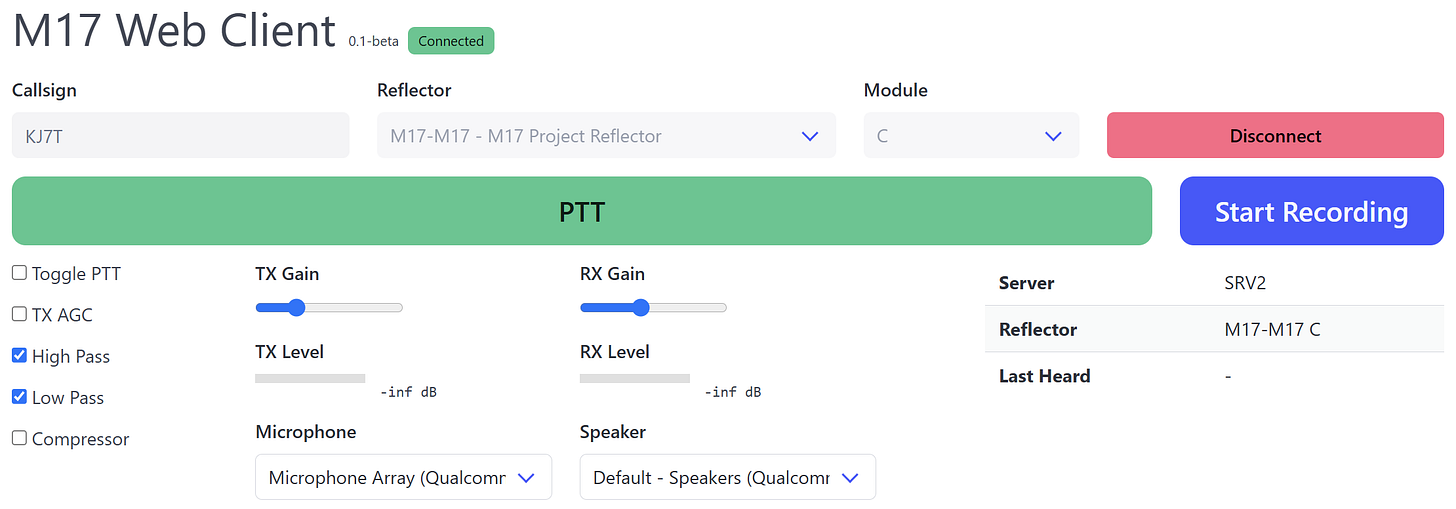
Stephen KC1AWV has an M17 web interface that’s worth exploring. Find it at https://m17web.kc1awv.net/
I tried the web client this week and it actually works very well, at least on receive. Do you need to buy a +$300 radio to try M17? No! You can do a test run with the M17 Web Client at no cost.
DVMEGA Cast
As an experiment, I tried to run the WPSD-M17 branch on the DVMEGA Cast (or as I abbreviate it: DVMC). As expected, it did not work, but it was worth a try because the DVMC would be even better with M17 support. Hope springs eternal.
I’ll reiterate what I said last week that the DVMC did not turn out to be the simple plug-and-play appliance I expected. However, once it is set up and humming along, it is a very convenient device.
My transmitted audio is reported to be good and what I receive also sounds good to my ears. The little box is sitting next to me on the table, with the microphone held in place with a magnetic mic holder. It’s set to boot up to my local Fusion system run by Jeff W7NEE. Most of the time, I’m leaving it on so I can monitor QSOs on the W7NEE repeater and jump in when I have something to add.
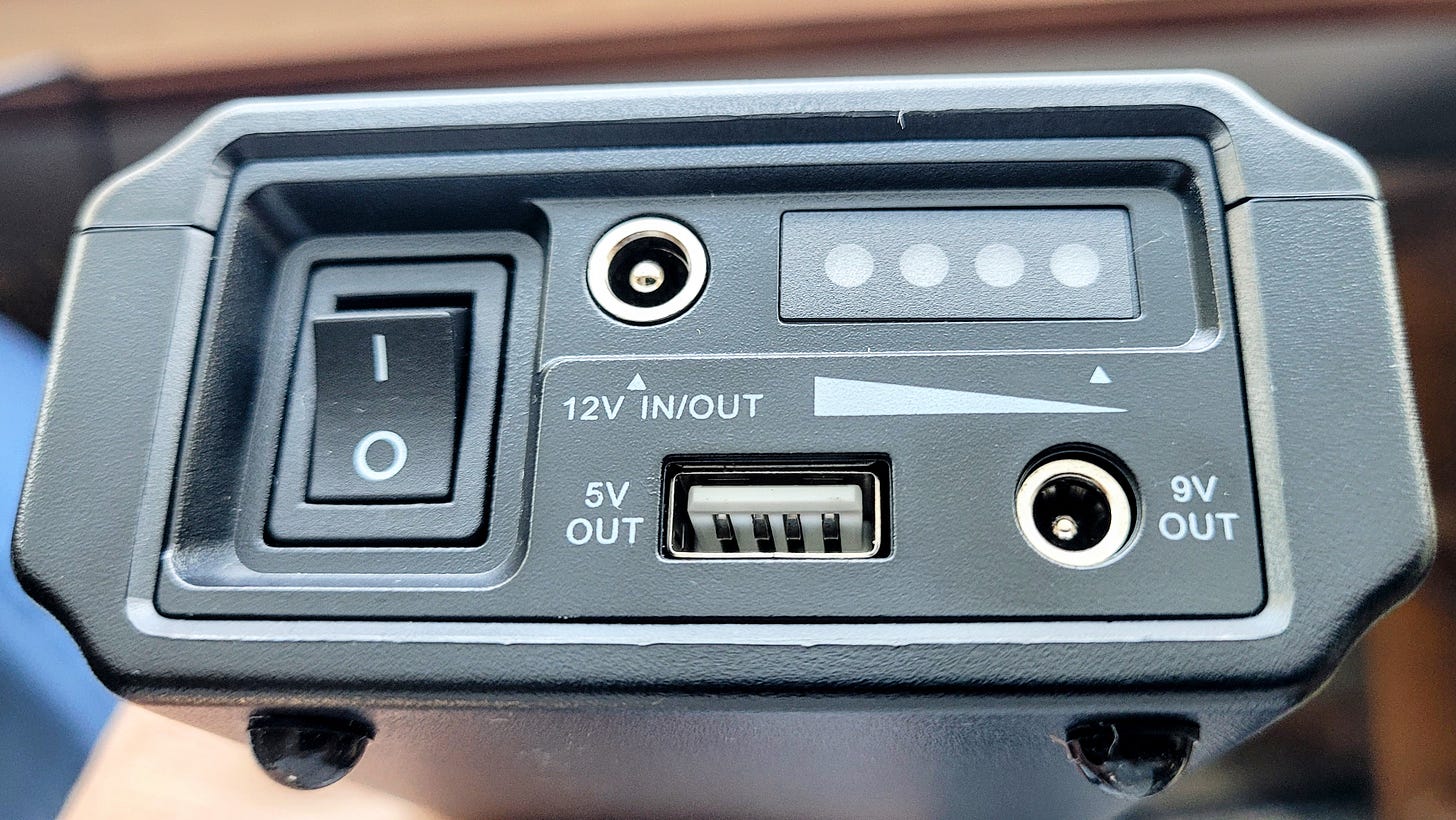
I have been experimenting with a TalentCell battery (affiliate link) and another brand that is similar to the TalentCell. What I intended was to connect the battery to the charger, and then connect the DVMC to the battery. Unfortunately, there is but one port on the TalentCell power bank, and it serves as the charging port and the power distribution port. (I didn’t think this through very carefully.) However, this is a nice device so I’ll hang onto it as I know I can put it into service elsewhere.
The DVMC expects to be fed 12VDC. I’d like the battery to be in a flat, rectangular format that I can easily marry to the DVMC. The battery would serve as a backup if the power goes out and also allow me to pick up and move the DVMC from place to place without rebooting it. I’m still fiddling with this idea.
Do you have GMRS in your kit?
I’ve resisted the movement toward GMRS radios. The primary use I’ve had for them is to converse between vehicles when we had to go someplace in two vehicles. Perhaps somewhere along the way, I fell into the trap of thinking that since it wasn’t ham radio, it wasn’t really radio.
I was wrong. (Thank you to Gary AC7VA and Jody KK7SLO for helping me recognize [I think I used the phrase “schooling me on”] the growing use of GMRS radios and repeaters!)
How wrong? Visit https://mygmrs.com/ to see how popular GMRS has become. You can easily find GMRS repeaters near you using the “Repeaters Near Me” button. For me, I find several:
It’s notable that the KCARC-Gold Mt. repeater is operated by the Kitsap County Amateur Radio Club on a tall tower, so it has extensive coverage for GMRS.
I’ve suggested before that neighborhoods would be well served to have FRS or GMRS radios all programmed with one common frequency. This would be useful in emergencies such as fire, flood, earthquake, police action, and more. Now that I’m seeing GMRS repeaters becoming more common, I’m realizing these low-power radios are no longer limited to just a local neighborhood. (In fact, I’m thinking the community around the lake where I’m staying right now would benefit from a GMRS repeater.)
Let’s face it: not many people want to become a licensed amateur radio operator. And yet we know that radio (and people proficient in their use) can save the day. I think GMRS repeaters are a great answer to communicating with our neighbors in an emergency, especially when all else fails.
How could our normal communication systems fail? Wildfire could take down lines that carry phone or power to a tower. A major earthquake is likely to result in damage infrastructure for weeks, if not months (I live in earthquake country where I see sleeping volcanoes every day). I suppose there are many more scenarios that could disrupt landline and cellular comms.
In my experience, those disruptions occur at the worst possible times, such as during a winter storm when you can’t get out and emergency services may not be able to get to you. That’s the kind of situation where your neighbors could make a huge difference if only you could reach them.
I’m warming up to the idea of incorporating GMRS in my QTH and in my vehicle.
If you want to dive into GMRS repeaters, here are a few commercial sources:
Closing
Thank you to the several hams who responded to my request to help test 44net email. It worked fine, once I remembered to check that account. That is the trouble with web-based email: unless you go to that web page, you don’t know if there is mail waiting or not.
It’s been a computer week more than a radio week, but some of the computer work is in preparation to use them for radio play. For example, getting MX Linux loaded onto an old Apple Mac Mini computer allows me to try installing AllStarLink 3 on that platform.
I confess that one reason I like amateur radio and computers is that I like to solve problems. (That is also why I became a geologist — the planet offers infinite puzzles to solve, often with very scanty information available!) In working with the DVMEGA Cast radio, this all-in-one appliance has revealed a bit more of its true nature to me. It is not the plug-and-play appliance that I expected to get, at least not for me. It was puzzling. While I’ve enjoyed figuring out why some things weren’t working right, this particular device should arrive ready to put into service. Why? Because it is configured to be an all-in-one, plug-and-play (almost) device, but it doesn’t come with the needed accessories, and in my case, it didn’t come with the hardware working correctly. That’s hard to take, given the cost of the device.
I think this is a useful decision point for radio amateurs, i.e., when you acquire something or when you reach for a radio, do you want it to work like a toaster or do you want to dig into it with your fingers and mind to make it work? Across the amateur radio community, I often hear statements about appliance operators, and those are usually pretty negative comments. However, most of the time, most of us just want to turn the thing on and know it will work the way we expect it to. In other words, we may say that appliance operators aren’t really hams but we’re hypocrites because we treat many of the things in our station exactly like appliances.
(And I appreciate that I need to find a term other than “appliance operator” because this phrase is sure to set some folks off. Maybe “radio user” would be a kinder description, and those who like to figure out and fix problems could be “radio investigators.” I identify more with the investigators, even though I often act as an operator/user.)
I’m not trying to point fingers or call anyone out. Instead, I’m suggesting that when you look at the stuff in your ham shack, or when you go to the amateur radio candy store, ask yourself: do I want this device to be a problem-free appliance for me most of the time? This might be a helpful way to look at a piece of equipment. If you want it to be a reliable appliance, you’ll look at how long the device has been manufactured, and you’ll read reviews and forum postings, and you’ll think about how to get the device serviced or repaired. Reputation, service, and support become important criteria for choosing a particular piece of equipment. However, if you don’t expect it to be an appliance, that probably means you expect some rough edges in the way the thing works, and you recognize you’ll probably have the cover open more than once, so you’ll want to know there are schematics and perhaps some community support for fixing things yourself. You’ll accept that you are exploring the device just as much as you are using the device.
Radio amateurs tend to love to fix things themselves…except when it’s a dependable appliance that suddenly doesn’t work anymore. Then we feel let down by the device or the manufacturer. That’s probably where things like ICOM means I Can Only Monitor come from.
Few of us are appliance operators all of the time, but many of us are appliance operators most of the time. For me, I don’t enjoy that moment when I first realize my reliable piece of equipment is not working right, but then I realize I will enjoy working the problem and finding a solution. Truth be told, I may enjoy this aspect of our hobby more than anything else! While I do buy and use radios, I like figuring them out even more. I think my father knew this when I was six years old and took apart everything I could get my hands on. I don’t think I’m alone in wanting to know how something works, and especially how my amateur radio gear works!
With that I’ll close the channel and say 73 to all. Remember to touch a radio every day!






Tom - If you’re going to base emergency communications around a repeater, GMRS in this case, that requires making the repeater reliable, especially with good backup power. This is especially true in community scenarios where the repeater might be the only radio system in a community building. Also, licenses ARE an issue. No Amateur Radio testing / knowledge is required - just apply and pay.
Take a look at "NoMachine" software for remote desktop. It has duplex audio transfer.