Random Wire Review 107: September 13, 2024
New Heltec T114, flashing Meshtastic, the Radxa E20C router, a Winlink presentation for some Boeing hams, an audio device error on WIRES-X portable digital node, charging a power station, and more
Contents
1. Featured: Heltec T114 Arrived, Easy Config
1.1 Assembly
1.2 Installing Meshtastic
1.3 Running on a power bank
1.4 Changing the antenna
2. Flashing Meshtastic
3. Radxa E20C Router/Computer Arrived
4. BEARS Meeting Winlink Presentation
5. WIRES-X Error (Again)
6. Old Power Station Power Supply
7. “Trials and Errors” Blog
8. Interesting Links
9. Closing
Find the audio version of this newsletter at https://www.randomwire.us/podcast.
1. Heltec T114 Arrived, Easy Config
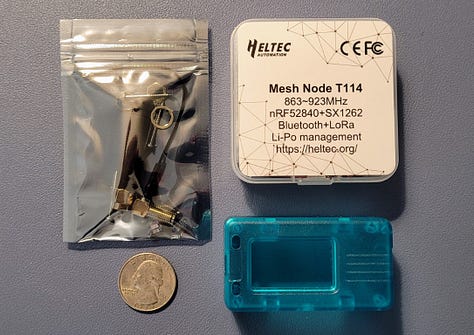
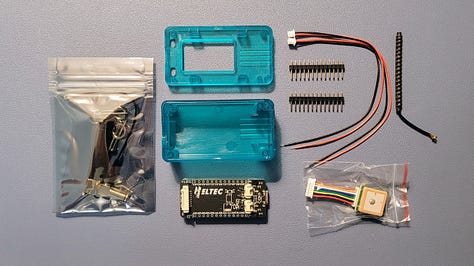
The new Heltec T114 arrived from Heltec Automation. It’s a cute little thing.
Unfortunately, it arrived with no battery. In hindsight, I should have bought the offering from Muzi Works that includes the battery. However, Muzi Works shows the battery number and Amazon had one for only $7.99 so the proper battery will arrive in a week. (UPDATE: The battery connector does not fit. I’m investigating!)
No instructions come with the device when ordered from Heltec, not even a link to product documentation. Not to worry, though, Heltec has a thorough page about the T114 at https://heltec.org/project/mesh-node-t114/
1.1 Assembly
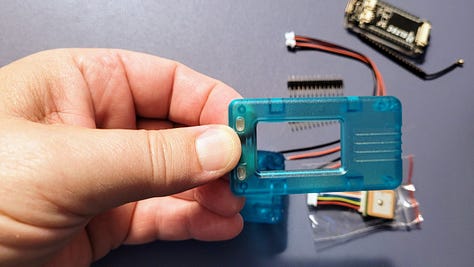
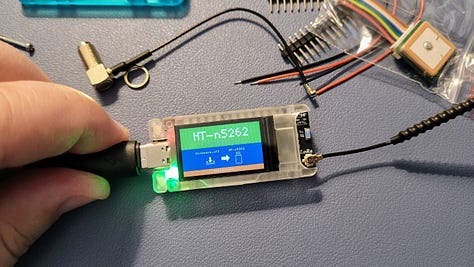
I assembled the unit without looking at the instructions. The hole in the case for the external antenna is not quite large enough so instead I used the included coil antenna and left it inside the case. The GPS antenna only goes one way so that was easy to slot into place. The GPS wiring harness only goes into the socket one way so that, too, was easy.
1.2 Installing Meshtastic
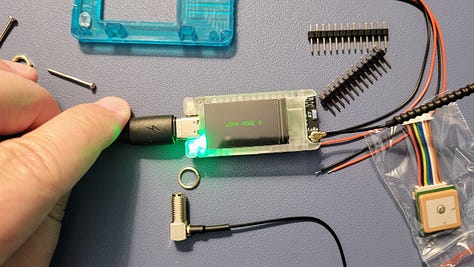
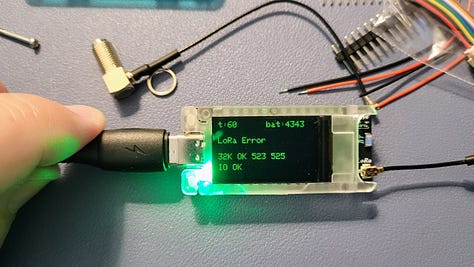
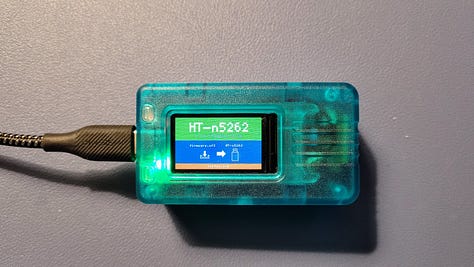
When I plugged it into power (USB-C) the device came alive but obviously Meshtastic was not installed on it. Here’s where it gets particularly easy to get Meshtastic running on the T114:
Plug a USB-C data cable (many are power-only cables so be sure to use one that also transfers data) into the T114 and into your computer.
Press the green blinking reset button twice in quick succession.
You should then see the T114 on your computer as a separate device.
Download the correct .uf2 file from Heltec, then drag-and-drop that file into the device folder on your computer. You can find it on the Heltec T114 page way down near the bottom in the Docs & Resource section. Once in that section, click the Related Resources link then download the file named nrf-meshtastic-V242.uf2.
Wait a few moments until the device reboots, at which point you should see Meshtastic 2.4.2 running.
You’ll still need to pair it with your smartphone, so go to Bluetooth on your smart device and find the T114. Click that to begin pairing. The T114 will show a six-digit code on the screen and you’ll get a popup on your smart device where you enter the six-digit number.
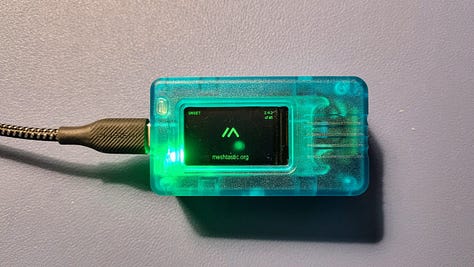
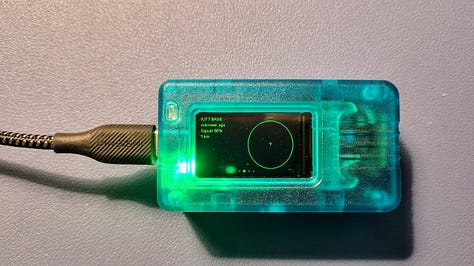
Then open the Meshtastic app and find and tap your new node. Once it is recognized by the app, change the Region setting to US. At this point, it should automatically reboot. And that’s it unless you want to fiddle with other settings.
1.3 Running on a power bank
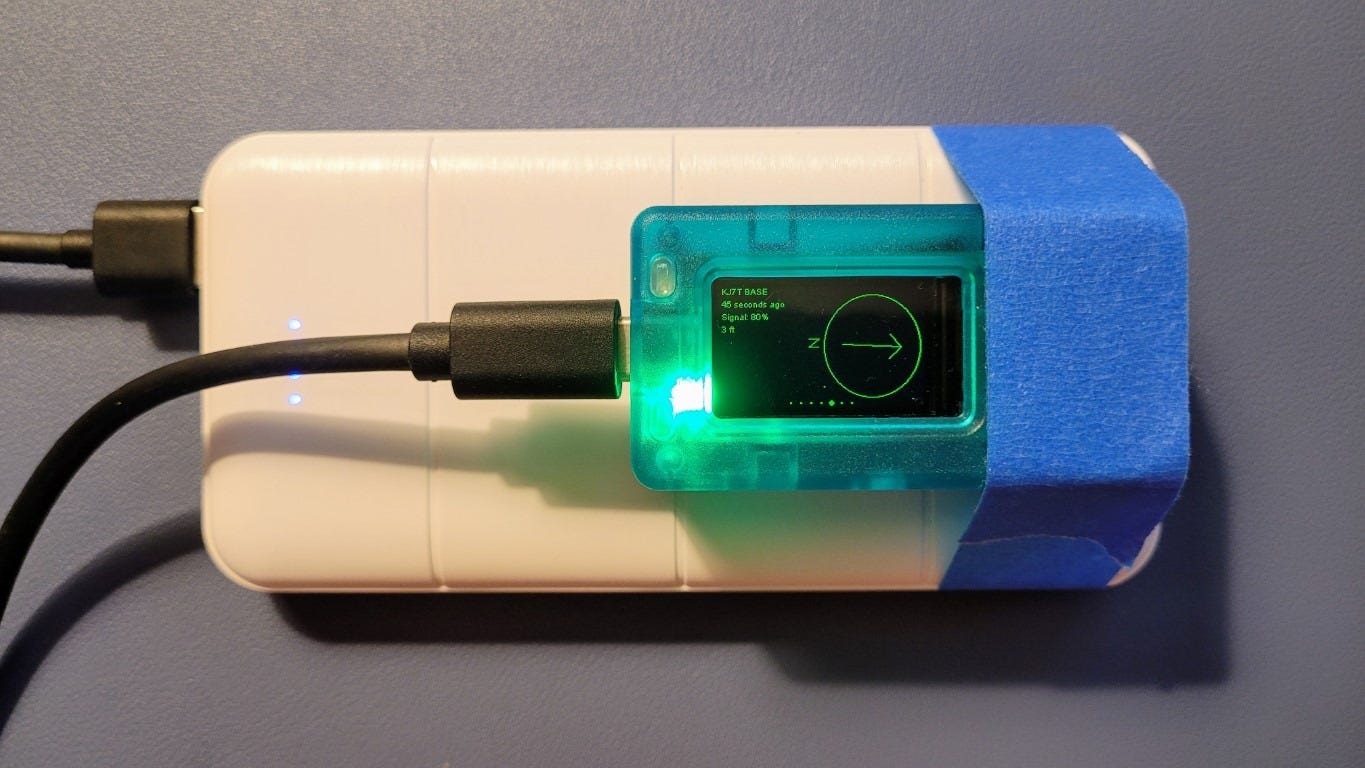
I confess that I did not wait for the internal battery to arrive from Amazon before trying the node in my vehicle. To do this, I used a power bank, a USB cable, and a strip of blue painter tape to temporarily hold the pieces together.
Surprisingly, it didn’t work for more than a few minutes. My power bank has a feature that causes the bank to shut off if insufficient draw is detected. The T114 did not draw enough power to keep the power bank turned on. This is probably a very good indication that the T114 is going to be miserly when it comes to power consumption!
I did test the unit while driving between Portland, Oregon and Olympia, Washington using a very sophisticated setup:
With no battery, the T114 stays very cool.
1.4 Changing the antenna
Later, I changed the antenna from the internal coil to the external stubby. The small wire coil inside the case, resting against the PCB, didn’t seem very sensitive.
I thought the SMA jack did not fit through the pre-drilled hole in the case but I was wrong. Upon closer inspection, there is a flat milled into the jack and the hole has a matching profile. The two little buttons are free-floating in the case cover holes so they get a bit fiddly when putting the case back together. Blue painter tape to the rescue!
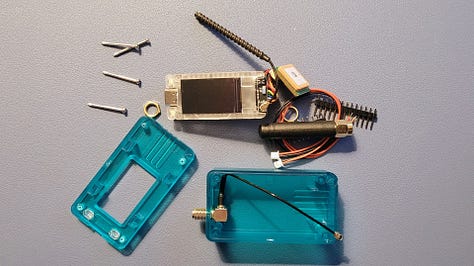
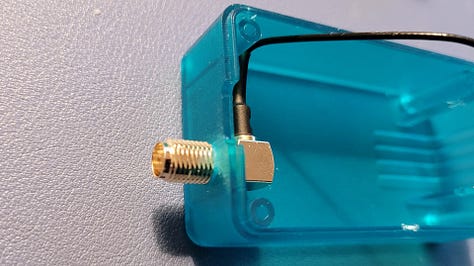
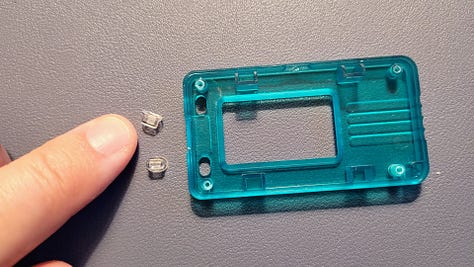
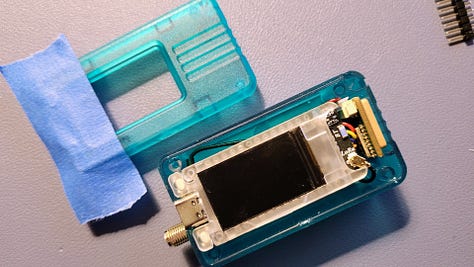
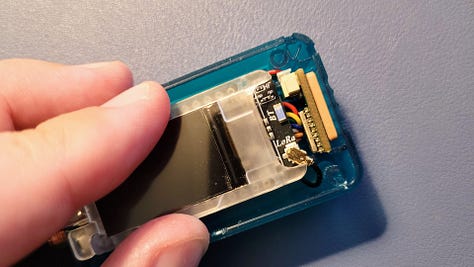
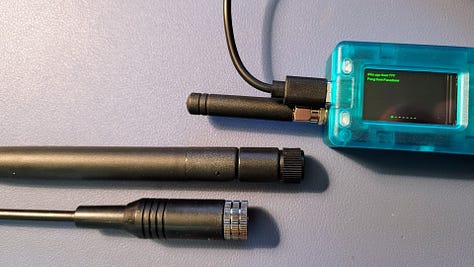
In the photo with the blue tape, you can see how I routed the antenna wire inside the case. Also, there is a design flaw in that the USB-C port on the case is too close to the antenna mount. Antennas with larger bases interfere with charging.
I suppose an additional design question mark is why the GPS antenna is on the opposite end of the case from the 915 MHz antenna. Most of us are going to carry this thing with the stubby antenna pointing up and that puts the GPS antenna at the base of the device. However, I’m not really complaining because in the car, this will sit on the back (the side opposite the display) where both antennas will be relatively unimpeded.
There is no lanyard hole. A device this small would be easy to carry on a neck lanyard if configured for this. Also, there is no way to access the tiny reset button on the board without disassembling the case.
Overall, I quite like this little unit. Adding the battery will improve it.
UPDATE: The battery arrived just as I was putting issue 107 to bed. The JST connector on the battery does not fit the 1.25x2P-LiPO connector (a smaller JST connector) on the T114 board. I’ve reached out to a vendor for clarification.
.-. .- -. -.. --- -- / .-- .. .-. . / .-. . ...- .. . .-- / -... -.-- / -.- .--- --... -
2. Flashing Meshtastic
As long as I had some Meshtastic devices out on the “bench” (my desk), I went ahead and updated the software for two nodes. Both are Heltec V3 devices. I chose to flash them to the latest stable version 2.4.2.5b45303 Beta. This note about flashing Meshtastic refers to other nodes, not the T114!
To do this, I connect my node to a USB port on my personal computer, then open https://flasher.meshtastic.org. A prerequisite of this is installing a serial driver for your COM port that matches the type of device you’ll be flashing. I had already done this so I just had to select the correct COM port.
The screen looks like this:
Then select the Flash button. You’ll get a popup that describes the firmware. Select the Continue button at the end of the description. Additional instructions follow:
I left items 1 and 2 at the default settings. For item 3, I did not select “Full Erase and Install” as I wanted to retain my settings. After clicking the Update bar/button, it took a few minutes for the firmware to install and then the node restarted.
.-. .- -. -.. --- -- / .-- .. .-. . / .-. . ...- .. . .-- / -... -.-- / -.- .--- --... -
3. Radxa E20C Router/Computer Arrived
The Radxa device I heard about on Liliputing arrived a week ago and I’ve just started to play with it. With 2 Gb of RAM and 16 Gb of eMMC storage, my hope is to load AllStarLink onto this machine. It can run Debian Bullseye so I’m hoping this could work, but we’ll see. In my first attempt, I’m going to try to get Bullseye loaded and then follow the steps outlined by David Gleason NR9V in an AllStarLink.org community forum post.
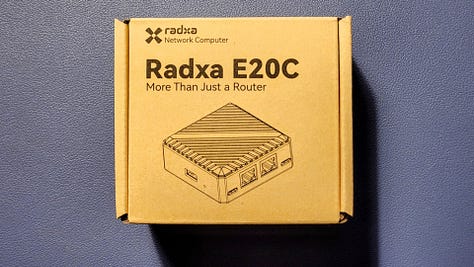
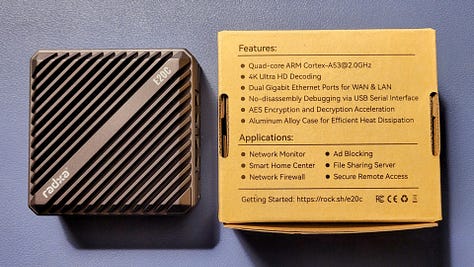
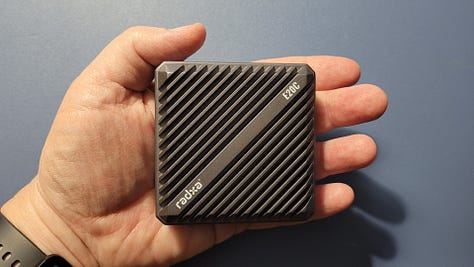
The E20C is described by Radxa as a “Mini Network Titan.” Strong words. An informative review is available on Hackster.io.
I wanted to try a similarly sized device called the NanoPi R2S Open Source Mini Router with Dual-Gbps Ethernet Ports but the NanoPi does not have built-in storage and it only comes with 1 GB of RAM. Therefore, I sprung for the E20C instead.
The operating system can be loaded onto a microSD card or into the built-in eMMC storage. I very much prefer running from eMMC so I’ll try loading it there first. Note that there is no display port on this little box. All interactions occur over TCP/IP in a browser of your choice.
This is a solid little thing. It weighs about the same as a USB charger of the same size; it’s a bit lighter in weight than a 16.9 fluid ounce bottle of water or soda. Find the overview and specs on the Radxa site.
.-. .- -. -.. --- -- / .-- .. .-. . / .-. . ...- .. . .-- / -... -.-- / -.- .--- --... -
4. BEARS Meeting Winlink Presentation
BEARS is the Boeing Employees Amateur Radio Society. I was deeply impressed by the level of experience and expertise present in the meeting. Lots of knowledge in this group of amateurs.
BEARS has been working on a repeater enhancement project with a grant from the ARDC. What I saw presented showed great work performed for BEARS by Day Wireless Systems.
But why did I attend the BEARS meeting over Zoom? It was to watch a presentation by Bill Thomassen N6NBN on Winlink. Winlink is often used by emergency management departments but it is also a common way for sailors to send and receive information on HF bands. (Click here for a “how to” on setting up Winlink on HF.)
I learned some new things from Bill’s presentation. He is clearly far more knowledgeable about Winlink than I am! You can see his presentation at this link: https://tinyurl.com/Intro-Winlink-N6NBN
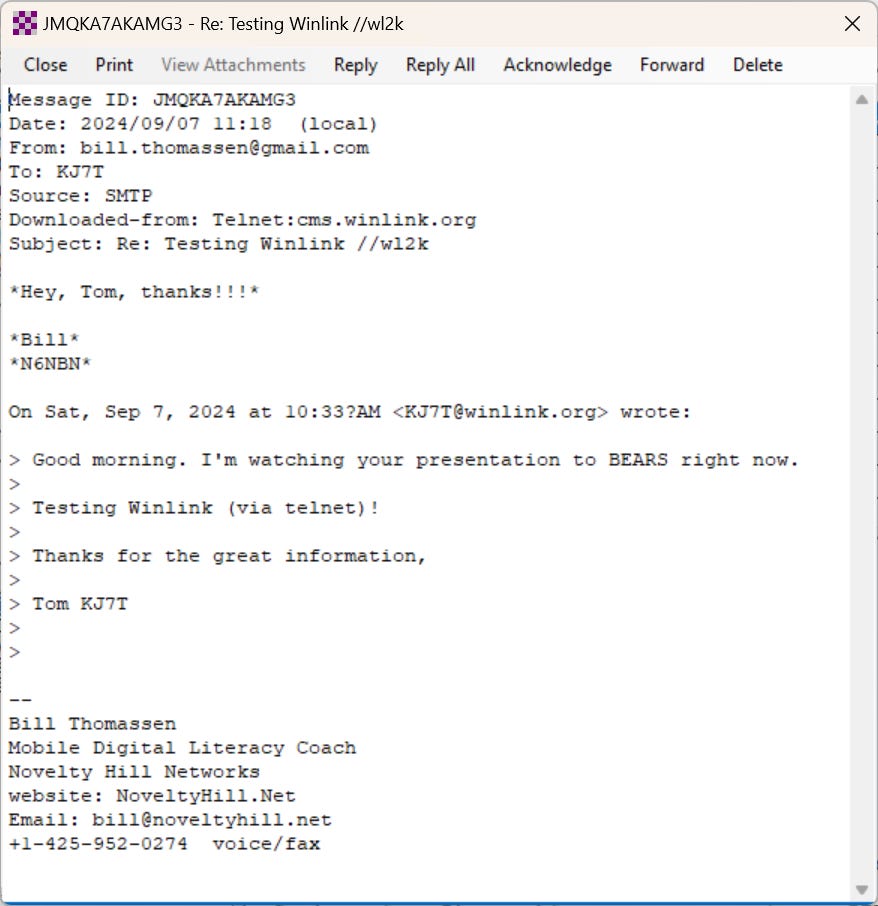
During the presentation, I emailed Bill over Winlink and it didn’t take long for him to respond:
.-. .- -. -.. --- -- / .-- .. .-. . / .-. . ...- .. . .-- / -... -.-- / -.- .--- --... -
5. WIRES-X Error (Again)
When I remoted into my home server to see if any software updates were needed, I also restarted WIRES-X. That might have been a mistake because when it came back up, I got the dreaded "Not Found the Audio device for the WIRES-X use" message for my Portable Digital Node.
What did I do?
I crawled around on the floor to check that the audio cables that connect to the SCU-58 cable set were in the soundcard holes (it’s an old soundcard with different colored ports).
I checked the connections for my audio extension cables (because the server is several feet away from the radio).
I unplugged the SCU-58 cable from the microphone jack and plugged in an old set of earbuds (kept on hand for this purpose) into that jack. (When that didn’t work, I reverted to having the SCU-58 cable in the mic jack.)
I unplugged the SCU-58 from the back of the radio and plugged it back in.
I restarted the radio.
Nope, no joy. Still had the error. And then I remembered I had written about this very problem back in June. Reviewing that note reminded me I had to reboot the server.
Usually, I can reboot the server and immediately connect over Remote Desktop Protocol (RDP). I run the server headless, meaning it operates with no monitor, keyboard, or mouse directly connected to it. That generally works fine. When it doesn’t work, it usually means an operating system update got installed that monkeyed with one of the interfaces.
OK, no worries. Break out the small keyboard and mouse I keep handy for just this purpose and temporarily plug the HDMI cable into my desktop monitor. Sure enough, Windows 11 was showing me the welcome screen to set up a new system. (Note: I find that operating system updates often mess with firmware.) I skipped all the prompts and got the server up. Then I restarted WIRES-X and the “not found” error for the audio device was gone.
Second reminder to myself: next time, just reboot the server!
.-. .- -. -.. --- -- / .-- .. .-. . / .-. . ...- .. . .-- / -... -.-- / -.- .--- --... -
6. Old Power Station Power Supply
One of the nice things about being a ham is learning to improvise. I have an older power station (circa 2021 is now “old” in power station years!) missing the charger. When I searched online for the Aukey PowerZeus, I found very little information available. I searched by model number, I searched for a manual.
The closest I came was for the same make and model listed in Italy:
Home Backup Power: Provides pure sine wave 110V AC just like the outlet at home. 518Wh huge capacity provides 16 extra hours of drone flying, 24 more hours of phone video recording, 18 hours of professional lighting, or an extra 10 hours of continuous live streaming from a remote location. Great for hiking, camping, RV travel, and hunting
But no charger.
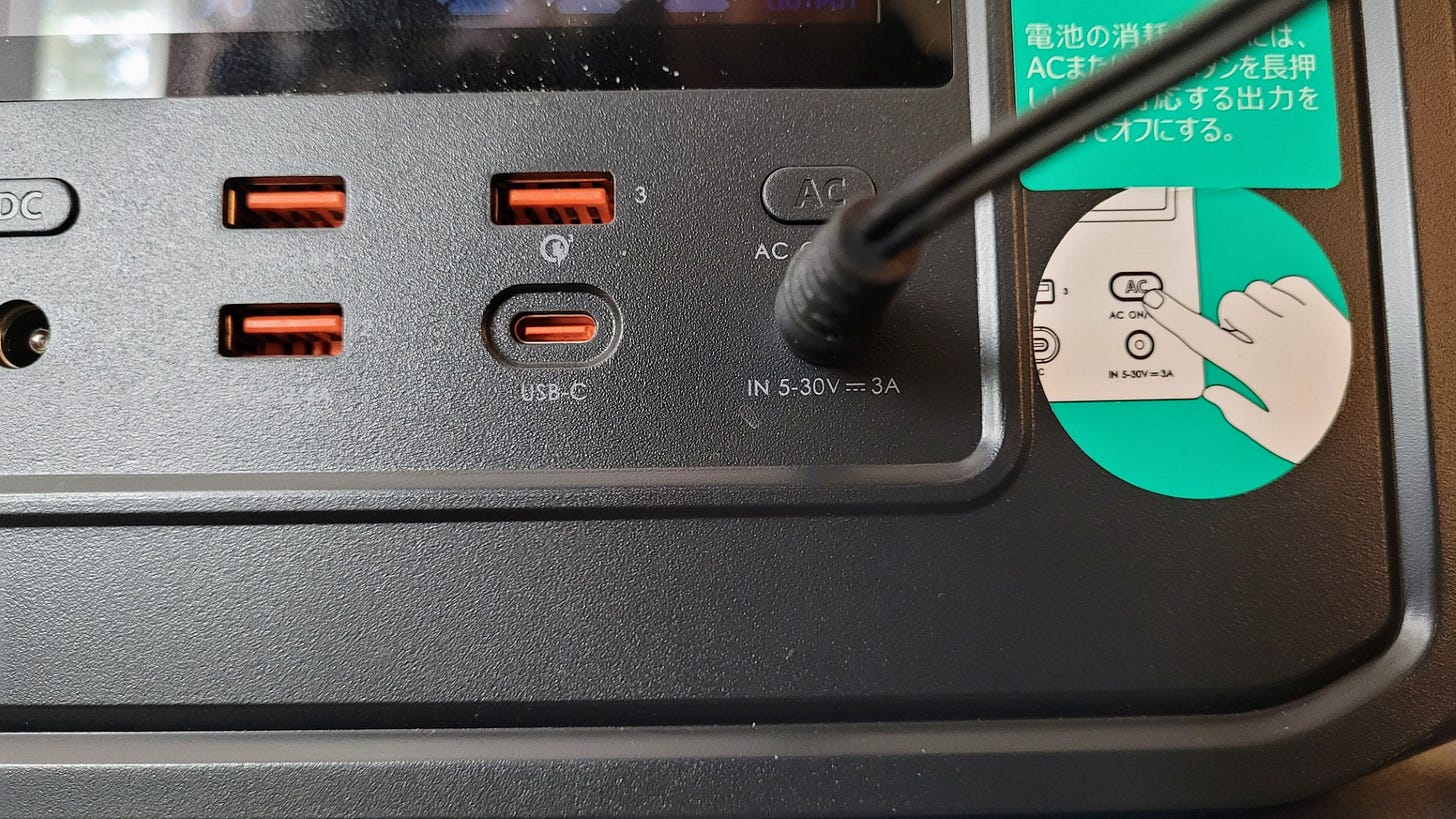
Fortunately, the charger input is a barrel jack for up to 3 amps of input power. When I saw the jack and the 3A specification, I immediately wondered if my 12VDC charger that I use for some Dell Wyse 3040 thin clients and for my Behringer MIC500USB pre-amplifier might fit. It did! I charged the power station for a few minutes but the draw made the wall wart very, very warm.
So, I ordered a heavier duty 12V 3A charger from Amazon with a 5.5mm x 2.5mm barrel connector. For just $9.99, this seemed like an easy experiment. The charger was delivered the next day and the power station has been pulling about 31 watts in. It just finished charging up to 100%.
Score one for this amateur radio operator. We’ll take this power station on our road trip to Kansas, giving us plenty of capacity to keep our phones and tablets charged.
.-. .- -. -.. --- -- / .-- .. .-. . / .-. . ...- .. . .-- / -... -.-- / -.- .--- --... -
7. “Trials and Errors” Blog
While I was wandering around the QRZ website, I stumbled across another amateur radio blog that has some interesting content. Below are three items I found of particular interest by Dave Jensen W7DGJ.
Chameleon Tactical Delta Loop antenna — I’m interested in this antenna so Dave’s informative review of it was very welcome.
The Morserino and the PreppComm MMX — These are interesting devices to help you learn and use Morse Code.
Shrinking the Kit — Being that I like small, compact devices, Dave’s article on “shrinking the kit” was also interesting.
.-. .- -. -.. --- -- / .-- .. .-. . / .-. . ...- .. . .-- / -... -.-- / -.- .--- --... -
8. Interesting Links
Some other content I found this week that was interesting:
Radio
This is the new magic carpet! Faraday cloth ground network (I’m going to try this)
Short Takes #28: Mastering the Waves -- A Primer on Magnetic Loop Antennas (because who doesn’t want to know more about magnetic loops!)
Nano-Spot 2.8” External Display (looks like an easy way to add a Nextion display to an MMDVM hotspot)
Networking
Minimize CO2 Emissions with Single-Pair Ethernet (of interest because of the network topology discussion)
3 reasons you should you be using VLANs on your home network (network security)
Angry IP Scanner (a simpler alternative to what I usually use: Advanced IP Scanner)
Other
I tested the DJI Neo and it's so good that all I can think about now is flying it (file this under “if I had money to throw away…”)
.-. .- -. -.. --- -- / .-- .. .-. . / .-. . ...- .. . .-- / -... -.-- / -.- .--- --... -
9. Closing
Next week I’m on the road Tuesday through Friday (Portland, Oregon to Omak, Washington) so the Random Wire content will undoubtedly be light. The week after that we set off on our two-week road trip from Portland, Oregon to Wichita, Kansas (with a stop in Moab) and back. I won’t be doing any building while I’m traveling but I hope to do some radio operating. I’m sure I’ll have some stories from the road to share!
I will be running my Yaesu FTM-300DR C4FM mobile radio with APRS running (find me as KJ7T-9 on https://aprs.fi). I’ll also be running a Meshtastic node as a tracker as I want to compare that against running APRS. I might also take a Ten-Tec Scout or my Yaesu FT-891 and a telescoping aerial for a bit of HF work but we’ll be driving long distances so I expect the HF radio will stay in the case most of the time. I know I’ll take an AllStarLink node with me (probably the 588417 SHARI node) pre-configured to connect to my travel router or cellular hotspot.
Wishing you a wonderful transition from summer to fall!
73,


