Random Wire Review 84: April 5, 2024
Links ☼ Winlink station components, Winlink Express settings ☼ APRS sounds on Yaesu FTM-300DR ☼ Workbench projects (hotspot, TM-281A for packet, updating Evolve laptop, DVMEGA DVstick 30)
CONTENTS
1.0 LINKS: Interesting, maybe useful
2.0 BASICS: How is your Winlink station?
2.1 My Winlink station components
2.2 Winlink Express settings
3.0 TIP: APRS sounds on Yaesu FTM-300DR
3.1 APRS Mute
3.2 APRS Ringer
4.0 WORKBENCH: Projects underway
4.1 Hotspot build with Nextion display
4.2 Kenwood TM-281A as packet radio
4.3 Updating my Evolve laptop
4.4 DVMEGA DVstick 30
1.0 LINKS: Interesting, maybe useful
Technician, General and Extra class pool questions with only the correct answers (Holland Amateur Radio Club K8DAA)
Amateur Radio In An Apartment (Reddit)
OMNIFIXO - Makers Third Hand (featured on Ham Radio Workbench episode 203)
2.0 BASICS: How is your Winlink station?
Do you have a Winlink station? This is one of those basic things we ought to have in a closet, ready to go. If you didn’t already know, Winlink allows you to send messages and attachments (think photos and forms) as emails over RF, even if the internet is not available.
Please note that you do not need to use a radio to send and receive Winlink email. Don’t let the lack of a radio or a terminal node controller (TNC) stop you from setting up Winlink Express on your computer. If nothing else, it’s a way to get a spare email address. Having a backup address can be helpful in a number of situations.
You do not need to register Winlink Express to use it. I did pay the one-time registration fee to help support this service.
2.1 My Winlink station components
This week, I pulled my old “Winlink in a box” setup out and made sure it was operating correctly. It consists of these components:
Yaesu FT-1900R VHF radio
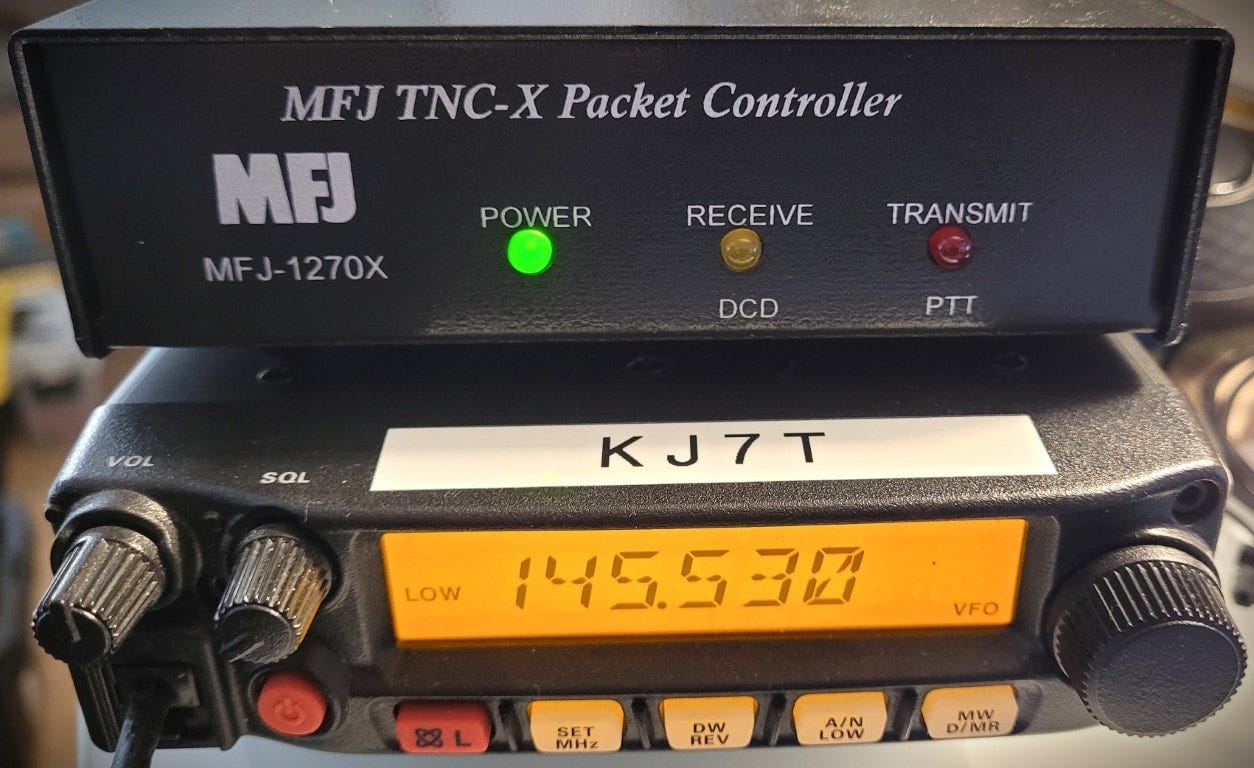
MFJ-1270X TNC-X Packet Controller
Custom cable from HamMadeParts.com
Power cable with lighter adapter plug
Windows laptop
RMS Express software
2.1.1 Yaesu FT-1900R VHF radio
This is an older radio. My first mobile was an FT-1900R radio but that original unit was stolen out of a vehicle about 15 years ago while I was on a business trip. I replaced it with an identical unit that has been a steady friend ever since. I think I paid $115 for it when new…but 15 years makes the exact memory a bit fuzzy.
2.1.2 MFJ-1270X TNC-X Packet Controller
This KISS-mode packet controller actually cost more than the radio I use it with! As I write this, it is going for $169.95 direct from MFJ. When we get to the Winlink Express software configuration, I’ll point out the settings for the TNC-X.
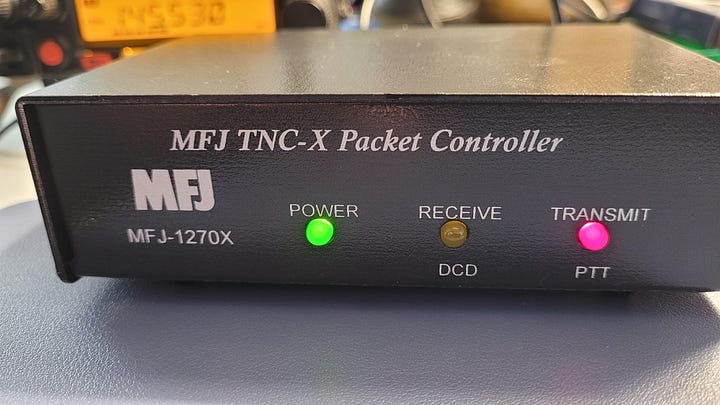
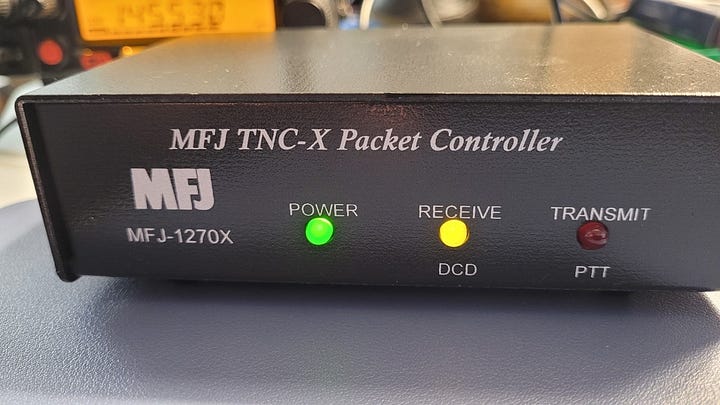
There are only three LED indicators on the front panel of the TNC-X. If it’s green, it’s on (powered by the computer’s USB port). When you are sending, the red PTT LED is illuminated. When data is being received, the yellow LED is lit.
2.1.3 Custom cable from HamMadeParts.com
I know I could have built my own cable, but since WY0GTR makes great ones, I picked up one of his constructions. He is also located near my wife’s family so I feel good about sending him some money. For my FT-1900R, he built a cable that connects to the front RJ-12 6-pin modular port and the rear mono speaker plug on the radio to the 5-pin DIN on the TNC-X.
2.1.4 Power cable with lighter adapter plug
I’m not real fond of this piece of the puzzle but it seems to work okay and, unlike many such lighter adapter systems, it is fused. At a mere $14.99 on Amazon, the risk seemed pretty low with this purchase. It suffers from the same weakness most of these adapters have: a funky little spring-loaded tip that is less than entirely reliable.
2.1.5 Windows laptop
I’m using a really nice Lenovo ThinkPad X1 at the moment, but in my Winlink-in-a-box case, I carry a cheap Evolve laptop and a 12-volt adapter for it. That’s right, the Evolve runs on 12 volts! A nicer version than what I have is available on Amazon. The Evolve is not my preferred platform because it is slow…but I don’t mistreat it and it does work fine if I exercise a bit of patience.
If you don’t care about powering the laptop directly from a 12-volt source, might I suggest sourcing a higher quality refurbished laptop, something manufactured by Lenovo, HP, or Dell. You’ll get a platform that can be used for more things and it is likely to be more durable than the Evolve. (Sometimes we hams can be a little rough on equipment!) The past few years I’ve been leaning toward refurbished Lenovo ThinkPad platforms. I just upgrade the OS, RAM, and battery on an old ThinkPad X250 that I intend to dedicate to amateur radio use.
2.1.6 Winlink Express software
Previously known as RMS Express, and now available as Winlink Express, this is the software to use on your Windows computer to send and receive Winlink messages. You can use it with a radio and terminal node controller (TNC), or without a radio over an internet connection via telnet. (I mention RMS Express because when you install Winlink Express, the installation folder defaults to being titled RMS Express!)
Introducing Winlink Express, the ultimate radio email client designed for seamless communication. With its extensive features and support for the Winlink Hybrid Network, it stands out as the top choice by users. Whether you're operating with or without an internet connection, Winlink Express ensures reliable email delivery.
If you want to see what a message sent over Winlink looks like, drop me a note at KJ7T@winlink.org. I’ll check my Winlink email regularly over the next couple of weeks.
2.2 Winlink Express settings
2.2.1 General setup
There is a general setup screen to complete before you can use the program. I’ve obscured my registration key and my phone number.
2.2.2 Main screen
Once that is complete, you’ll see the main screen where you can compose and read messages, and where you start a session.
2.2.3 Composing a message
Unlike modern email clients, Winlink Express requires you to tell the software to take action. You compose a message, and when you’re ready to send it, you click “Post to Outbox” at the top of the message composition window.
2.2.4 Opening a session
That doesn’t actually send the message — it just moves it into your Outbox. To send it, you open a session from the main screen. Before you do that, you need to select the kind of session you are opening. You do that in the main screen in the upper right corner where it says Open Session. If you are using the internet to send and receive Winlink mail, select Telnet Winlink. If you are using a radio and TNC, select Packet Winlink. Then select the Open session icon in the main screen toolbar.
2.2.5 Session settings
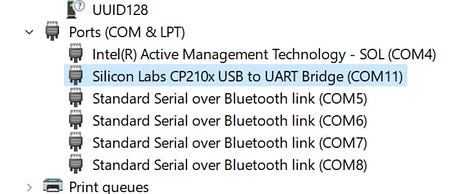
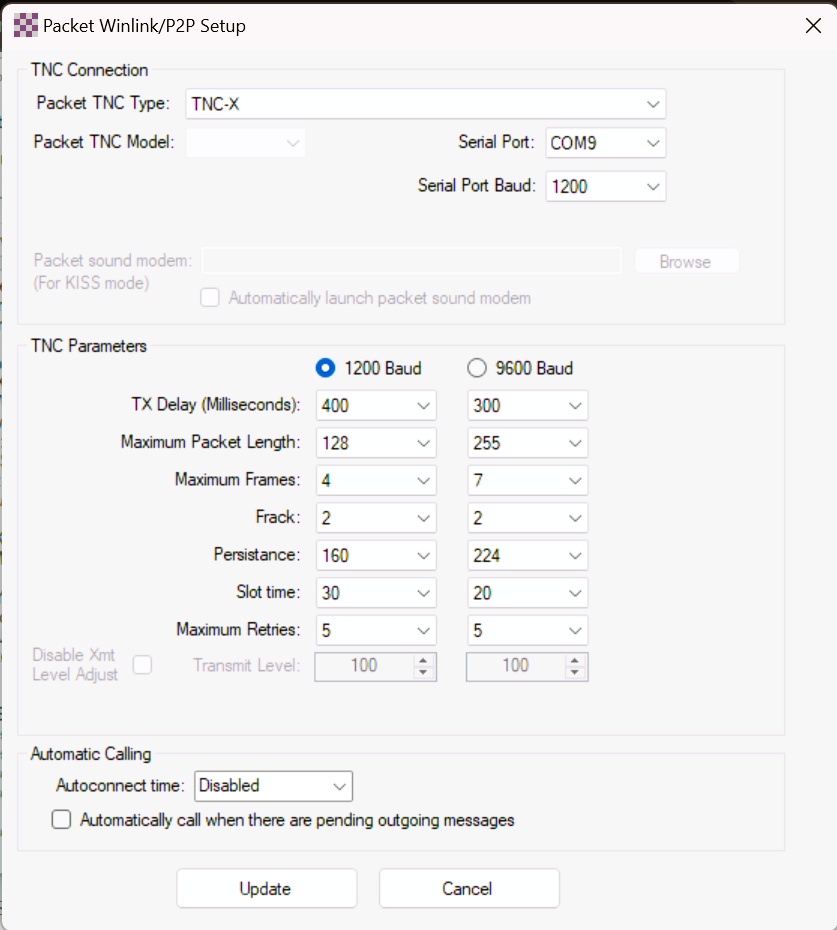
You have some additional choices to make in the resulting screen. Click the Settings choice in the top menu bar. If you are using Telnet Winlink, the defaults are probably fine. If you are using Packet Winlink, you’ll need to select your device (called the Packet TNC Type), the COM port, and the baud rate (1200 baud is probably fine). You should be able to find the COM port by opening Device Manager in Windows and opening the Ports section.
To reiterate: if you are using Telnet Winlink, just use the defaults. If you are using a radio and Packet Winlink, you’ll need to configure the TNC in the Packet Winlink settings screen and as part of that, find the COM port number your TNC is using on your Windows computer.
2.2.6 Packet Winlink settings for TNC-X
Shown below is the Packet Winlink settings screen in my setup.
For Telnet Winlink, you’re ready to rock and roll. For Packet Winlink, you’ll need to select a channel. You do this one screen back in the sequence, at the Packet Winlink Session screen where you clicked the Settings choice. The choice just to the right of Settings is Channel Selection.
2.2.7 Finding nearby stations
You previously entered your location in the general settings page so the system knows where you are located. Based on that information, Winlink Express lists stations found near you, from closest to farthest away. (If this is the first time running Winlink Express, select the appropriate Update Table option to get the latest list of nearby Winlink stations.) I tested each of these stations in sequence until I found one that worked well (in my case, N1ACW-10). Double-click on the station’s callsign to select it.
2.2.8 Sending your message
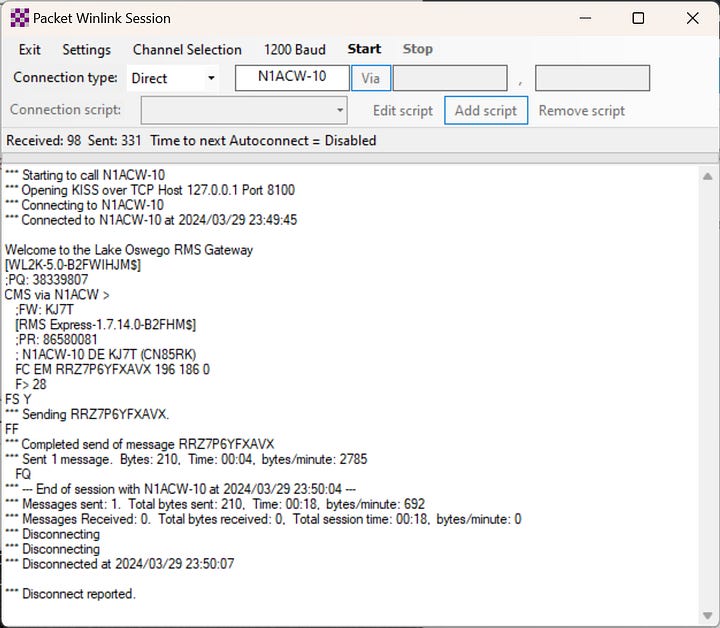
And now you are finally ready to send your message. (Once you’ve gone through all these steps, you don’t have to do it again unless you change your configuration.) Sending by RF (packet) looked like this in my setup:
Be patient and wait for the session to start and end.
2.2.9 Retrieving messages
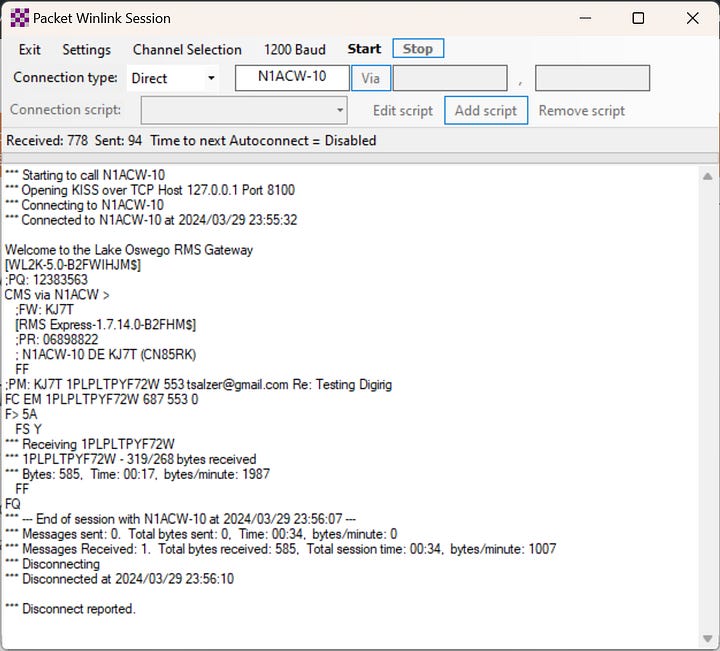
I replied to that email message and retrieved it with Winlink Express. Just like sending, you start a session to retrieve messages. That transaction looked like this:
2.2.10 Winlink help
Winlink help can be found by searching the internet. Here are a few resources I picked out of the herd.
A high-level summary is available at https://lansingarpsc.com/guide/2021/07/15/Getting-Started-with-Winlink.html
Winlink.org has tutorials at https://www.winlink.org/tags/tutorial.
If you are going to use PACTOR or WINMOR on HF, reviewing this presentation will be helpful: https://wr4cc.org/wp-content/uploads/2018/01/Beginners-Guide-to-Winlink.pdf
If you are using VARA FM, check out this guide: https://winlink.org/sites/default/files/RMSE_FORMS/vara_fm_for_winlink_with_signalink_on_windows_v4_0.pdf
3.0 TIP: APRS sounds on Yaesu FTM-300DR
I think most of us who operate APRS while mobile or portable mute the sounds of packets being exchanged. I suppose that if you had a single-purpose radio and you were actively tracking other stations, you might want to hear those sounds, but for most of us, they are just awfully disruptive.
3.1 APRS Mute
On the Yaesu FTM-300DR, the setting for suppressing those sounds is APRS Mute. This is explained in the APRS Edition manual found on the Yaesu.com website.
And if you’re like me and didn’t read this manual, you might have enabled APRS Mute but still be hearing bell-like dings while APRS is running on your radio. How do you suppress those sounds?
3.2 APRS Ringer
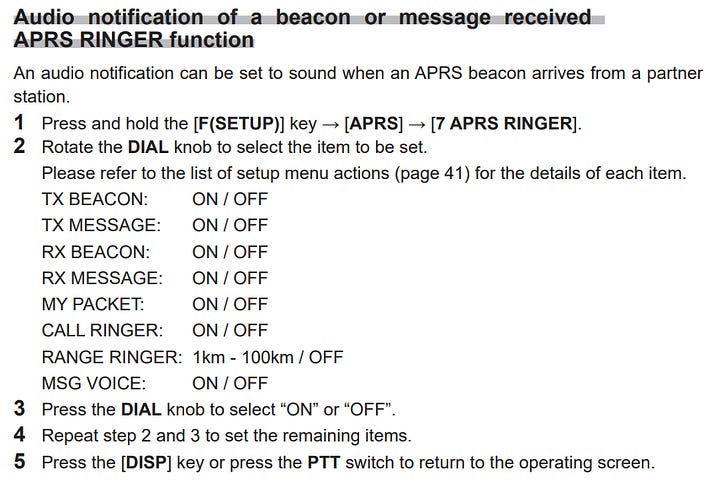
You do this through the APRS Ringer setting. From the APRS Edition, page 8:
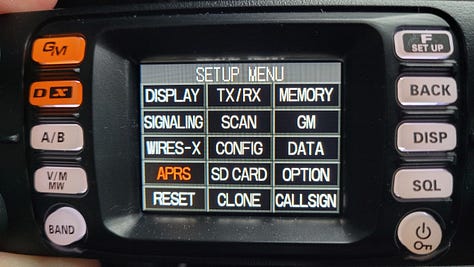
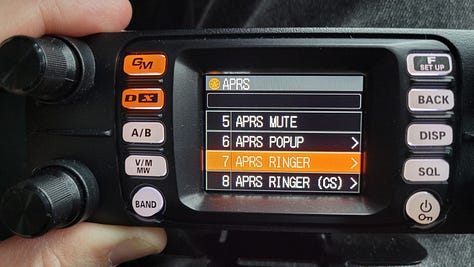
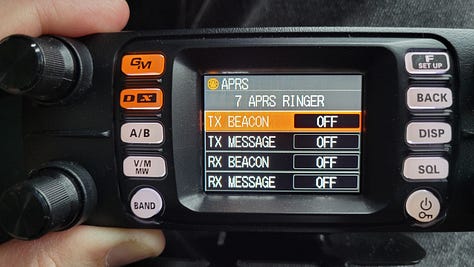
How to turn off sounds with APRS Ringer? Long press the F key on the FTM-300DR panel, select APRS (rotate the channel selector to highlight it, then press the channel selector knob in), scroll to selection 7 APRS RINGER, then press the channel selector knob in. You should now see the list of choices.
I’ve added a few photos below to help with visualization, and below the photos are screen shots of the relevant APRS manual sections about APRS RINGER:
Relevant sections from the Yaesu FTM-300DR APRS manual are shown below:
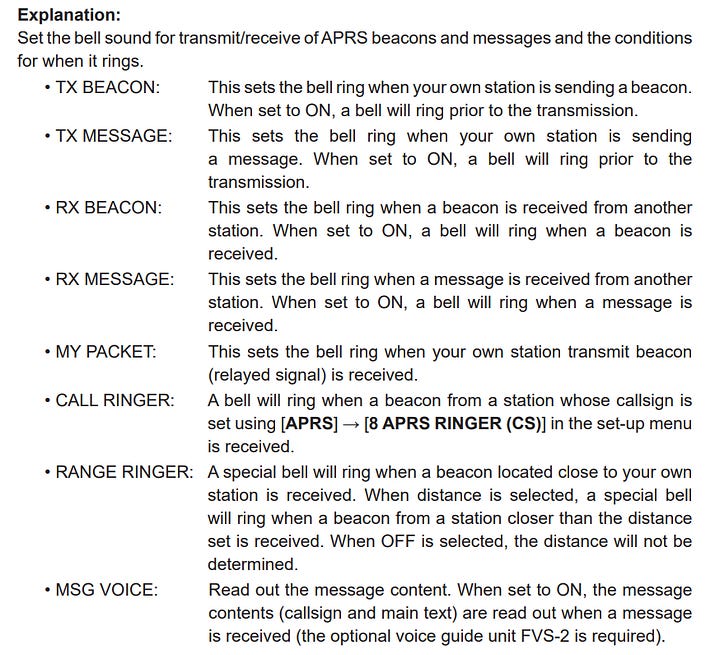
Personally, I like to know when my radio is beaconing so I have the first choice — TX Beacon — set to ON. Everything else is off. If I was using APRS more actively, more of the choices would be on.
4.0 WORKBENCH: Projects underway
4.1 Hotspot build with Nextion display
I had a problem assembling my new hotspot with a Nextion display in a C4Labs case. The problem seemed to be that the Nextion wouldn’t fit. I must’ve been tired when I assembled it because it turned out that I reversed one layer in the C4Labs case.
To try to make the display fit, I nibbled at the layer that seemed to be blocking parts of the display, ruining that layer. I reached out to C4Labs and sent them a link to a photo album of every layer in the case. They generously sent me a replacement for layer 14, even though the error was mine. Thank you, C4Labs.com!
The other fitment issue I had was the AURSINC duplex MMDVM board. The corners on the board were more square than the rounder corners in the C4Labs case. I filed the corners of the MMDVM board down to fit.
Finally, I had quite a bit of trouble with the Nextion display. I followed the wiring directions included with the case but that didn’t work. After digging through various online resources, I concluded that there was something different about using the WPSD software for the hotspot with a Nextion display. I posted a request for help in the WPSD Project Facebook group and a few folks provided suggestions. The one that worked was reversing the TX and RX leads to the MMDVM board.
By the way, after digging around the internet for longer than I care to admit, I did find a source of already compiled .tft files for Nextion screens.
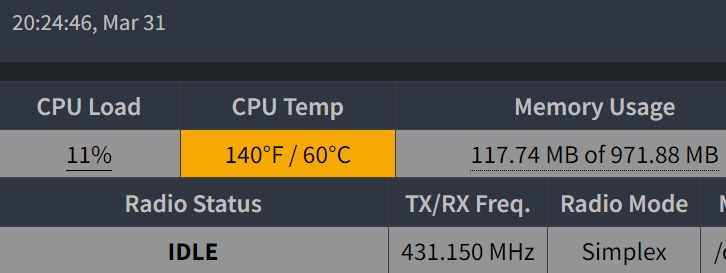
I will say that this hotspot is running, well, hot! I’ve ordered a USB-powered computer fan from the company that starts with a capital A, which should arrive before this newsletter is published.
Update: a 40mm USB-powered fan is keeping the temperature around 110-115° F, well below what it was without the fan. The fan is temporarily held in place with some always useful blue tape.
4.2 Kenwood TM-281A as packet radio
Custom cables ordered and received from Ham Made Parts on March 29th. Since the last edition, I also powered up the TM-281A to make sure it was operable.
With the new cables in hand, I tested them by firing up my Yaesu FT-1900R transceiver. The known good cables are connected to the Yaesu’s microphone port and speaker port. The other part of the cable is new, connecting the radio cabling to the audio port on a Digirig Mobile unit.
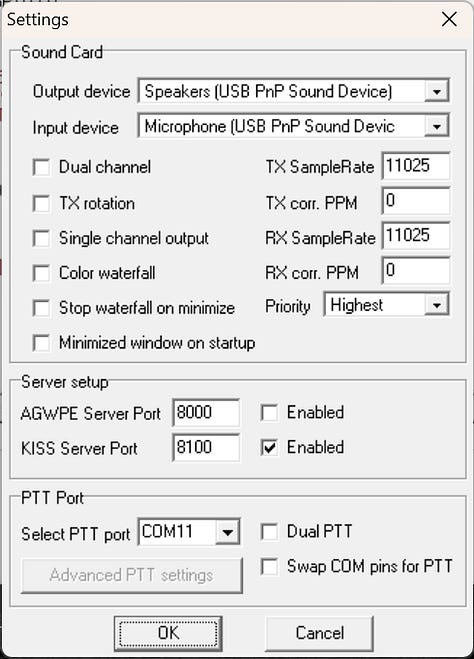
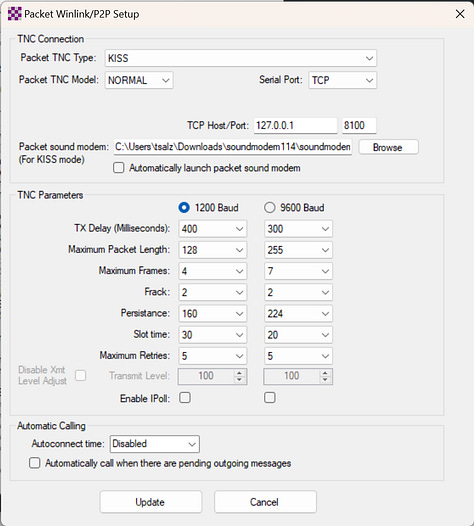
I forgot that a sound modem is required. I downloaded the UZ7HO sound modem. Configuration details are shown in the following screenshots. This was a successful test. Now that I know it works with the Yaesu, the next step is to configure the Kenwood and package that system into “Winlink in a box #2”!
4.3 Updating my Evolve laptop
It took hours — several hours — to update my Evolve laptop. I had not updated it in nearly two years so it just took forever to finish. Patience was key, though, because once the update process starts, it’s important to let it finish. My Evolve laptop updated without any hiccups, but it sure did take a long time!
4.4 DVMEGA DVstick 30
On order, interested in seeing how this will work!








Your Winlink instructions are superb! Suggest discussing practicing connecting to a local VHF / UHF Winlink RMS, and offering encouragement to those that operate them. Also, an increasing number of RMS stations are upgrading to VARA FM which is incompatible with 1200 bps packet, so check beforehand.