Random Wire Review issue 113: November 15, 2024
Moving a WIRES-X instance and an AllStarLink node to a microcomputer. The Kenwood TH-D7A is my newest old radio. A great POTA antenna you can make. The DigiPi and an e-ink Meshtastic device. And more!
Contents
1. Hello
1.1 My secret: touch a radio every day!
1.2 Interesting items
2. WIRES-X and AllStarLink Moved to New PC
2.1 Dell OptiPlex microcomputer
2.2 Connect the SCU-58 cables
2.3 WIRES-X imported to new instance
2.4 AllStarLink node copied to new machine
2.5 New memory installed
3. New Old Radio: Kenwood TH-D7A
4. POTA Antenna You Can Make
5. What is the DigiPi?
6. Meshtastic Node with e-Ink Display
7. Closing
7.1 As I write issue 113
7.2 Seems I must learn Morse Code
7.3 New-to-me news gathering service
7.4 Another keyboard lands on my desk
.-. .- -. -.. --- -- / .-- .. .-. . / .-. . ...- .. . .-- / -... -.-- / -.- .--- --... -
1. Hello
Featured content in today’s RWR issue 113 focused on moving my WIRES-X instance and an AllStarLink (ASL) node from my ThinkStation server to a small Dell OptiPlex 3050 microcomputer, a new-to-me old Kenwood handie talkie, plus a POTA antenna you can make!
1.1 My secret: touch a radio every day!
Friends sometimes wonder how I manage to write about amateur radio while working full-time in a job that demands so much of my time and attention. The answer is simple: I make sure I touch a radio every day. Spending even a few minutes with a radio opens a small corner in my mind where I can save radio thoughts while I go about my daily tasks. As soon as I find some spare time, I capture some of those thoughts to share with you via the Random Wire newsletter.
If you want to do more with amateur radio, I suggest using a radio every day. Be it a handie talkie, a base station, or an internet-connected system, the act of turning on a radio and tuning to a frequency or station will create a placeholder in your mind for all things radio. In my experience, the more I do this, the more I want to do it!
1.2 Interesting items
This is creative: “Design a way for people who can’t easily use a keyboard to create text for applications such as Word, OpenOffice, eBay, or Google via Morse code.” The article goes into some depth on designing, building, and programming such an interface. Find it on Nuts & Volts at: https://www.nutsvolts.com/magazine/article/cant-keyboard-use-morse-code-instead
Hurricane Helene provided plenty of learning for many in the emergency communications field. I found How to stay in touch when the grid goes down: ham radio, Wi-Fi, and other lifelines during disasters very interesting. The author breaks down this complex topic into simpler, actionable items you may wish to consider.
If Hurricane Helen caught your attention, I recommend spending some time listening to Ham Radio Workbench #222: HRWB 222 - Disaster Prep with Thomas K4SWL and Josh K7OSH. Thomas K4SWL was dramatically affected by Helene so his observations on disaster preparedness are informed by recent, real world experience. Learn more about his experience in HRWB 221 - Thomas Witherspoon, K4SWL, On Hurricane Helene and Emergency Prep.
.-. .- -. -.. --- -- / .-- .. .-. . / .-. . ...- .. . .-- / -... -.-- / -.- .--- --... -
2. WIRES-X and AllStarLink Moved to New PC
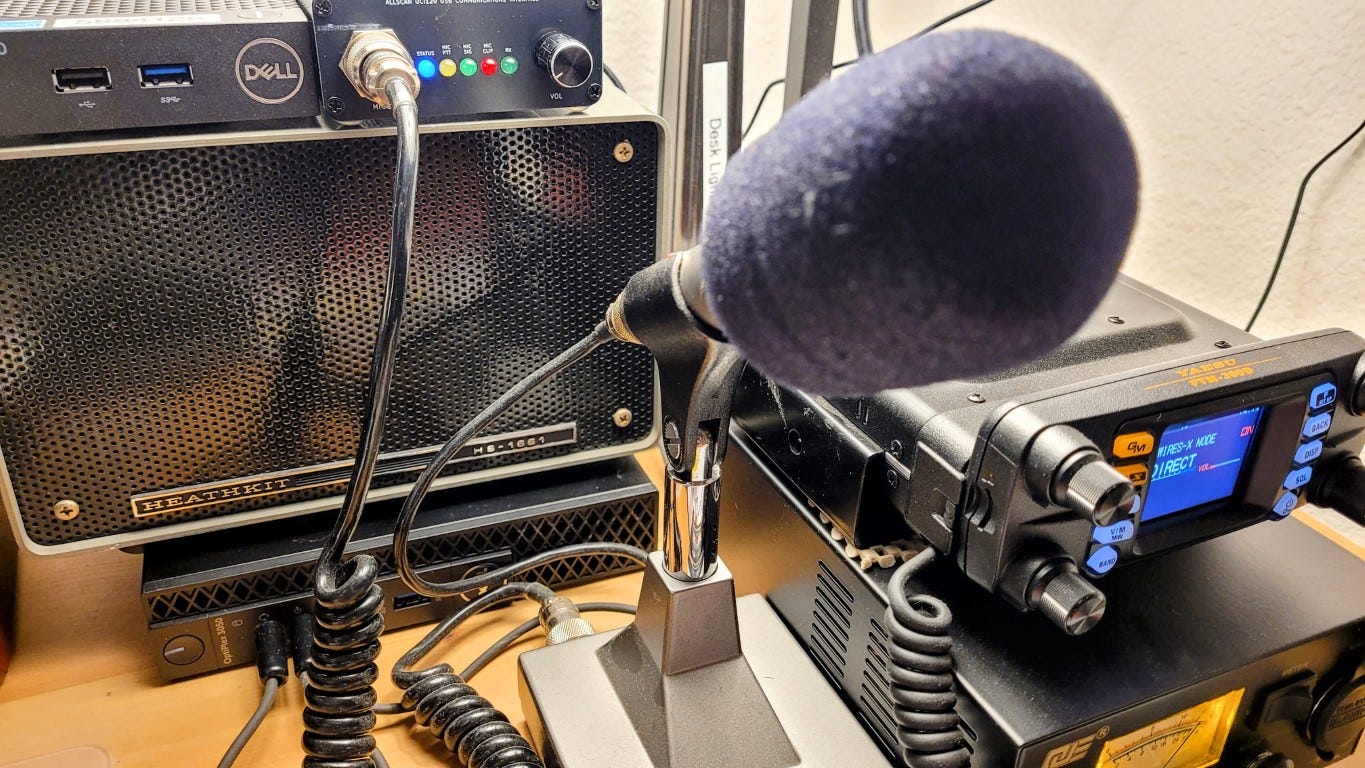
I moved my WIRES-X Portable Digital Node (PDN) and my AllStarLink node 588411 (running in a virtual machine) to a Dell OptiPlex 3050 microcomputer. This little PC sits underneath the speaker for my desktop node 588412.
2.1 Dell OptiPlex microcomputer
The OptiPlex is an older machine but was new in the box. It took a while to update Windows 10 Pro on the computer as there were a lot of updates ready for it. Specs are sufficient for my use:
PROCESSOR: Intel(R) Core(TM) i5-6500T CPU @ 2.50GHz
RAM: 16 GB (15.9 GB usable)
OS: Windows 10 Pro
STORAGE: 256 Gb SSD
The processor has four cores and can handle up to four threads. That is a bit limiting so I looked for additional memory to give the system more resources to use. Amazon had two Silicon Power-brand memory sticks for a good price so I doubled the memory to 32 GB of RAM in the OptiPlex.
Moving WIRES-X and VirtualBox to the OptiPlex MFF (micro form factor) computer will allow me to keep my big, electricity-slurping ThinkStation server powered off most of the time. The micro PC will generate less heat and noise, too.
2.2 Connect the SCU-58 cables
I connected the SCU-58 cable to the Yaesu FTM-300DR radio and the mic and speaker ports on the front panel of the OptiPlex.
2.3 WIRES-X imported to new instance
Did you know WIRES-X provides an export function to capture your current configuration? I didn’t. The export function in WIRES-X (Files, Export settings) came in handy once I found it. I was able to save the settings of my working WIRES-X instance and then import them into the new instance on the OptiPlex. (Word to the wise: if you run a WIRES-X node, consider saving your configuration. You never know when you might have to reinstall the program and having your previous configuration saved might save you time.)
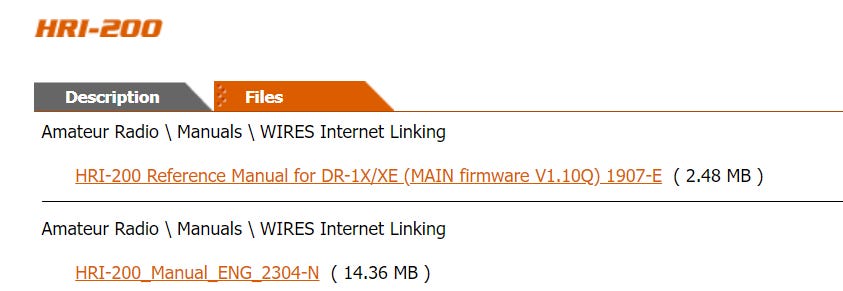
First, though, I had to install the WIRES-X program. Find it at Yaesu.com under Products, WIRES Internet Linking:
Once there, select Files:
Scroll to the bottom of the list to download the WIRES-X Portable Digital Node Function PC Software:
During installation, I found that I was missing the required Microsoft C++ Runtime engine and Python, and even after installing these, I kept getting warnings about Python. I finally found the answer at https://codelikechamp.com/python-core-package-for-virtualbox/. And then I installed the Prolific USB driver that WIRES-X needs. I rebooted between each step.
Once those configuration requirements were met, WIRES-X started right up and presented me with the activation screen. I found my registration information in an older email, entered that information, and I was in…except now I was getting the “audio device not found” error I’ve encountered before.
No worries, though. This is where I imported the settings I had previously exported. Happily, this also imported my saved bookmarks. Then I rebooted again. The audio device warning went away with the reboot.
I added port forwards to my router for the new WIRES-X instance and also added those ports as an inbound rule in my OptiPlex firewall. Boom, I was in business. With the SCU-58 cables connecting the pieces and WIRES-X installed and properly configured, WIRES-X was working on the new OptiPlex machine.
By the way, I run the FTM-300DR Portable Digital Node (PDN) off a power supply that provides 13.8 VDC to the radio. Some months ago, I ran the PDN off a large LiFePO4 battery and that worked fine, but the power supply is a bit easier to manage.
2.4 AllStarLink node copied to new machine
In issue 112, I mentioned I had copied the virtual machine for node 588411 to a Dell Wyse 5070 thin client machine. That went well and served as a test for when the OptiPlex machine arrived. Having been through the export/import process before, it took about 10 minutes to import the saved virtual machine into a new VirtualBox instance on the Optiplex and update my router and my SIP phone. I’m listening to a net coming in from ASL node 51018 as I type this.
2.5 New memory installed
The new memory I ordered arrived while we were doing some emergency dog sitting for the kids. When we returned home, I removed the two 8 Gb sticks of memory and snapped in the two 16 Gb sticks. The memory that came out was PC4-2400 and what went in was DDR4 PC4-2666 SODIMM sticks. The boot time and responsiveness of programs on the OptiPlex are noticeably improved with the increase in memory. Doubling the memory provides a lot more headroom for WIRES-X and AllStarLink.
It’s just one thumb screw on the back panel to remove the cover. The two memory sticks are located under the ducted cooling fan that stays in place with a couple of easy-to-manipulate spring clips. Access to memory and to the storage drive are easy, something that I can’t always say about computers in this micro form factor.
.-. .- -. -.. --- -- / .-- .. .-. . / .-. . ...- .. . .-- / -... -.-- / -.- .--- --... -
3. New Old Radio: Kenwood TH-D7A
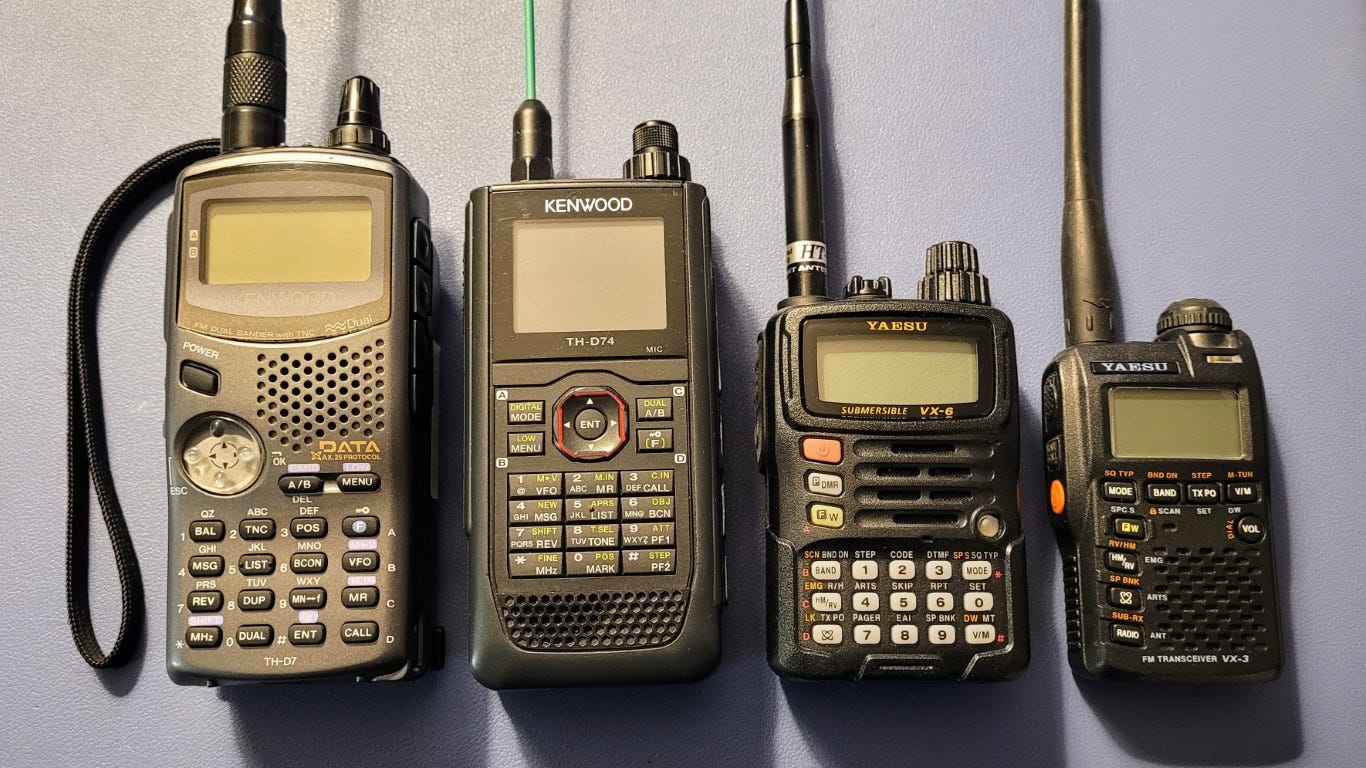
I wanted a duplex radio for working with a few of my AllStarLink nodes and I found one on eBay: the Kenwood TH-D7A handie talkie. This is an old radio, first introduced in 1998 to amateur radio operators. (I’m also looking at old Yaesu FT-530 radios as they are also full duplex.)
By the way, this thing is a chunk. You might notice that the tuning knob on the TH-D7A looks a bit tilted. Yep, it arrived slightly bent (not a big surprise, given that this thing is a quarter-century old) but it doesn’t seem to affect the operation of the radio.
The Kenwood TH-D7A/E was the first Kenwood radio with APRS messaging, bulletins, and texting capabilities. It could also take GPS inputs, enabling APRS (Automatic Packet Report System) without having to use a computer. The TH-D7A/E was the most popular Kenwood handheld radio for 11 years. (This paragraph was paraphrased from AI output.)
At first, I thought the radio was broken because it would restart whenever I pushed the transmit button. But eventually I found in a Groups.io thread that the Kenwood charger doesn’t supply enough current to operate the radio, and if you try to run it off the charger, it simply restarts. I charged the battery and that solved the “problem.” A new NiMH battery is scheduled to arrive around the time this issue is published.
I did reach out to Kenwood about what I was experiencing and whether repair service was available. The Kenwood representative said:
I would say normally the TH-D7A vintage 1998 would do this if the battery was exhausted. Perhaps it’s the battery.
Kenwood no longer sells the TH-D7A battery, but you could get a generic ione from Batteries America.
Kenwood also no longer supports or services the TH-D7A vintage 1998.
And in a good marketing move, the rep included a brochure for the new Kenwood TH-D75A radio.
The takeaway is the charger is a charger only, not a power source for the radio.
Additional information was provided about possible places to try if I needed repair service:
Kenwood no longer supports or services your Kenwood product due to age and available parts. Perhaps the places I have listed below will service your Kenwood product.
https://www.amateurradioservice.com/index.htm
https://affordableradiorepair.com/
http://burghardtradiorepair.com (site did not resolve when tested)
Those sites might be worth checking out if you have an old radio that needs repair.
.-. .- -. -.. --- -- / .-- .. .-. . / .-. . ...- .. . .-- / -... -.-- / -.- .--- --... -
4. POTA Antenna You Can Make
At a recent amateur radio club meeting (https://mc-arc.org/) I learned about an antenna called the POTA Performer by Greg KJ6ER. (Hat tip to Ann AI7PS and Ben AB7I for this.) An overview of the POTA Performer and a downloadable PDF are available at, respectively:
The POTA Performer is essentially a 17-foot telescoping whip antenna with two elevated radials. The version I saw was mounted on a camera tripod.
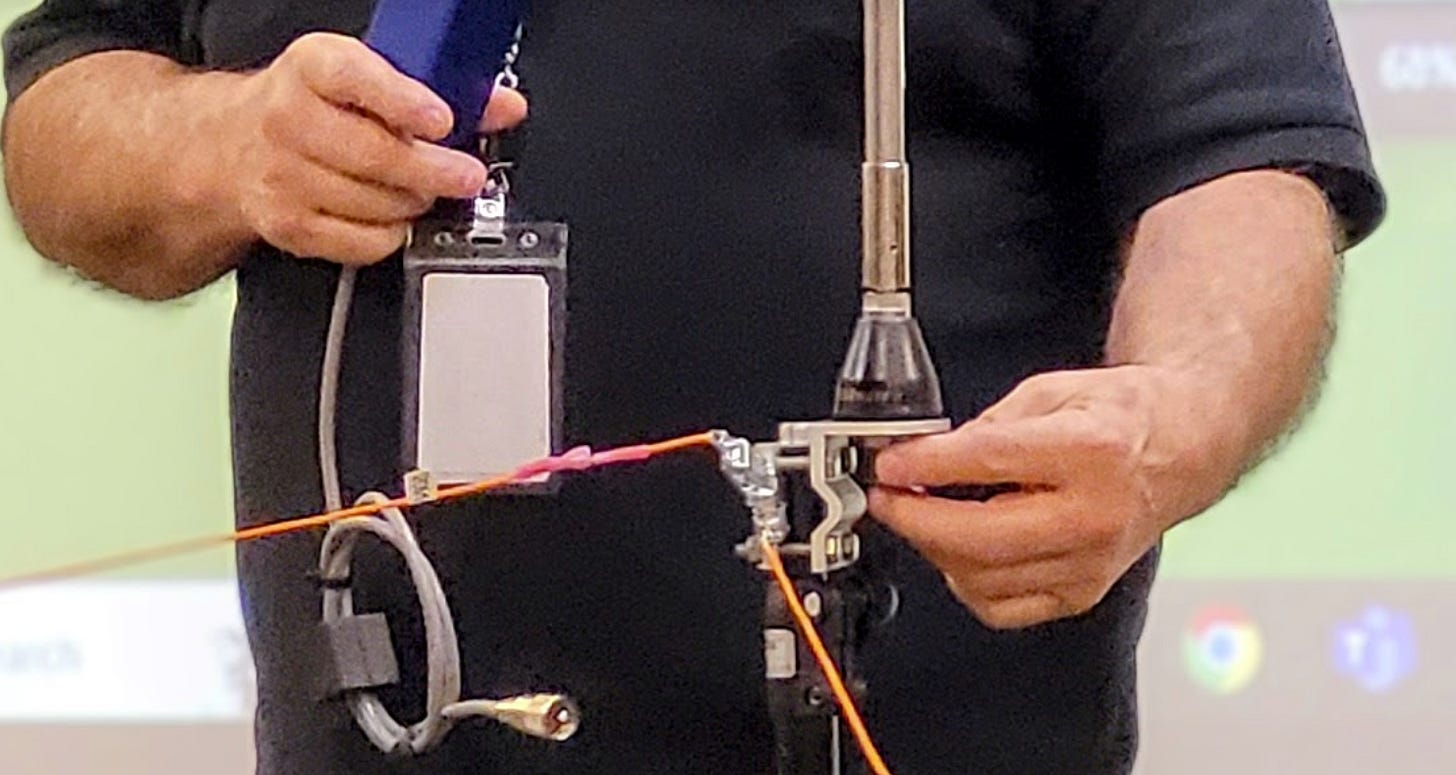
The radials are 18AWG wire with a Mueller clip on the end to attach to a fiberglass electric fencing post. You may be able to discern in the photos that the radials use automotive spade connectors at band-specific lengths so that the radial wires can be quickly configured for the band you wish to use.
Without a loading coil, the antenna works from 6M to 20M. With a coil, performance can extend to 40M. The two elevated radials are supposed to be 5 feet above the ground. With the radials positioned 90 degrees to each other, the antenna is directional toward the arc described by the two radials. For an omnidirectional pattern, place the radials at 180 degrees.
The product list in the PDF does not include the spade connectors and the specific tripod is no longer available. In the parts list below, I include the tripod I purchased for my Moab trip as it has worked well for me and is still available.
Chameleon 17-foot telescoping whip. This whip is listed as out of stock at Chameleon but DX Engineering has them for $70. Amazon has a 17-foot telescoping whip with a brand name I’ve never heard of for $75. I don’t think you can go wrong with the Chameleon whip.
K&F Concept 64 inch/163cm Camera Tripod. This is the tripod I bought for travel. It is relatively short at about 5-feet tall extended (only about 4-feet tall without the center column) but KJ6ER says you want the elevated radials up about 5 feet, so it seems sufficient. K&F also has some taller tripods available, easily found on Amazon, e.g.: K&F Concept 72"/184cm Camera Tripod. I think the 5-foot version is probably sufficient because you will need to be able to reach the telescoping whip to tune it by lengthening and shortening the whip. (You can probably be very creative here. Why a tripod? Why not a short three or four-step folding ladder? A picnic table? Typical wooden broom handles are a bit over 1” in diameter so the CB antenna mount should fit. Toss a few bungie cords in your kit to help with attaching to what you may find at the POTA site! Heck, you’ll probably want a CB Radio Antenna Quick Release Mirror Mount and an SO239 to 3/8 x 24 Antenna Adapter, too!)
Aluminum tubing to insert into the tripod. Make sure the diameter will fit the center column hole in your tripod. The one I’ve linked to does fit my K&F tripod if I remove the entire center column assembly. (By the way, good luck finding that dimension in product descriptions! Not even the K&F site has that measurement.) The reason for the piece of aluminum tubing is to save your camera tripod center column from being deformed by the antenna clamp. Instead of using your good camera tripod, you may wish to consider dedicating a simple tripod for this use, such as the Amazon Basics Aluminum Light Photography Tripod Stand with Case - 2.8 - 6.7 Feet, Black.
3 Way Aluminum Cb or Ham Antenna Aluminum Mirror Mount with Stud to clamp to the aluminum tube.
18 Gauge Silicone Wire Spool 100 ft Orange Flexible 18 AWG Stranded Tinned Copper Wire for making your radials.
Mueller clips for the ends of the radials. (You may want to use a bit of heat shrink tubing where the wire connects to the clip just to make it a bit more finger friendly.)
A Nylon Spade Quick Disconnect Connectors Kit for making adjustable radial lengths.
Electric Fence Fiberglass Posts in a 10-pack from Amazon, or just visit your local farm supply store to buy just a couple of posts. You want the step-in posts to make it easy to move the posts around.
I’m sure you can figure out the construction details. The CB mount clamps to the center column of the tripod (or the tube or even broom handle you put in the tripod to save your good center column!). The telescoping whip screws into the CB mount. Run coax from the CB mount to your radio.
My tripod folds down to a pretty compact package. It’s a bit hard to visualize, but the three legs fold out and down to form the tripod. Shown below is the tripod fully folded for travel.
Recommended: an antenna analyzer (at least 14 MHz to 50 MHz range) to get your antenna dialed in for the band you wish to work. If you don’t have an analyzer, you can use your SWR meter to find resonance:
Also recommended: a current balun (learn more at DX Engineering) to block common-mode current returning to your radio via the coax. A current balun, or choke, blocks current returning to the radio via the coax shield. You can buy current baluns but they aren’t particularly inexpensive. One of the least expensive options is the LDG Electronics RU-1:1 Unun RU-1-1 available from DX Engineering or buy several snap-on ferrites that fit your cable (hint: keep them from sliding down the coax by placing a zip tie on the coax). You can also try making several tight coils of your coax at the feed point to the antenna, being sure to bind the coils closely together. If it was me, I’d start with a tight coil of coax or coiling coax around a form like PVC pipe.
Finally, you may also wish to pack an empty stuff sack or sand bag and some paracord so you can manufacture a temporary stabilizing weight if you set up this antenna on a breezy day. It always surprises me how much a little wind pushes on a tall whip.
By the way, KJ6ER also has a 10M-12M-15M antenna design he calls the Dominator that requires no radials. It functions as an end-fed halfwave vertical antenna. Find details at https://ve3gam.webqth.com/am-work/dominator/dominator.html.
Considering the solar maximum we’re experiencing, if you haven’t been on 10M lately, you’re missing some fantastic propagation! There is no better time to get on the air than right now.
Again, thank you to Ann AI7PS and Ben AB7I for sharing this interesting antenna and launching me down another rabbit hole! This looks like a portable antenna I’m going to have to try.
.-. .- -. -.. --- -- / .-- .. .-. . / .-. . ...- .. . .-- / -... -.-- / -.- .--- --... -
5. What is the DigiPi?
What is the DigiPi? According to https://craiger.org/digipi/:
DigiPi is an easy-to-use amateur radio data transceiver hotspot for Raspberry Pi. All radio data modes are easily accessible over wifi via your phone or web browser. Make FT8, JS8Call, APRS and packet modes work like any other mobile phone app. Hookup a DigiPi to your rig and instantly have access to radio SMS, EMail, and texting. Ultra-light, low-power makes it indispensable for Summit and Park operations.
For a more in-depth discussion, see The KM6LYW Radio DigiPi Project: A Comprehensive Guide (you may need to scroll down that page to find the content).
It seems like a do-it-all (almost) kind of thing. Here’s a build from 2021 when the DigiPi was at version 1.5: https://m0iax.com/2021/11/16/digipi-raspberry-pi-zero-2-w-project/
The latest DigiPi 1.9 has been released, as shared by Steve Stroh in his Zero Retries newsletter. (And while I have your attention on Zero Retries, Steve published an article about new content being added to the Digital Library of Amateur Radio & Communications, or DLARC.)
.-. .- -. -.. --- -- / .-- .. .-. . / .-. . ...- .. . .-- / -... -.-- / -.- .--- --... -
6. Meshtastic Node with e-Ink Display
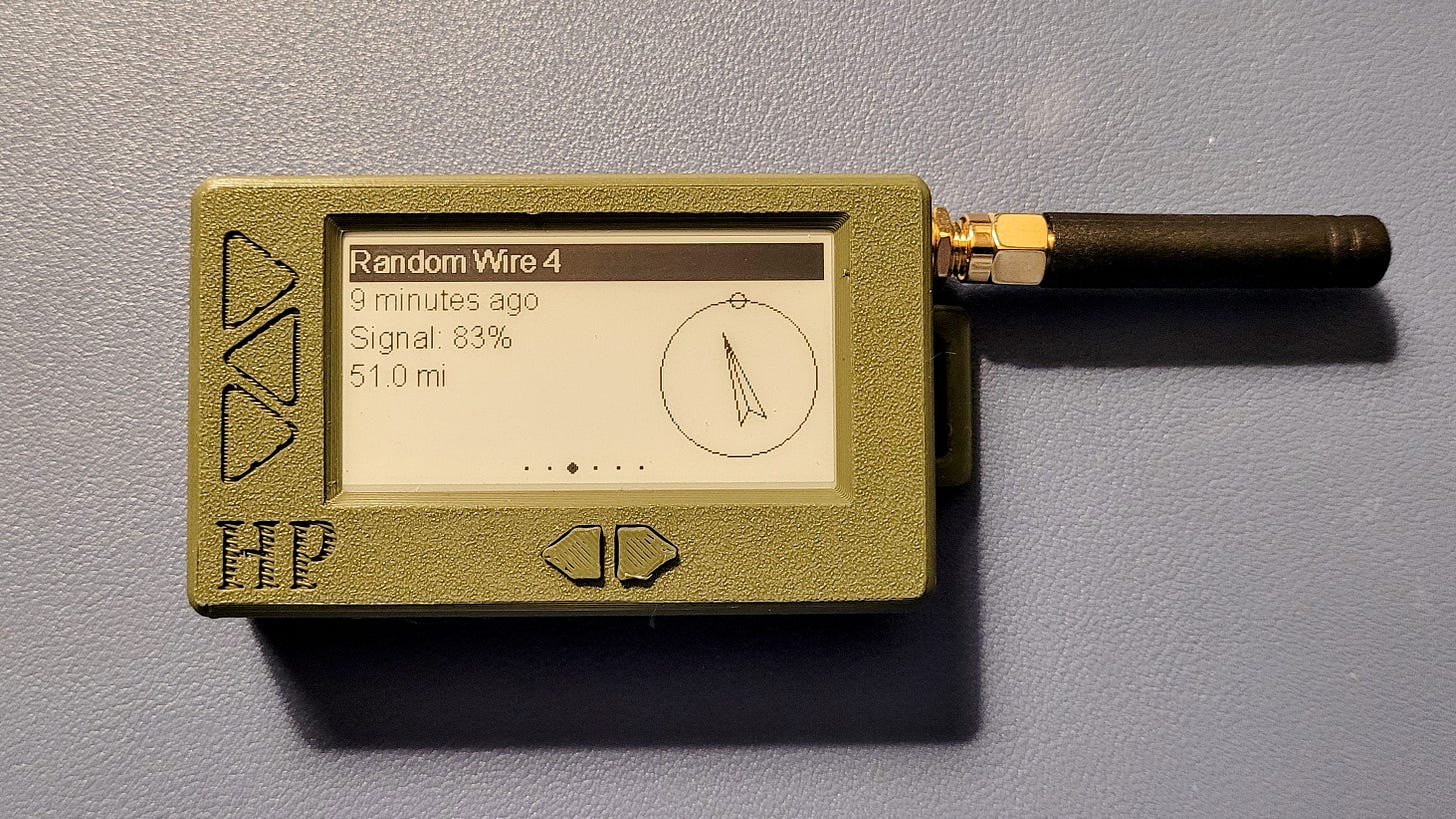
Ordered on November 3rd and received on November 8th, this Meshtastic node features an e-ink display. The price was quite affordable at $55.
Check out the display! I can read this without my reading glasses, unlike so many of the tiny Meshtastic screens.
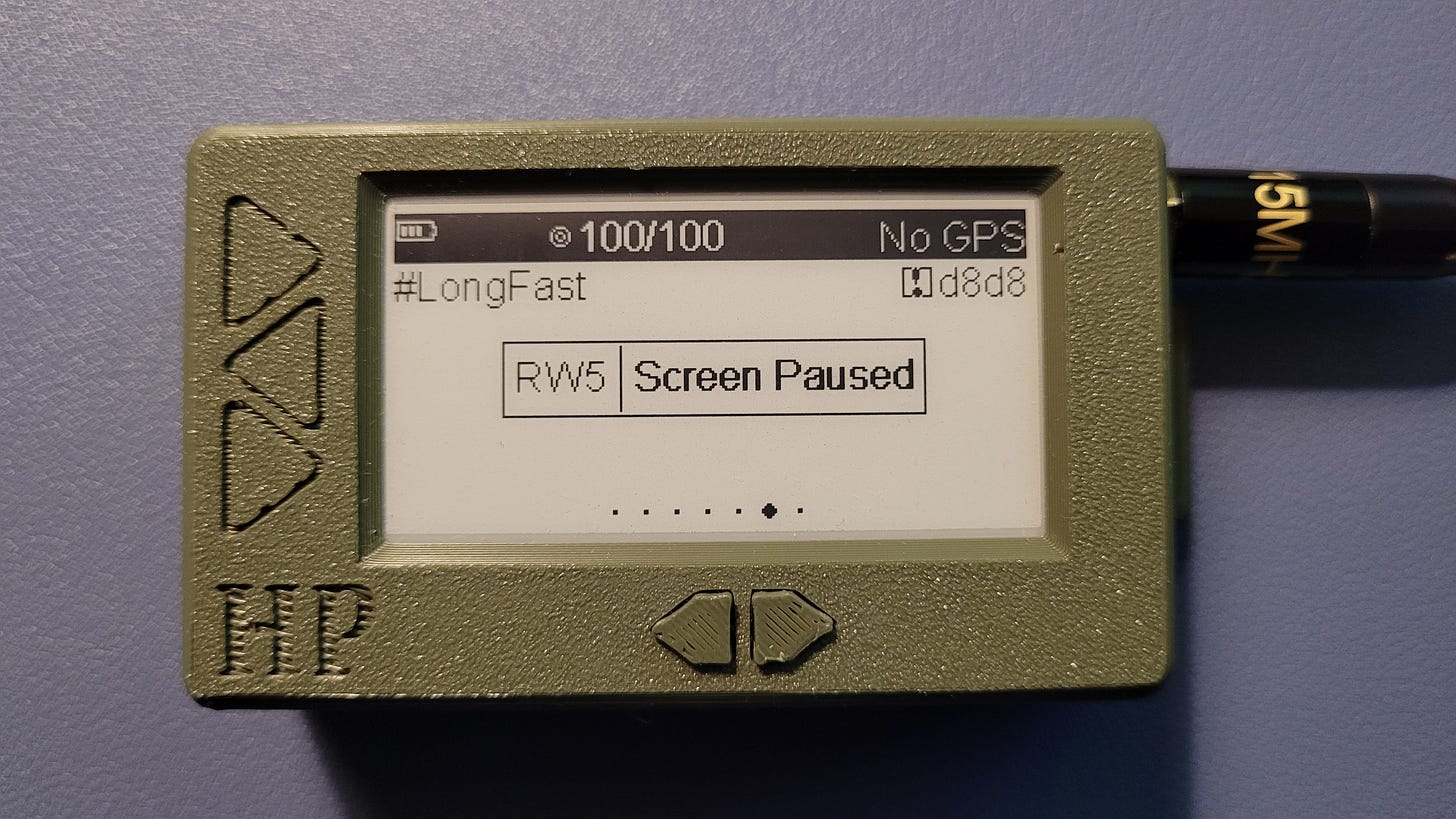
The 3,000 MAh battery is larger than most portable Meshtastic nodes I’ve seen. It should last at least a couple of days. Because of the larger battery, the node weighs a bit more than most, but having a readable screen (including in daylight!) and multiple-day operating time balances the somewhat heavier weight.
The node comes with settings already configured to conserve battery life. Here, the screen display has been paused automatically. (Also, this photo shows I’ve changed the antenna to a longer flexible whip.)
By the way, if you’ve not explored Meshtastic at all, a website at https://meshtastic.letstalkthis.com/ self-described as “An unofficial guide to the open source, off-grid, GPS mesh communicator” is a great place to start. It provides a good step-by-step guide to getting started with Meshtastic. A much more in-depth view is provided by the official documentation at https://meshtastic.org/docs/introduction/. I recommend the unofficial guide as a starting point and then using the official docs to dig into specific configuration questions you might have.
.-. .- -. -.. --- -- / .-- .. .-. . / .-. . ...- .. . .-- / -... -.-- / -.- .--- --... -
7. Closing
7.1 As I write issue 113
Issue 113 came together in fits and starts as I crammed intense writing sessions into brief breaks in my schedule. Some of this I wrote in Portland, Oregon. Some I wrote in Goldendale, Washington. I added more and did some cleanup while in Shelton, Washington, trying not to be too distracted by this view:
Being at a lake, I am surrounded by slightly higher topography. This is not a good location for VHF communications so unless I drive up to the main road, I can’t hear the Mason County Amateur Radio Club repeaters, nor can I reach the C4FM/System Fusion repeater by Jeff W7NEE. But with my PiZero AllStarLink node from Kits4Hams and the TD-H3 handie-talkie, I can listen to the W7NEE repeater and chat anytime. The combination of technologies used by W7NEE makes his system accessible for people who are too distant to reach the analog repeaters maintained by the Club. I’ve got to say: it feels really good to be able to reach my radio friends from almost anywhere. It helps me feel connected, especially when I am traveling.
Issue 113 also spans both sides of the November 5th general election. I started writing before November 5th and continued afterwards. No writing was done on the 5th or the 6th as I monitored various news feeds for election outcomes and projections. I am very grateful to have amateur radio as a hobby because it presents endless possibilities and stimulates my brain!
7.2 Seems I must learn Morse Code
One of the skills I’ve been wanting to learn was Python coding but I think that’s going to take a back seat to learning Morse Code. My “cousin-in-law” Greg AC7RX is going down the Morse Code trail, renewing skills that have been dormant for many years. I’d love to make this journey with him. Unlike me, Greg has been a lifelong ham. He has a creative, flexible intellect so I’ll probably be hard pressed to keep up with him. If you can’t tell, I look up to cousin Greg and look forward to future QSOs with him.
7.3 New-to-me news gathering service
In my daily work, I’m a bit of a news junkie, always trying to detect new trends or events that may impact my nonprofit association’s members. When I stumbled across a news service called The Brutalist Report (https://brutalist.report/), I subscribed, then I purchased a premium subscription.
The list updates frequently and is chock full of categorized content. I haven’t used this long enough to recommend it but I find myself heading to it before I pop open Google News. If I’m in a hurry, I just hit the Summarizer to get quick summaries of major items.
One thing about The Brutalist Report: it’s a web page, not an app. That’s a bit inconvenient on a mobile device. On my smartphone, I turned The Brutalist into an app using Hermit. The Hermit app and how to use it are described at https://www.howtogeek.com/how-to-turn-any-website-into-an-android-app-and-why-you-should/
7.4 Another keyboard lands on my desk
I’ve been wanting to try a keyboard with mechanical switches and finally picked up a lower cost Keychron computer keyboard. It connects via USB-C cable or Bluetooth. I got the one with red switches as I didn’t want them to be overly clacky sounding. I’m pleased to report that the keyboard is only quietly clacky.
In this recording, I typed the first two sentences of the above paragraph. The recorder picked up more of the clacky sounds than I hear when typing (I tend to pound the keys and the recording certainly picks that up):
I have to say that the slight springiness of the keys and the audible (but not overbearing) sounds from typing are somehow rather pleasant. As an added bonus, various lighting patterns are available, from scrolling lights to illuminating keys as they are used during typing.
.-. .- -. -.. --- -- / .-- .. .-. . / .-. . ...- .. . .-- / -... -.-- / -.- .--- --... -
Perhaps right after the November 5th general election, a reminder of the Amateur’s Code might be appropriate. If you haven’t read this before or have forgotten what it says, you may find it interesting.
I’ll say 73 to all (and if you run across someone who says 72, check out what that means on QRPer.com). Be well, one and all!


