

Random Wire Review issue 117
January 3, 2025: Welcome to a new year! Issue 117 features how I upgraded my node-in-the-cloud from AllStarLink 2 to ASL 3. Issue 117 closes with appreciation to many friends, leaders, and educators.

Contents
1. ALLSTARLINK: Version upgrade of AllStarLink cloud node
1.1 Preparation
1.2 What didn’t work
1.2.1 asl-menu was “off”
1.2.2 Destroyed the server
1.2.3 New Debian install failed
1.3 What did work
1.3.1 New server instance provisioned
1.3.2 Debian installed smoothly
1.3.3 ASL installed normally
1.4 Server configuration
1.4.1 Basic packages and configuration
1.4.2 Configured DNS
1.4.3 Secured web connections
1.4.4 Index page restored
1.4.5 Configured for Hamshack Hotline number
1.5 An aside on SIP phones
2. RADIO: Radios organized and stored
3: RADIO: Updated homemade YSF hotspot
4. COMPUTING: Added utility to bash shell
5. COMPUTING: New antivirus software installed
6. TECH: NVMe storage gadget with USB-C
7. CATCH-ALL = little things
7.1 Speaker
7.2 Drive on 5
8. CLOSING: farewell 2024, hello 2025

An audio teaser of issue 117 was published at https://www.randomwire.us/podcast on Wednesday, January 1, 2025. You can find the Random Wire Reflections podcast on most major podcast platforms.
My New Year’s resolution? Try to avoid burdening listeners with too much information, which means shorter, more accessible podcasts.
.-. .- -. -.. --- -- / .-- .. .-. . / .-. . ...- .. . .-- / -... -.-- / -.- .--- --... -
1. Version upgrade of AllStarLink cloud node
TL;DR: I tried to upgrade my node-in-the-cloud on a Vultr.com server from AllStarLink 2 to 3 without reinstalling the operating system, but ultimately resorted to a fresh install of Debian 12 and ASL 3.
They say there is no easy upgrade path to take an AllStarLink node from version 2 to version 3, but I had to prove that to myself.
I’ll describe what I did that failed and what I did that worked. Complicating this is the location of the node: it is a virtual node on a Vultr.com server instance located about 150 miles away from me. The takeaway: if you’re moving from ASL 2 to ASL 3, just start fresh.
If you want to try Vultr, please use my link: https://www.vultr.com/?ref=9261098
1.1 Preparation
While the node was still running AllStarLink 2, I backed up three folders with rdiff-backup:
/etc/asterisk
/etc/allmon
/var/www/html
Then I zipped those directories and sent them with Tailscale to my laptop. (Tailscale calls this a taildrop.) This gave me working configuration files I could refer to if I had to resort to a complete reinstall.
I also saved a snapshot of the working ASL 2 instance of my Vultr.com server. That would allow me to easily return the system to the pre-upgrade working configuration.
1.2 What didn’t work
Hoping that I could simply install ASL 3 on the existing Debian 12 machine, I didn’t delete those three directories. Instead, I hid them from Asterisk by “dotting” the names. By this I mean I renamed the asterisk folder as .asterisk, and so on.
1.2.1 asl-menu was “off”
Then I installed AllStarLink 3 following the AllStarLink Manual. When I started the asl-menu interface, I immediately saw it looked different. When I tried to set the node number, I couldn’t. It wouldn’t save.
I wondered: was it because I had held Debian updates on the ASL 2 node? When I did the last upgrade to Debian 12, I discovered that upgrades to the OS broke the node (generally speaking, because of DAHDI dependencies). So I had held core OS updates, meaning I prevented them from upgrading.
Since I didn’t remember what I had held, I used apt-mark to show me what was held (sudo apt-mark showhold) and then to unhold those packages (sudo apt-mark unhold [name of package]). But…of the three held packages, only two were released. The system would not let go of the third one.

Running apt update didn’t show any packages that could be upgraded. I rebooted and then ran asl-menu again, but it acted the same. I also tried apt dist-upgrade but again, nothing was available.
At that point I assumed there was something lurking outside of the three directories I “dotted” that was confusing ASL. Rather than spend more time sleuthing, I chose to move ahead with a more drastic process.
1.2.2 Destroyed the server
What do I mean by drastic? Vultr.com describes the process of deleting a server as destroying it. Well, that’s what I did. First, though, I confirmed with Vultr support that my snapshots of the working ASL 2 instance would not be deleted. They confirmed the old snapshots would still be available so I clicked the Destroy button.

1.2.3 New Debian install failed
After I created a new server instance (described below in 1.3.1), I attempted to install Debian 12 from my favorite ISO. I installed from that image three times but each time, something happened at the final GRUB (Grand Unified Bootloader) step. Each time I restarted the new machine, it started at the installation screen. That got a bit tiresome. I will say that after installing Debian a few weeks ago on a slow hard drive, the cloud node installation was screaming fast.
1.3 What did work
1.3.1 New server instance provisioned
After destroying the old server, I provisioned a new server instance. The cloud compute instance I chose is at the low end of Vultr’s offerings with one virtual CPU, only one gigabyte of RAM, and 25 gigs of NVMe storage. For the light usage node 57945 gets, this seems sufficient. If more users choose to use the 57945 hub, I may need to increase the RAM to two gigs.

1.3.2 Debian installed smoothly
I ended up installing the Debian 12 image supplied by Vultr. That went smoothly. I would have preferred to not have a root user but that is the default in the Vultr package.

1.3.3 ASL installed normally
When I installed ASL 3 and ran asl-menu, the interface was what I expected. I was able to complete the installation of ASL 3 without incident.
So: server destroy, deploy new server, choose Cloud Compute (again located relatively nearby in Seattle), and add automatic backups for a total cost of $7.20/month. That works out to about 24 cents a day.
One of the interesting aspects of this exercise is all of the stats for node 57945 disappeared when I replaced the server, perhaps because the IP address changed:

1.4 Server configuration
1.4.1 Basic packages and configuration
I installed some of my standard suite of packages I like, including:
UFW firewall. I set the default incoming connections to deny, outgoing connections to allow, then opened ports for SSH, HTTP, HTTPS, and specific ports needed by ASL (4569, 5038, 5060). I also allowed Tailscale connections. Then I checked the configure and loaded the firewall.
Tailscale
rdiff-backup
1.4.2 Configured DNS
Through Vultr’s web-based interface, I updated the Vultr DNS settings for the server. My kj7t.net domain name is registered with Namecheap.com but I have Vultr manage the namespace for me. It’s just simpler that way.
1.4.3 Secured web connections
To secure HTTP connections, I installed certbot and installed a new SSL certificate with the help of two online guides:
My HTPPS URLs still wouldn’t work, and as I reviewed my settings, I was puzzled. My configuration looked exactly right. That meant the problem was probably external. As I thought about this, I remembered I had selected a Vultr firewall when I deployed the new instance. When I checked that system, I saw that HTTPS connections were blocked. Once I corrected that, my HTTPS URLs immediately began working.
1.4.4 Index page restored
And then I replaced the default index.html file in /var/www/html with the custom index file I had on the previous server. That page uses a simple template from HTML5UP.
Of course, the index file didn’t render correctly when I opened that page on the new server instance, and that’s because other resources the page needed weren’t present on the server. Since I had saved the old /var/ww/html contents, I was able to locate the two subdirectories the index file was looking for. I zipped them on my Windows machine, sent them by Tailscale to the remote server, unzipped them, moved them to the correct locations on the server, and changed the ownership and permissions as needed.

Later, I added a change log so I could more easily share with users the changes made to the server and node.
1.4.5 Configured for Hamshack Hotline number
My Hamshack Hotline line also connects to node 57945…or it did before I upgraded to ASL 3. I copied the special stanza in /etc/asterisk/extensions.conf into the new instance, and also brought over the dial plan code from /etc/asterisk/iax.conf to the new server.
After making those changes, I could connect to node 57945 from my SIP phone, but as soon as the connection announcement was made, the connection terminated. I sought some help on the HH Discord channel and we were able to find a solution.
1.5 An aside on SIP phones
I’ll be moving my SIP instance from an old Cisco SPA525G phone to a smaller Polycom VVX 401 phone, but to do that, I need help from the Hamshack Hotline folks. Their help desk is closed until the middle of January. With the backlog of folks wanting help, I expect it will be several weeks before I can get the Polycom phone put in service.
I bought two identical Polycom VVX 401 phones to replace the SPA525G phone in Portland, Oregon and the SPA303 phone in Olympia, Washington. I’m finding the configuration interface for the Polycom phones a bit more confusing than the Cisco interface, but that’s probably just because I’m not familiar with the Polycom platform. I’ve configured the Polycom phone in Portland to work with node 588416 and I have to say the sound quality seems even better than with the two Cisco phones.
I’m looking forward to getting the Polycom phones working with my Hamshack Hotline number.
If you have a local AllStarLink node and want to experience really nice, clear audio, a $40 SIP phone is a great addition to your shack. There are a few nodes I like to monitor, and listening over the speakerphone is very convenient.
.-. .- -. -.. --- -- / .-- .. .-. . / .-. . ...- .. . .-- / -... -.-- / -.- .--- --... -
2. Radios organized and stored
I have way too many handheld radios. Until the day comes that I begin to thin my herd of handhelds, I needed a way to keep them in one place and secure from knocking each other over. (When I stand them all up beside each other, when one tips over, they all tip over!) To do this, I bought a simple spice rack and used it to organize the handhelds. It looks like this:

I needed to create some working space in my small corner of the room, so several vintage tube-based radios went to storage. I’m certain they will resurface at some point in time.
.-. .- -. -.. --- -- / .-- .. .-. . / .-. . ...- .. . .-- / -... -.-- / -.- .--- --... -
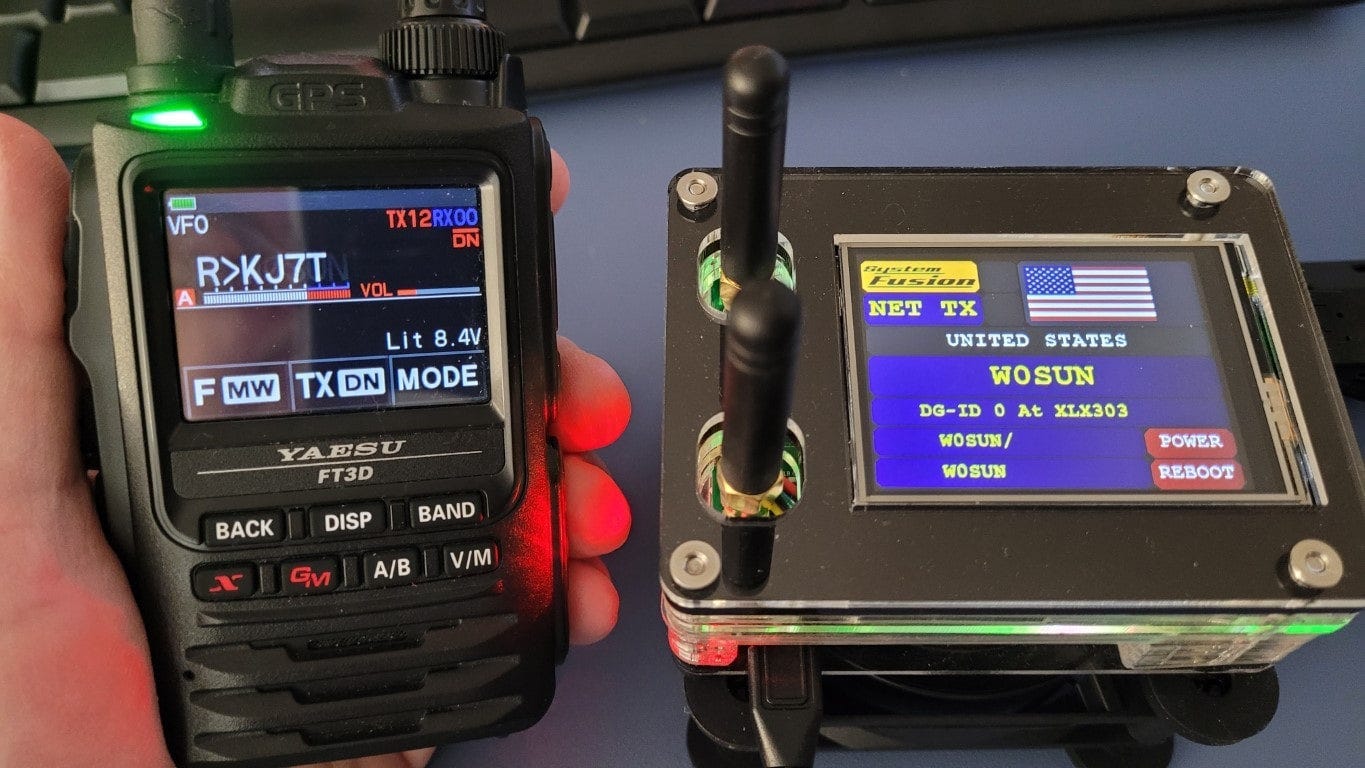
3. Updated homemade YSF hotspot
It had been a while since I checked on my home-built hotspot that I use for Yaesu System Fusion with my Yaesu FT3D/FT5D handheld radios. I ran updates, charged up the handheld, and made sure I could connect.
I had no problems updating but a little voice in the back of my mind was telling me to make a backup of the microSD card in the hotspot. Oh wait, I backed it up in June and saved it as an image file…somewhere. Maybe I stashed it on my server? I’m glad I looked because the backup file was missing from where I expected it to be. I finally found it in another old backup and put a copy into the correct folder to make it easier to find if I need it in the future.
The WPSD dashboard updated and looks great:

With my always-on WIRES-X Portable Digital Node, I don’t use this hotspot nearly as often. The PDN is just so comfortably convenient when I’m working at my desks, and now with audio passing through the Heathkit HS-1661 speaker (see item 7.1 below), it is very pleasant to listen to.
One interesting aside is that I can pick up the hotspot in my Honda Ridgeline truck up to about 1/6-mile away. I have a second Yaesu FTM-300DR in the Ridgeline and I can easily have a QSO over the hotspot while I’m sitting in my truck.
By the way, an easy way to seek out active WIRES-X nodes is to use the active node list. There are a couple of ways to look for nodes. You can click on the State or the Country and the list will sort…but remember that this is a very big list so be patient if you are trying to sort the list. You can also word search on the page to find a particular city, state, call sign, etc.
Here’s what a sort on Washington looks like:

.-. .- -. -.. --- -- / .-- .. .-. . / .-. . ...- .. . .-- / -... -.-- / -.- .--- --... -
4. Added utility to bash shell
https://github.com/KittyKatt/screenFetch?tab=readme-ov-file#screenfetch---the-bash-screenshot-information-tool
I added the screenfetch command to the end of my .bashrc file so whenever I open a terminal, Screenfetch runs. It was easy in Debian 12:
sudo apt install screenfetchNote that if you have a graphical desktop installed, this goes very quickly. If you do not have a desktop environment installed, the installation routine installs a lot of stuff! Screenfetch is probably not recommended if you are running a terminal-only headless server.
I like the basic information it provides and it reminds me of what machine I’m on at the moment:

For context, here’s how it looks on my KDE Plasma desktop:

(Yes, I moved the icon panel from the default position along the bottom of the screen to the left side of the display. It looks good there!)
.-. .- -. -.. --- -- / .-- .. .-. . / .-. . ...- .. . .-- / -... -.-- / -.- .--- --... -
5. New antivirus software installed
I’ve been running Bitdefender on my laptop to provide protection, but lately I’ve been noticing slowdowns in performance, including video streams becoming interrupted with momentary freezes and dropouts. The video quality was also rendering in lower resolution than my monitor can handle. I looked at the resources being used and saw my antivirus program was really dragging down performance.
So I went shopping. Good protection and minimum impact on my system are important to me. I really wanted to use Kaspersky software but because of restrictions imposed by the United States, it was no longer available to me. I ended up settling on Emsisoft.
So far, it seems fine. My video problems have improved. Browser windows are noticeably more responsive.
Of course, I also screen for bad sites through NextDNS. Lastly, I also run AdGuard Home on my GL.iNet router with a couple of custom filter sets. Having multiple layers of protection brings me some extra peace of mind.
Nevertheless, my video was still a bit ragged. To eliminate other possibilities, I bypassed my new Power-over-Ethernet switch by running the Ethernet cable directly from the laptop to a separate LAN port on my gl.INet Flint 2 router. That helped.
The biggest improvement came from switching to a USB-C adapter for Ethernet and HDMI. The old USB-A adapter I had been using turns out to have been a bottleneck. The situation is much better now, with the second display showing better resolution and performing much more smoothly.
.-. .- -. -.. --- -- / .-- .. .-. . / .-. . ...- .. . .-- / -... -.-- / -.- .--- --... -
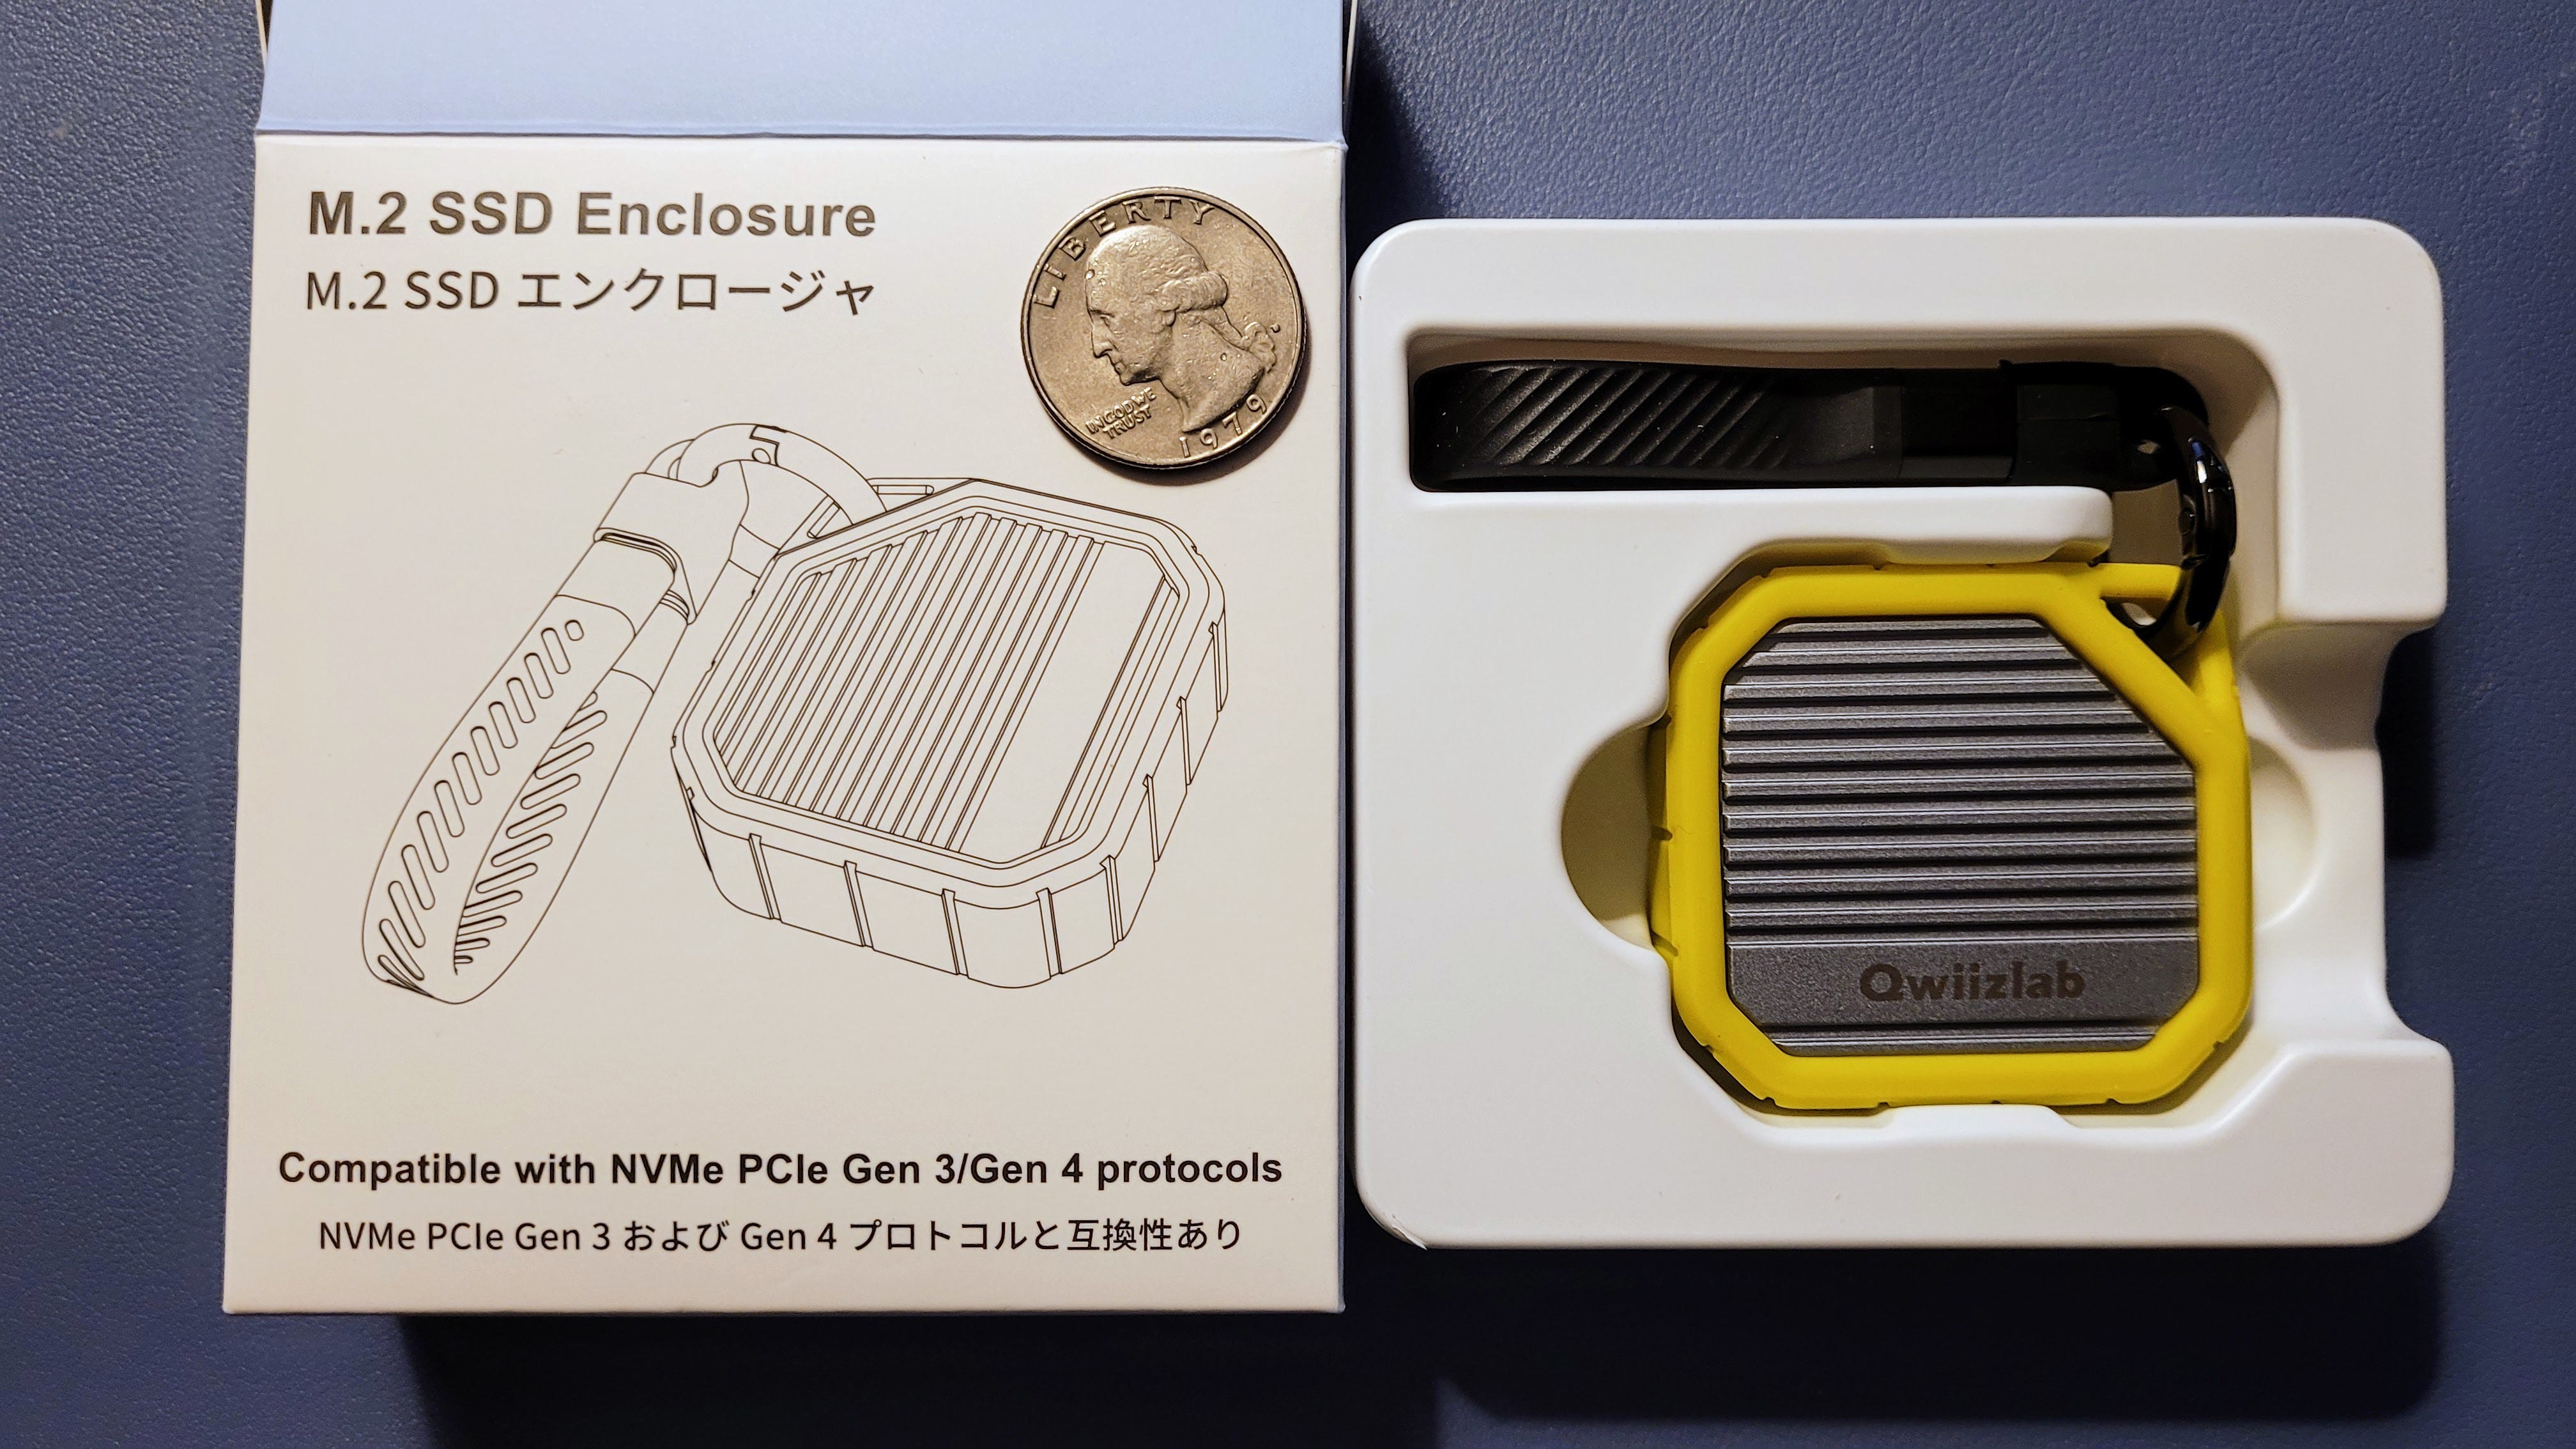
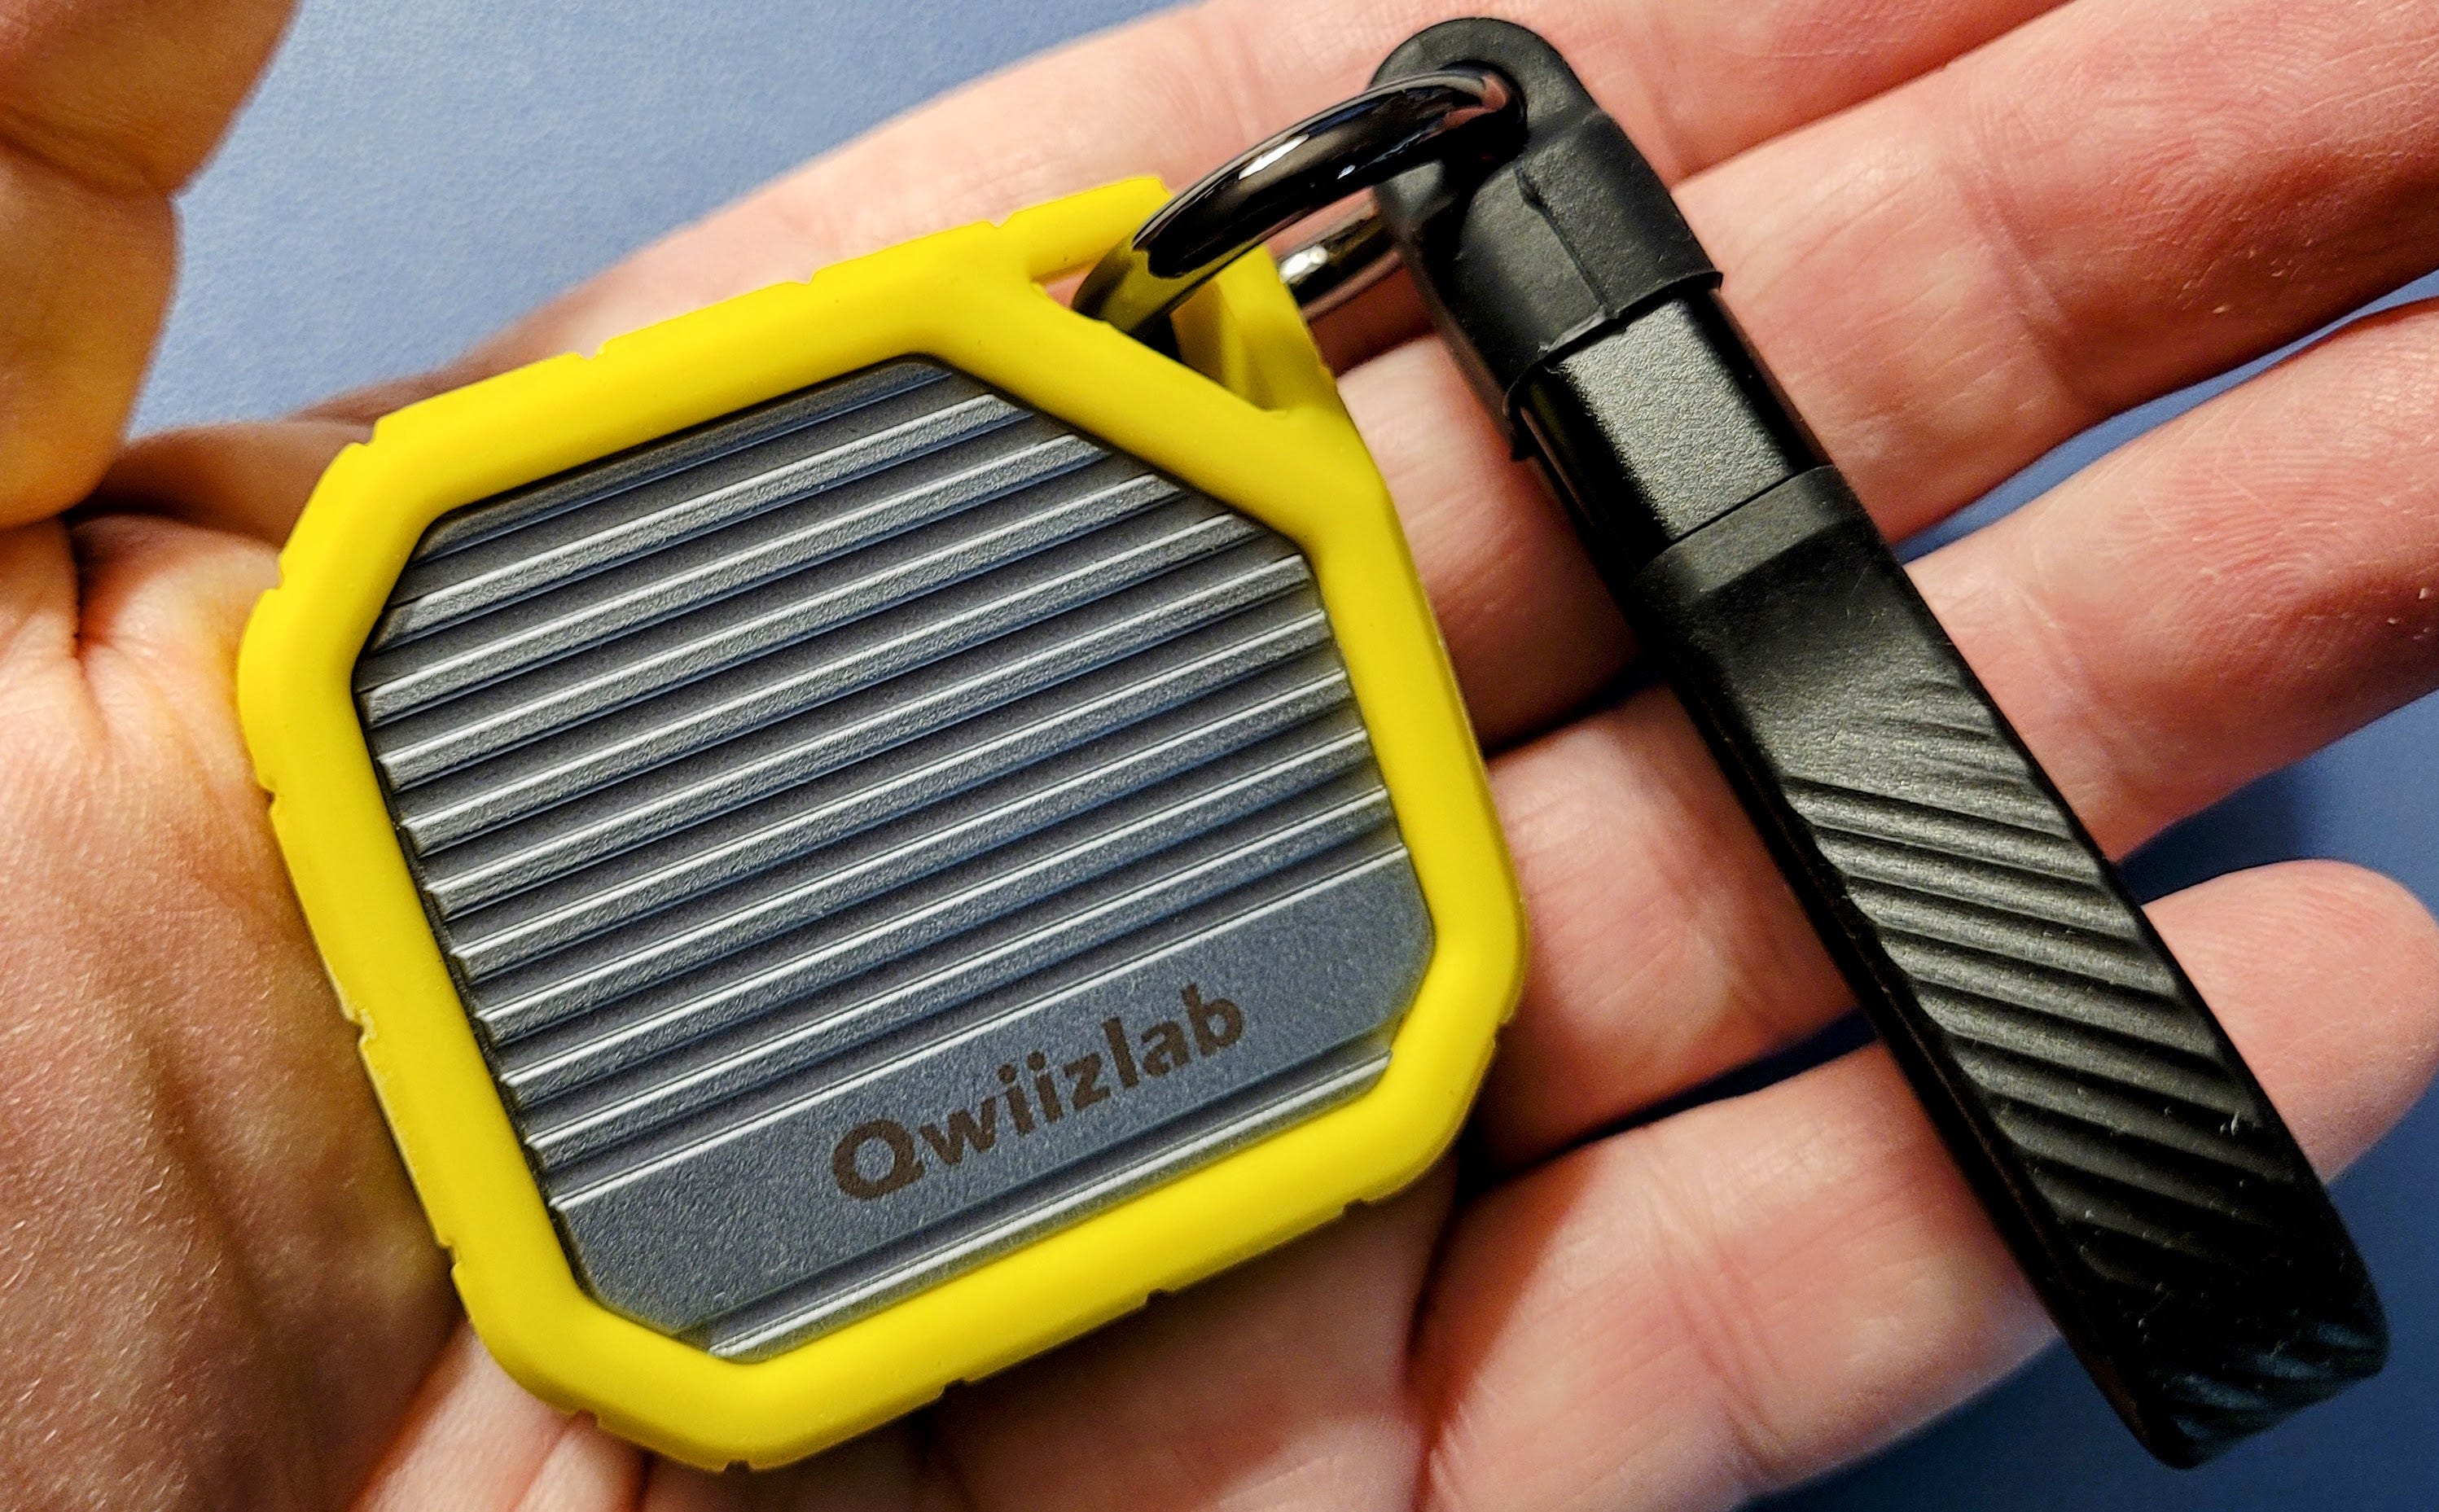
6. NVMe storage gadget with USB-C
I noticed a small metal enclosure for an NVMe stick and thought it was so cute I should pick one up. As the name of the device implies, a 2230-size NVMe drive plugs into an M.2 slot on the device.
I installed a terabyte of storage for $77 which felt like a pretty reasonable outlay for so much storage space.
This device is not large (25-cent coin shown for scale):
The instructions are rudimentary. You get screws, the necessary tools, and a thermal pad:
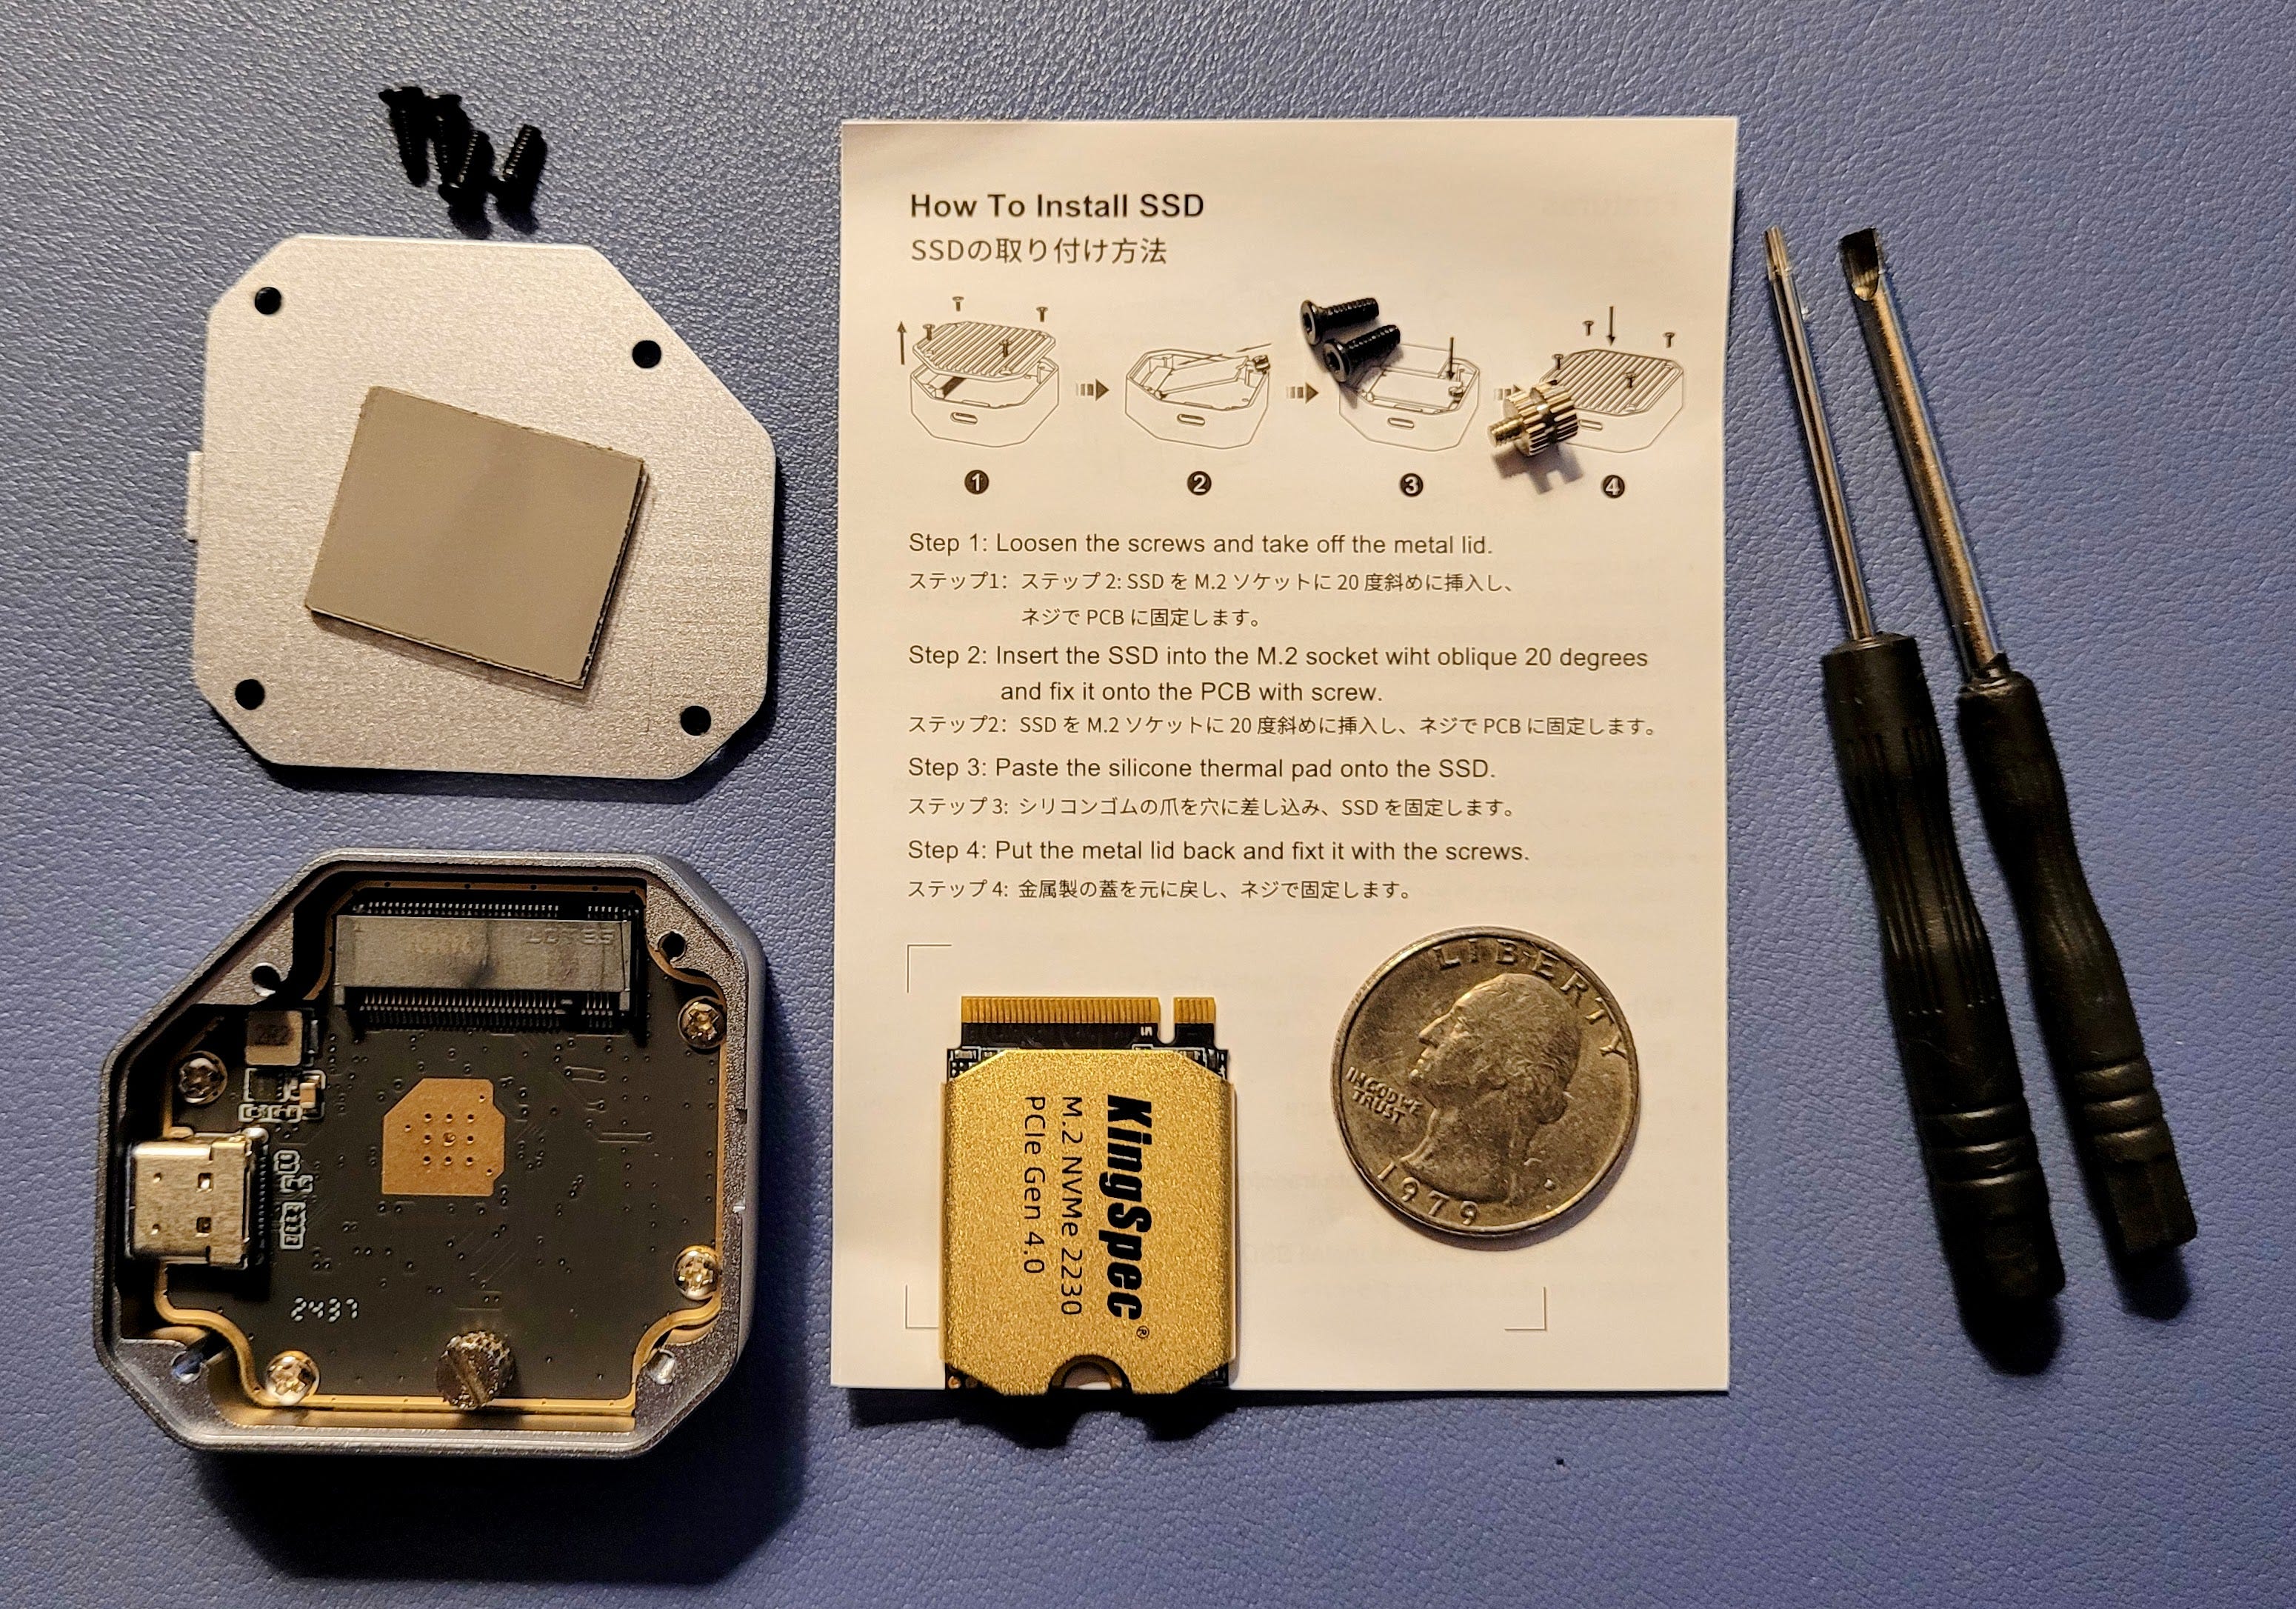
Warning: the screws are small! Also, you might note that the silver toolless screw shown in the image beside step #4 has a channel milled into it. The cutout on the NVMe drive slots into that channel so that the drive is properly aligned and secured in the device.
Once the drive is secured, select the thermal pad that will bridge the gap between the top of the NVMe drive and the metal case lid. It’s important that the thermal pad be in contact with both surfaces: the drive and the lid. Peel off the sticky backing on the silicone thermal pad and affix it to the top of the drive. Then peel off the plastic from the other side of the pad, replace the lid, and check for fit. Once it looks right, secure the cover with the black screws, then slip the metal device into the silicone “cage” that helps protect it.
The finished device is larger than a USB stick but still quite small. I appreciate that it is not a tiny USB stick because I seem to lose those, especially inside computer bags with a dark fabric lining. This thing will be more visible in those bags.
When I plugged the device into my laptop, the computer did not detect it. I had to open a partition manager to create a volume. I formatted the volume in exFAT format.
The handle is actually a male-male USB-C data cable, making this a convenient all-in-one device. I’ve been copying large datasets onto it and it hasn’t skipped a beat yet.
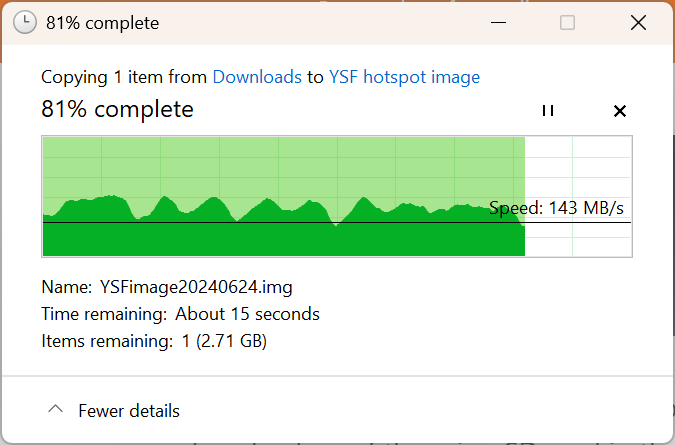
To demonstrate speed, I copied a folder with 12.3 gigabytes of content to a new folder on the drive. To be clear, I had already moved the 12.3 gigs of content onto the drive. For this test, I simply copied and pasted that folder.

It took two minutes and 57 seconds (round up to three minutes) to copy 12.3 gigabytes of typical office documents and images. Using a transfer time of three minutes, the write speed calculates to 546.7 Mbit (or 68.3 megabytes) per second. Seems speedy enough for me!
The case did not get warm during that time. Some similar devices have active cooling systems but that seems like a failure point to me. This device, with the ribbed metal case and thermal pad, seemed like a more durable option for tossing into a computer bag.
When I showed the device to my adult daughter, she thought it was cute. When I explained that it held a terabyte of content, she suddenly got more interested. I might be assembling a few more of these in the future!
I like this little thing so much I did order another one in orange. Amazon has a 10% off coupon right now so the $27 device costs less than $25. I found a 2-terabyte NVMe drive for $135. I’m going to have plenty of portable storage capacity on hand.
Want extra storage without assembling your own? Here’s a 1-terabyte USB stick for $80, but right now it also boasts a 30% discount. That’s a deal.
.-. .- -. -.. --- -- / .-- .. .-. . / .-. . ...- .. . .-- / -... -.-- / -.- .--- --... -
7. CATCH-ALL = little things
7.1 Speaker
I rewired an old Heathkit HS-1661 speaker with a mono 1/8” plug. I’m using that as an external speaker on my Yaesu FTM-300DR that runs on my desk as a WIRES-X Portable Digital Node. It sounds great.
7.2 Drive on 5
I drive quite a bit, and a lot of it happens on Interstate 5 between Portland, Oregon and Olympia, Washington. I call it my “drive on 5” time and use it for thinking and listening to podcasts. Most of my project ideas are born while I’m in “drive on 5” mode.
Most recently, I spent the drive listening to the latest Ham Radio Workbench podcast. I can’t recommend this podcast enough. Not only do I learn at least a few new things with each episode, I also enjoy the banter among the hosts and guests. The Ham Radio Workbench podcast is Random Wire Recommended.
What other ideas have recently popped up while driving? With no nod to practicality or originality at all, here’s a short list from my made-by-voice-while-driving Google Keep notes:
Look for a USB cable tester that will tell me if a cable is secretly reporting the data moving through it.
Buy some USB cable data blockers.
Check out ABR Industries for patch cords.
Look up the MTR 3B Mountain Topper radio.
radiomonkey.com would be a funny domain name.
Why aren’t Asterisk voice mailboxes more common for AllStarLink nodes?
Why aren’t there pre-made “canned” images of various implementations of AllStarLink — tested and verified to work? This might greatly reduce the friction of entering this aspect of the hobby.
Learn more about the FH-2 remote control keypad (“button board”) for Yaesu radios.
Welcome to Oregon where none of the place names sound like they should.
Organizations are about money, memos, and members.
Exponential means the more it happens the more it happens!
.-. .- -. -.. --- -- / .-- .. .-. . / .-. . ...- .. . .-- / -... -.-- / -.- .--- --... -
8. CLOSING: farewall 2024, hello 2025
As I turn the corner from 2024 and see 2025 dawning in front of me, I am feeling grateful. Several people in my amateur radio universe really stand out as friends, leaders, and educators.
I’m grateful to Jeff W7NEE for standing up a Yaesu System Fusion repeater in my home town that is a three-hour drive away from where I spend much of my time. Hearing familiar voices, learning what is going on, and staying in touch help me feel like I’m still a part of the community that helped launch my amateur radio hobby. The Mason County Amateur Radio Club folks are wonderful people. I count myself lucky to be able to share thoughts and learn from Ben AB7I, Gary AC7VA, Merle W7YOZ, Brian NT7Y, and so many others in the MCARC community. (I’m listening to Ben and Gary talk about RFI issues on WIRES-X as I write this!)
I appreciate the time George KJ6VU spent with me over coffee one day in 2024. We had a lovely conversation (it’s easy to talk with George!) and I learned a lot. There are people in my orbit, and on the periphery of it, that will always know a lot more than I do, and George is a bright light in my amateur radio sky. George began his amateur radio journey much earlier in life than I did and it shows.
I also have to say that I appreciate the entire crew behind the Ham Radio Workbench podcast. They give a ton of their time, talent, and energy to helping others. We see the produced show, but they each do so much more to help other hams and contribute to their communities that many of us don’t see. Their friendliness makes it easier to feel like I’m part of a large, extended family.
Thank you to Steve N8GNJ who puts out a tremendous newsletter called Zero Retries. His support and camaraderie have helped me stay the course more than once when I felt like producing a newsletter was too much.
A very big thank you to David NR9V, not just for his tremendous contributions to the AllStarLink community through his AllScan favorites management utility, and not just for his great ASL audio interfaces and repeaters, but also for his friendly aid time and time again in 2024. If you haven’t tried the AllScan utility or checked out his product line, I encourage you to do so.
I am thankful for the three clubs I belong to: the Mason County Amateur Radio Club, the Portland Amateur Radio Club, and the Hoodview Amateur Radio Club. I’ve never been much of a joiner, but being part of these clubs helps me be part of the community, even if I rarely attend their in-person functions. It takes an amazing amount of energy to keep an amateur radio club going so I’m particularly grateful for the many club officers who, through their commitment, time, and talent, make it happen throughout the year.
I am also deeply grateful for a spouse who supports my interest in radio even if she doesn’t understand it. While I occasionally catch a raised eyebrow when I’m talking about a project or radio, she is remarkably forgiving as I spend time, money, and energy on learning more and sharing with others.
What an incredible hobby we enjoy! May 2025 be a great year for you and for everyone in your orbit.
