Random Wire Review 82: March 22, 2024
A little Field Day, a new-to-me radio, a new hotspot build, using the hotspot while mobile, and more.
Contents
1 — FIELD DAY: JUNE 22-23, 2024
Straight from the ARRL website:
03/15/2024
The theme for 2024 ARRL Field Day is "Be Radio Active." The event will run on June 22 - 23, and it will be one-part contest, one-part emergency communications exercise, and one-part open house -- and a great time. The theme encourages radio amateurs to take advantage of the peak of Solar Cycle 25, which we are nearing. Activity this year is likely to be extremely high thanks to favorable solar conditions. The upper HF bands, such as 15 and 10 meters, should benefit most from the Cycle's peak.
There are resources available already for clubs and individuals to make their Field Day plans. ARRL will publish more information and tools so that hams can make the most of the event as it draws near. Amateurs interested in learning more are invited to join the Field Day Facebook group to connect with others who are planning for the big weekend.
Find links to all of the resources on the ARRL Field Day web page at www.arrl.org/field-day.
The ARRL is also hosting a Field Day locator on their website.
2 — PLANNING: USING THE TM-281A FOR WINLINK
I was hoping to use a Digirig device as the sound card interface between an old ThinkPad X250 laptop and the Kenwood TM-281A radio I picked up at the Mike & Key hamfest. That looks doomed from the get go. What to do? Look at the SignaLink™ product line instead! (I also upgraded the X250 from 4 Gb of RAM to 8 Gb, then installed a fresh copy of Windows 11 Pro on it. It works much better with 8 Gb of RAM.)
The 281A has an RJ-45 connector for the microphone and a 3.5mm speaker jack. That’s it for data connection points. According to SignaLink, I would need these items:
$149: SignaLink USB p/n SLUSBRJ4 with 8-pin Modular RJ-45 Mic Cable (available from The Ham Shop for $129.95)
$26: Radio Cable p/n SLCABRJ4, for 8-pin modular (RJ45) Mic jack
$10: SLMODR4K Jumper Module (Kenwood)
An alternative — especially for use as a Winlink station — is the MFJ KISS-mode packet controller. I think I’ve got one somewhere so I’ll dig into storage boxes and, with luck, find it!
I’ve got a 12VDC lighter adapter to the T-adapter necessary to power the radio but I think I’d prefer to get a PowerPole version of the cable. I couldn’t find the power brick for the old ThinkPad (an eBay acquisition) but a replacement was less than $15 from Amazon.
I think that’s about all I’ll need to repurpose the radio and laptop as a Winlink-in-a-bag setup.
This $40 protective case from Harbor Freight should provide enough room for the laptop, power supply/battery, radio, Signalink, and cables. I can strap a mag-mount antenna to the outside of the case for a completely portable setup.
3 — PROJECT: ANOTHER HOME-BUILT HOTSPOT
I put together another home-built DMR hotspot. Why? Well, I can use my nice home-built hotspot on both DMR and Yaesu System Fusion (YSF), but I find that to be a bit clunky in practice. I want to separate those two modes, and the easiest way to do that is to add another hotspot to the mix. I’ll run DMR on my first home-built hotspot and run YSF on the second. That also means two different radios but since I have them, why not?
The other reason for doing this is I can move the YSF hotspot to a different frequency than the DMR hotspot. That means I can monitor a conversation on YSF at the same time a DMR conversation is occurring without worrying about interference.
Pro tip → Spend 22 minutes on YouTube watching A New DMR Hotspot for 2024 for an A-to-Z explanation on how to get from zero to a working hotspot. If you have questions and DMR and hotspots, start with this video!
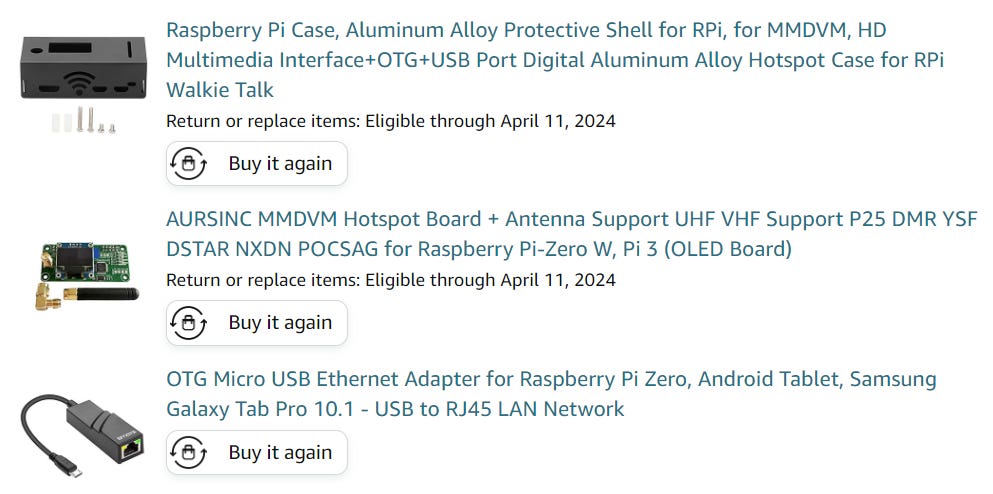
This build is based on a Raspberry Pi Zero 2 W. Here are the parts I ordered from Amazon:
I really wanted to build this in a C4Labs clear case, but as I read more about the quad-core RPi Zero 2 W, I became concerned about heat buildup. My first home-built hotspot in the C4Labs case is beautiful but it does not allow a lot of air through the case for cooling. I did put a small heat sink on that RPi board. With this build, I’m using a metal case with some reasonably large openings, plus a large heat sink. Heat is the enemy of CPUs.
I also like to use a good-quality power supply. I’ve had very good luck with Raspberry Pi-brand power supplies. I find those supplies have a shielded cable from the transformer to the hotspot, removing another potential source of RFI. The CanaKit power supply will probably be adequate, though, and it was inexpensive. If it generates some hash, I’ll get a genuine RPi-branded power supply.
I could have used an RPi Zero W as the single-board computer but I found advice online that suggested the Zero 2 W would work better for the WPSD operating system I wanted to use. The quad-core processor in the Zero 2 W does make a difference. Note that there are cheaper already-built hotspots available on AliExpress and even Amazon. With the price of pre-built hotspots close to what I can put together my self, I prefer to build it. By building the hotspot myself, I will know exactly what goes into the unit.
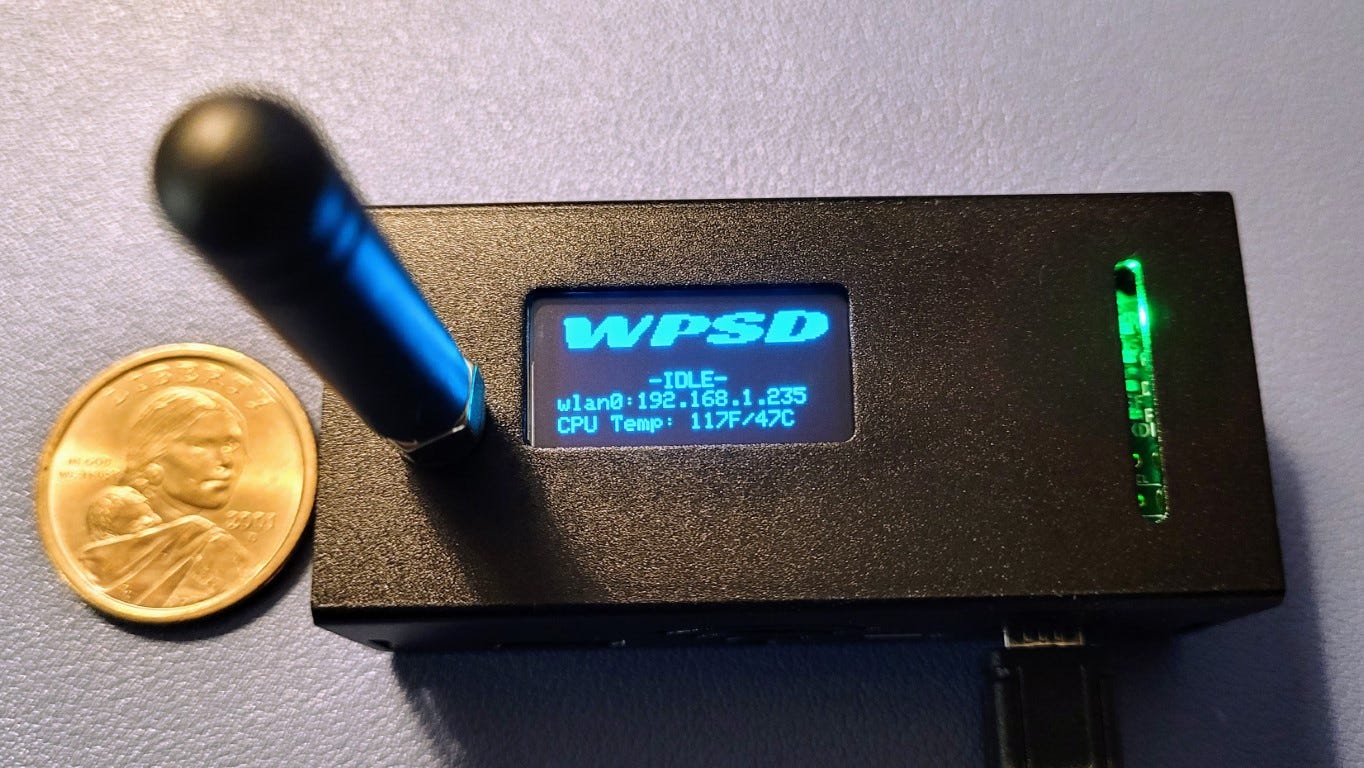
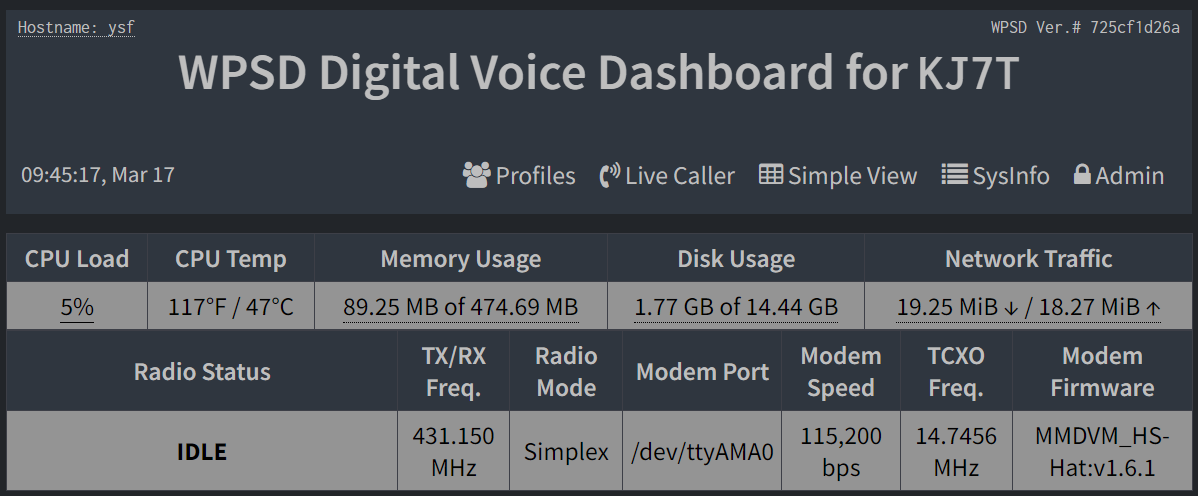
Update: I built it. More accurately stated, I assembled it. I find the little hotspot (and it is a tiny thing) is running about 10°F cooler than the RPi 3B+ hotspot in the clear C4Labs case. (Update to the update: it runs around 120°F when the WPSD dashboard is open in my browser, and around 106°F without the dashboard page running.)
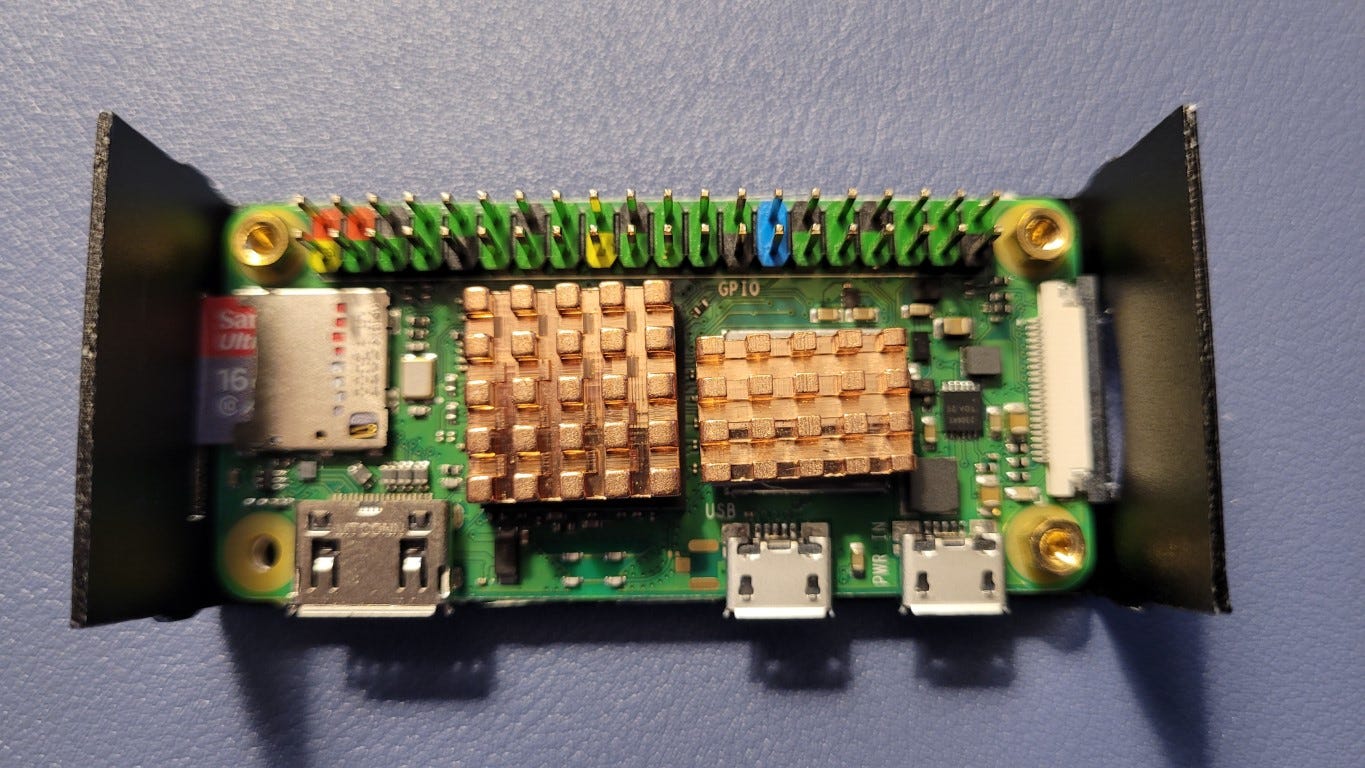
I did not use the heatsink, choosing to hold that back and install it later if indicated. (Later, I did add the heatsink which seemed to drop the processor temperature by 8-10 degrees F, but since the temperature without the heatsink is around 120°F and the Pi is rated to 167°F [75°C], I removed it. And even later: I ordered a small heatsink that is formed from a solid chunk of copper and installed that!) The basic kit with the pre-soldered headers made this a snap to assemble:
Separate the two parts of the metal case.
Place the RPi Zero 2 W board inside the case, secure the corners with four machine screws.
Press-fit the MMDVM hat on the header pins.
Snap the top of the case in place, making sure that the USB and microHDMI ports line up with the holes in the case.
Screw on the antenna and insert your microSD card*.
Add power and boot it up.
*For the operating system, I chose to use WPSD as that has proved to be a great choice for my larger hotspot. I downloaded the correct image and used Raspberry Pi Imager to write the image to the card.
I forgot where to put the wpa_supplicant.conf file (it was late and I had driven five hours that day), so I used the microUSB-to-Ethernet adapter to jack into my network. (Note that if you do add the wpa_supplicant.conf file to the card, your wifi will be configured automatically, meaning you would not need the specialized Ethernet adapter.) That put it on the network but the screen remained blank because the hotspot had, at first boot, not yet been configured. I found the IP address in my router clients list, opened that IP address, and proceeded with the configuration. Getting the config right took very little time because I had the config for the larger hotspot open, and I literally just copied and pasted from one config to the other.
Pro tip → If you use Raspberry Pi Imager, consider using the “Use Customization Options” choice. This lets you set your wifi details and more, so that when you boot up, you’ll be connected without any trouble.
Here’s the most amazing part: from the time I got home to having a working hotspot was one hour. This includes opening the packages, figuring out how things must go together (because: no instructions), assembling the bits, downloading the image and burning it to the microSD card, powering it up, and getting the initial configuration completed.
After I put it through its paces, I updated the modem firmware. With WPSD, you can actually update the firmware through the web interface. Once done, I found I had to pull the power and power it back up, and then everything was fine.
That’s not building so much as it was just snapping pieces together. It went so quickly that I did not take pictures of the process. And did I say it was small? The thing is tiny. Audio reports have been fine when I’ve used it, so it’s a keeper.
If you are interested, here are the Amazon links for building your own tiny hotspot for $111.73, not including a microSD card:
$9.99: https://www.amazon.com/dp/B09DTBZRX3 is the aluminum alloy cast for the Raspberry Pi and MMDVM board.
$45.90: https://www.amazon.com/dp/B09LTDQY2Z is the Raspberry Pi Zero 2 W with pre-soldered header.
$45.89: https://www.amazon.com/dp/B07VW819NW is the AURSINC-brand MMDVM hotspot board.
$9.95: https://www.amazon.com/dp/B00MARDJZ4 is a CanaKit-brand 5V 2.5A power supply.
I don’t get anything from any purchases made through these links. I looked at prices at DigiKey and CanaKit. The RPi board board ($15 for the Raspberry Pi Zero 2 W is currently out of stock at DigiKey. CanaKit has prices that are similar to what I paid through Amazon. Here are the CanaKit prices I found:
$15 for the Raspberry Pi Zero 2 W (but note: no pre-soldered header) or $32.95 for the basic kit that includes a 32-gigabyte microSD card, heat sink, and powers supply.
AliExpress has an MMDVM board, antenna, and protective case for $55.
So I could have spent $32.95 (RPi Zero 2 W basic kit) + $3.95 (40-pin header) + $55 (MMDVM board, antenna, and case) = $91.90…and then wait for it to be shipped. I’m happy about using Amazon to source the bits for this build.
4 — USING: CELLULAR HOTSPOT WITH AMATEUR RADIO HOTSPOT
Why would I want to do this? So I can enjoy long-distance digital voice comms while driving. I spend a lot of time on the road and I’d like to stay in touch with my home amateur radio club members.
What this entails is operating a cellular hotspot (I chose an Inseego Mifi X Pro M3000) and an unlimited account with Mint Mobile (on special for three months for $45). Mint runs on the T-Mobile network, and where I live and work, T-Mo has provided solid service. If you’d like to try Mint Mobile, visit my affiliate link for plan details: http://fbuy.me/uSW6m
That cellular hotspot connects over wifi to an amateur radio hotspot like the one described in this newsletter. However, the Inseego unit has an Ethernet port, so I might be able to physically connect it to the radio hotspot. I’d like to eliminate potential interference coming in via wifi, if possible.
My Yaesu FT-3DR handheld radio is configured to transmit to, and receive from, the radio hotspot. I can use the HT for this or I can add a programmed channel to my Yaesu FTM-300DR and use that (on low power) to connect to the radio hotspot.
An incoming transmission would follow this path:
System Fusion repeater → Internet → Cellular hotspot → Radio hotspot → Radio
How much data will System Fusion use while I’m mobile? I don’t know. I did some Google searching but didn’t really find anything conclusive. Thus, my plan is to “just do it” and look at my data usage as I go. From there, I should be able to determine whether I need to keep the unlimited data plan after three months or perhaps downgrade to a lower-cost plan.
UPDATE from last week’s Random Wire: Jeff W7NEE suggested a hotspot with a Nextion display for mobile use because there is a shutdown option with the Nextion display. Alternatively, an OpenSpot 3 or 4 would also work. I checked some of my usual amateur radio shopping sites but found no reasonable deals on a used OpenSpot 3. Meanwhile, I’ll give the cellular hotspot a good test and look at building a hotspot with a Nextion display.
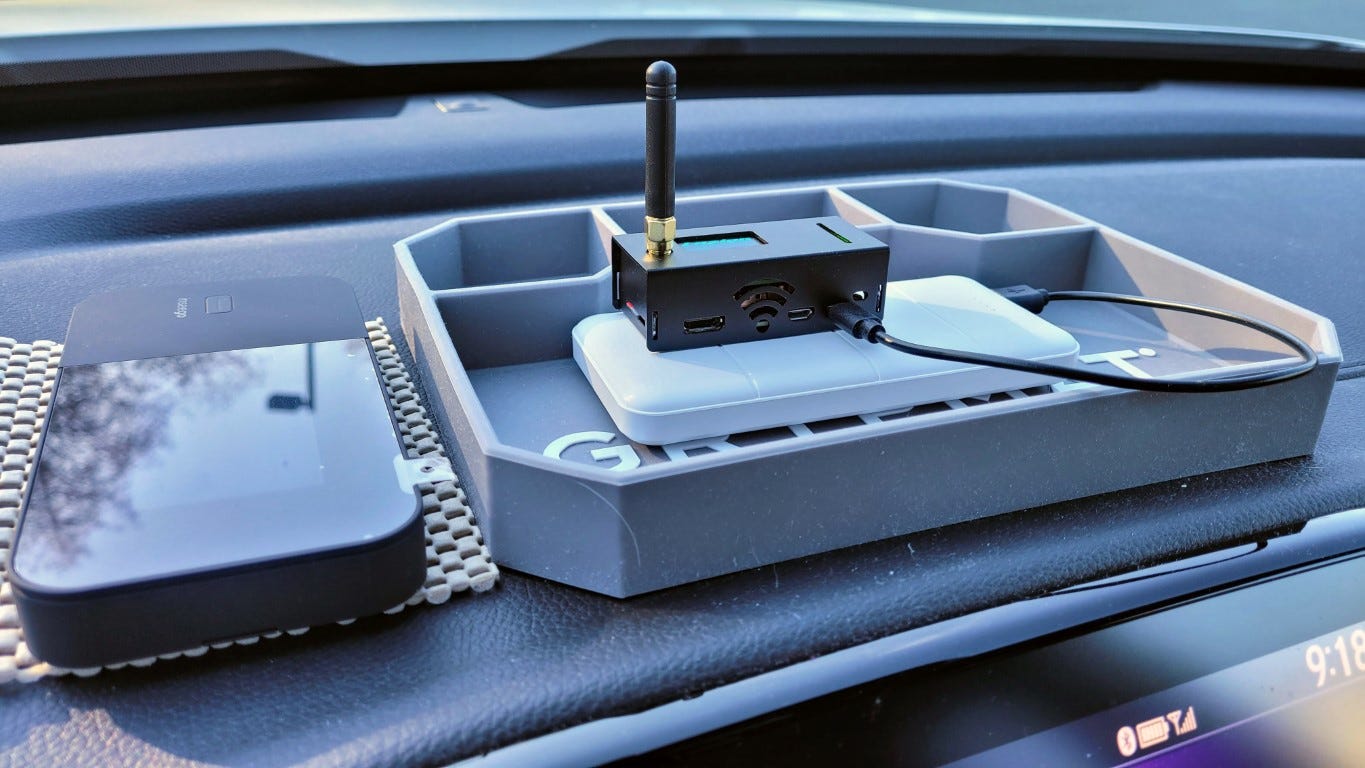
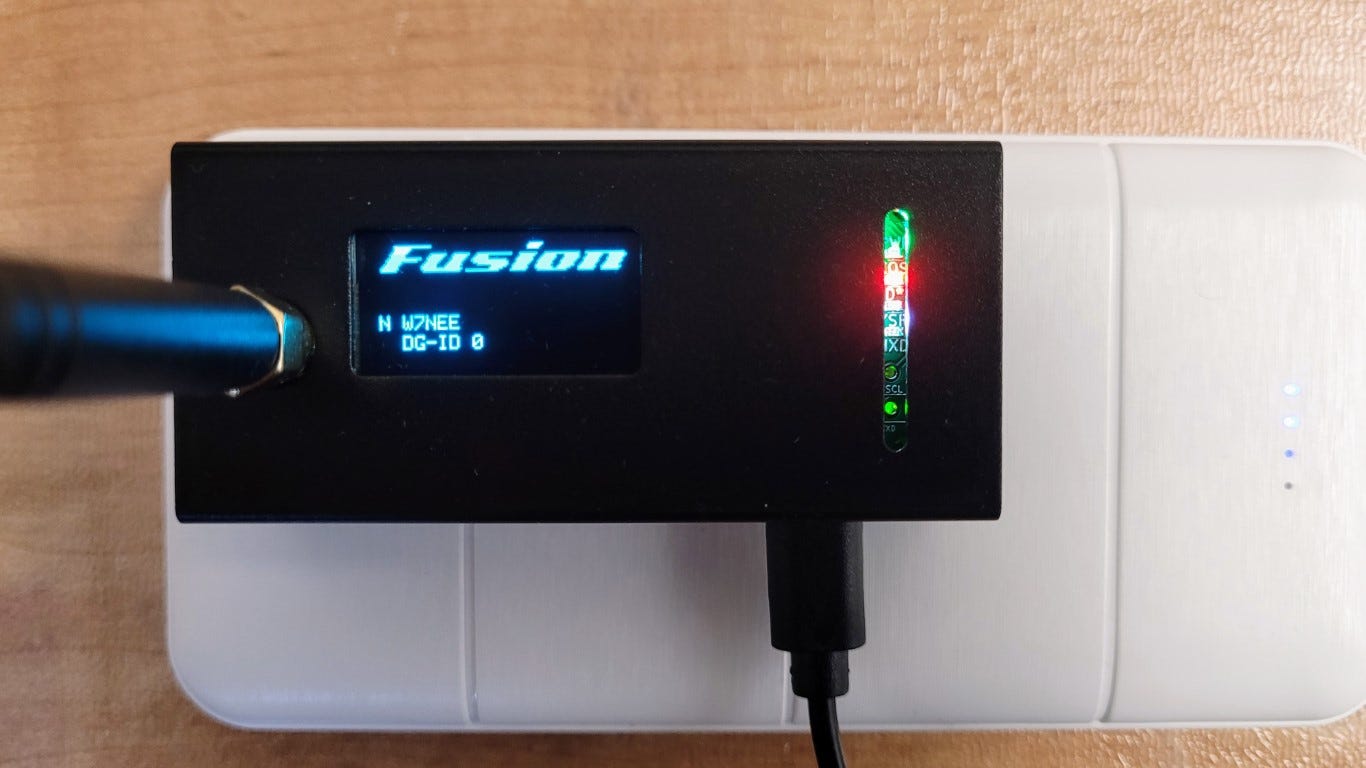
My very simple configuration for use in the pickup truck is a 15,000 mAh USB power bank powering the Raspberry Pi Zero 2 W hotspot. I used a bit of blue painters tape on the bottom of the hotspot to stick it to the power bank, just to keep the hotspot from banging around. A cellular hotspot sits next to to this package. The RPi hotspot is connecting to the cellular hotspot via wifi. I added the RPi hotspot frequency to the Yaesu FTM-300DR mobile rig and set the transmit power to low.
I started operating the RPi hotspot at 11:15 am on March 17. At 7:00 am on March 18, I moved it to the pickup truck and headed to Olympia, a two-hour drive. I operated on the hotspot during that drive. When I arrived, the battery was down to 50%. In about 22 hours of operation, I consumed approximately 7,500 mAh of stored energy. I need to get more hours on this setup before I can estimate how much data I am using through the cellular hotspot.
It appears that the power bank supports power bank pass through charging. I plugged it into a charger and the RPi hotspot did not power off. The lights are blinking and it appears to be charging! This means I can simply plug in the power bank when I get to work or when I get back home, without having to log into the RPi hotspot to perform a proper shutdown.
5 — BUILDING: DC POWER STRIP KIT
My collection of PowerPort-powered gear continues to grow and I find myself wanting a simple power strip. Thank you to the Ham Radio Workbench folks for working with DigiKey on a kit.
Interestingly, it sounds like the Portland Amateur Radio Club is planning a build party to construct a similar unit but rated for 30 amps. I attended the March PARC meeting on March 11 to learn from the KiCad presentation, not realizing that this was also the teaser for using KiCad to design a DC power strip. Their out-of-pocket cost looks like it will be quite low, especially compared to the Ham Radio Workbench power strip. That tells me there is probably some decent profit built into the DigiKey kit, but I don’t begrudge helping to fund the Ham Radio Workbench folks. They deserve the support!
Here’s the state of this project at the moment:
I have to say that the Digikey mailing envelope was a nice change from the packaging I’ve been receiving from that giant company that starts with the letter A. The bubble protection was much thicker and larger. The package was shipped very quickly, too.
6 — APPRECIATION: W7NEE REPEATER
I’ve mentioned that some friends have put up a repeater in my home area of Shelton, Washington. The repeater owner is Jeff W7NEE. One of these days I’ll get the story from him on how he arrived at the decision to stand up a repeater and the partnerships he formed to do so.
I write this in deep appreciation for his work and the work of everyone else involved. The W7NEE repeater is a Yaesu System Fusion box but with connections to other services that Jeff and company have initiated. It is so much more than your usual 2-meter repeater. I can certainly hit it via RF when I’m local. I can reach it via YSF to YSF from my Yaesu handheld radio going through my hotspot, and reports of my audio quality are very good. But I can also hit the repeater on DMR or using AllStarLink. This gives me maximum flexibility and vastly expands the accessibility of this system.
From Portland, I can use my hotspot and a DMR handheld or a Yaesu handheld. From Portland and Olympia, I can also use AllStarLink to reach the repeater. As I write this on March 12, I just finished several exchanges during a round-table net using my Cisco SPA 303 phone (an IP phone), Hamshack Hotline, and my AllStarLink node-in-the-cloud (https://kj7t.net). It turns out that N7VDR who was also on the net was similarly connecting via Hamshack Hotline on his IP phone.
This is the closest to an all-in-one repeater I’ve experienced and I want all who are involved with it to know how much I appreciate their work to stand up the repeater and to support it. Thank you!
7 — REFLECTION: NEED FOR ENGAGING YOUNG PEOPLE IN AMATEUR RADIO
Fifteen years ago, in 2009, I got my first license and joined a local amateur radio club. I’m just an amateur radio teenager.
As I wrote a few weeks ago, I followed up in 2020 with my General license and in 2013 with my Amateur Extra license. Along the way, I encountered some attitudes that I still don’t really understand.
Fairly early in my ham radio life, I was a proponent of buying some Technician manuals for the local high school radio club. This would have been a small expense to our amateur radio club but would have demonstrated interest and support. The argument against this that held sway with the voting members was (paraphrased by me): High school students have no money, so they shouldn’t bother getting licensed. This hobby takes a lot of money and we don’t want to have to deal with new hams asking us for help.
My instant reaction was: wait a minute, I’m one of those new hams! Granted, it’s been quite a while since I was in high school, but I haven’t had my license long and I’m trying to scrape together cash to build up my station. I don’t want to make mistakes. I want to learn from the folks who have already walked this path before me.
The sense of elitism expressed by some fellow hams the day I proposed buying manuals for high school students still rankles today, almost 15 years later. Yes, the longer I am in this hobby, the more I recognize that it can be expensive. But I had a ton of fun with a handheld radio and handheld Yagi working satellites for more than year. My cost of entry was low and I learned a lot about radio, antennas, propagation, space, and myself.
It can be hard to view the young people of today as the amateur radio leaders of tomorrow…but they are out there, waiting to be found. Don’t they deserve some support from those of us lucky enough to be able to help them discover this hobby? I encourage all of us to keep an open mind when visiting with family members, neighbors, and students. I know few of these folks will be interested in our fun and educational hobby. However, along the way, we might just spark the interest of someone who will become another great experimenter or leader for amateur radio. That outcome seems worth the effort to me.
UPDATE: As I drove from Portland to Olympia yesterday, I thought about what I had written. I think my points are incomplete. Instead of focusing on young people, we should be focusing on all ages of people, from all walks of life. That would help strengthen our hobby immediately and also help build a stronger future.








Tom-Your Knwd TM-281A can be made to do exactly what you want it to do. See https://docs.google.com/document/d/1mURT5G8ThwIr0zUotgYdzkQteEMbsf9728qooTBDZVk/edit
It's easier on the TM-271A as they have the locations for the 6-pin mini-DIN pigtail marked right on the board and i've modified four of them to support a sound card connection through a 6-pin mini-DIN--see http://n1vg.net/
Let me know if you undertake the mod of you TM-281. 73 de K3FZT / Steve
Hi, I greatly appreciated your discussion on building the PIZero W2 based hotspot and the use of the new software vs the normal Pi-Star software. I just bought a new Pi-Zero 2W but with the loose pin header that I will solder on. This was to modify my old PI-Zero from 5 years ago. Thanks for providing a well written description of how I need to proceed.
Glen WB4KTF