Random Wire 139: Intro to the BTECH UV-PRO VHF/UHF handheld radio
July 11, 2025: First impressions of the BTECH UV-PRO 5W VHF/UHF radio
Featured this week
This issue features the BTECH UV-PRO handheld radio. This radio is sometimes compared to the Kenwood TH-D74A but has a much lower price point. Is it worth it? Read on!
Breaking news: Hamshack Hotline and Kansas City Wide
Hamshack Hotline service will end
This week, the Hamshack Hotline folks announced that their service will end:
To our valued Hamshack Hotline community, It is with a heavy heart that we announce the sunset of the Hamshack Hotline project, effective August 29th, 2025.
Find the full announcement on the HH home page at https://hamshackhotline.com/.
As a donor supporting the Hamshack Hotline project, I am saddened to see this announcement. It’s a loss to our community. I hope an angel will take over the service and that the HH board of directors will be willing to support such a transition.
If you have been using a SIP phone with Hamshack Hotline, consider getting a Hams Over IP (HOIP) account and configuring your phone for that service.
POST-PUBLICATION UPDATE: I was remiss in not also mentioning Amateur Wire, a voice-over-IP system for radio amateurs with more than 500 users so far.
Kansas City Wide hiccups on WIRES-X PDNs
If you are a user of the Kansas City Wide network, please be aware that some users with a Portable Digital Node (PDN) can’t hear all sides of conversations:
Next week’s topic
Next week, the featured content will show the AllScan UCI90 USB Communications Interface with a Raspberry Pi Zero 2W to make a simple, small AllStar node.
A handheld radio that checks the boxes for me
How about an analog handheld radio that can receive airband transmissions, FM broadcasts, and recharges by USB-C? A VHF/UHF radio that not only receives NOAA weather alerts but has an IP67 rating against dust and moisture intrusion. Bluetooth pairing for easy management of the radio with an app. How about a KISS TNC and APRS? The ability to store and forward messages. A Bluetooth speaker-mic? A Bluetooth PTT button so you can use your favorite Bluetooth headphones or earbuds with this transceiver.
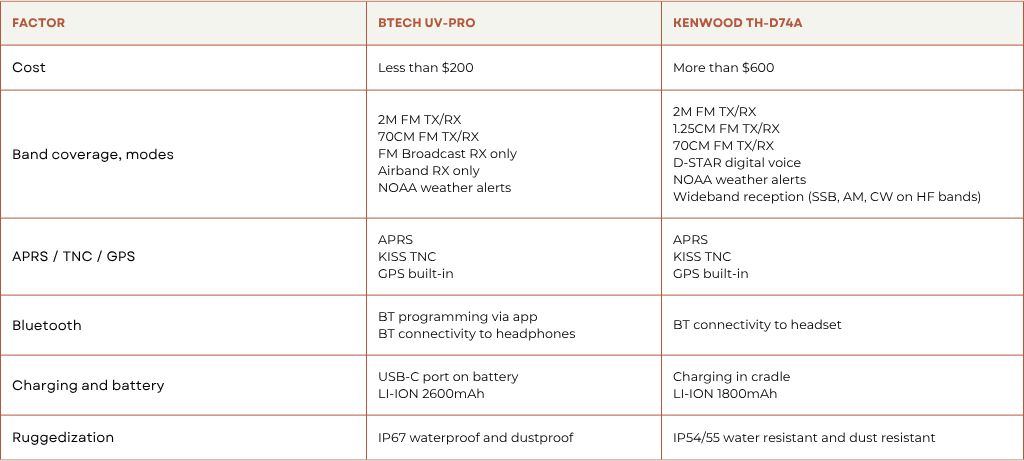
If that sounds like I’m talking about a Kenwood TH-D74A, others have thought that, too. The radio in question today is the BTECH UV-PRO. Here’s a high-level comparison of the BTECH UV-PRO and Kenwood TH-D74A that might help you decide whether to keep reading:
If you want D-STAR, 1.25cm/220MHz TX/RX, and wideband RX on HF, the Kenwood TH-D74A (and its successor, the TH-D75A) is indicated. If you want airband coverage, programming via an app, a bigger battery and better resistance to water and dust intrusion, the BTECH UV-PRO is indicated. To me, the BTECH UV-PRO represents a great value.
The BTECH UV-PRO can be acquired from Amazon:
(As I write this, the price has dropped to $140 which is $25 less than what I paid!)
Three versions of this radio
There are three versions of this radio, each branded differently:
BTECH UV-PRO
They are all pretty much the same, with minor differences in menus and configuration choices. I’m not going to detail the specific differences here, especially since the first YouTube video below covers the high points of differences between the VR-N76 and the UV-PRO.
“Any color the customer wants, as long as it’s black.” Henry Ford
If you are happy with a black-colored radio, well, the Radioddity GA-5WB only comes in black. The BTECH UV-PRO is available in black and in tan. If you want a wider color range, take a look at the VR-N76. I wanted the radio in tan, so that pointed me to the UV-PRO.
Instructional and review videos are available
If the features of the BTECH UV-PRO sound interesting, you’ll find these next two videos very informative. The first introduces the BTECH UV-PRO and its sister radios. I’m sure you’ll notice how similar the BTECH UV-PRO and VGC VR-N76 radios are, side-by-side:
The second demonstrates direct operation of the UV-PRO radio:
More great videos on the UV-PRO are available from the The Comms Channel. Find them with this query: https://www.youtube.com/@The_Comms_Channel/search?query=UV-PRO
It looks like Reddit also has quite a bit of how-to information from folks who own the BTECH UV-PRO radio. Hit this query to find many threads about it: https://www.reddit.com/r/amateurradio/search/?q=BTECH+UV-PRO
I’m looking forward to playing with APRS on the UV-PRO and getting Winlink running through the KISS TNC. For APRS, I think I’ll follow the set-up instructions for the VGC VR-N76 radio (the basis for the BTECH UV-PRO) at https://www.verotelecom.com/How-to-use-APRS-on-VR-N76-two-way-radio-a714977.html.
For Winlink on Android, I’ll be investigating WoAD. I went ahead and bought RadioMail for iOS which runs perfectly on my iPad Mini.
The UV-PRO is not perfect
No radio is perfect. That’s a given. How about the UV-PRO? Well, the buzz on this radio isn’t always good. While I’m happy with my acquisition, I want to be sure you’re aware that not everyone is pleased with the UV-PRO. Here are some threads and articles I found that you might find informative.
https://www.reddit.com/r/amateurradio/comments/1f8tnl4/review_of_the_btech_uvpro/
https://www.reddit.com/r/amateurradio/comments/1gujgn5/vgc_vrn76_or_btech_uvpro/
https://www.reddit.com/r/amateurradio/comments/1fbe7wd/short_video_testing_uvpro_vs_direwolf_for/
I find the user manual to be rather thin, both in size and content. While it provides the basic information needed to get started with the radio, it feels a bit light. A good user guide would help new users make full use of this radio’s capabilities.
I’ve read or heard some concerns about water getting into the SMA connector, the USB-C port, and under the battery. However, I have not heard of any UV-PRO radios that have been compromised by water entering those places. In particular, the electrical contacts under the battery are gasketed to prevent water intrusion. My guess is there would be complaints posted online if people were experiencing equipment failures due to water ingress. You can run a Google search if you are interested in this topic: https://www.google.com/search?q=BTECH+UV-PRO+WATER+INGRESS
Radio received, box opened
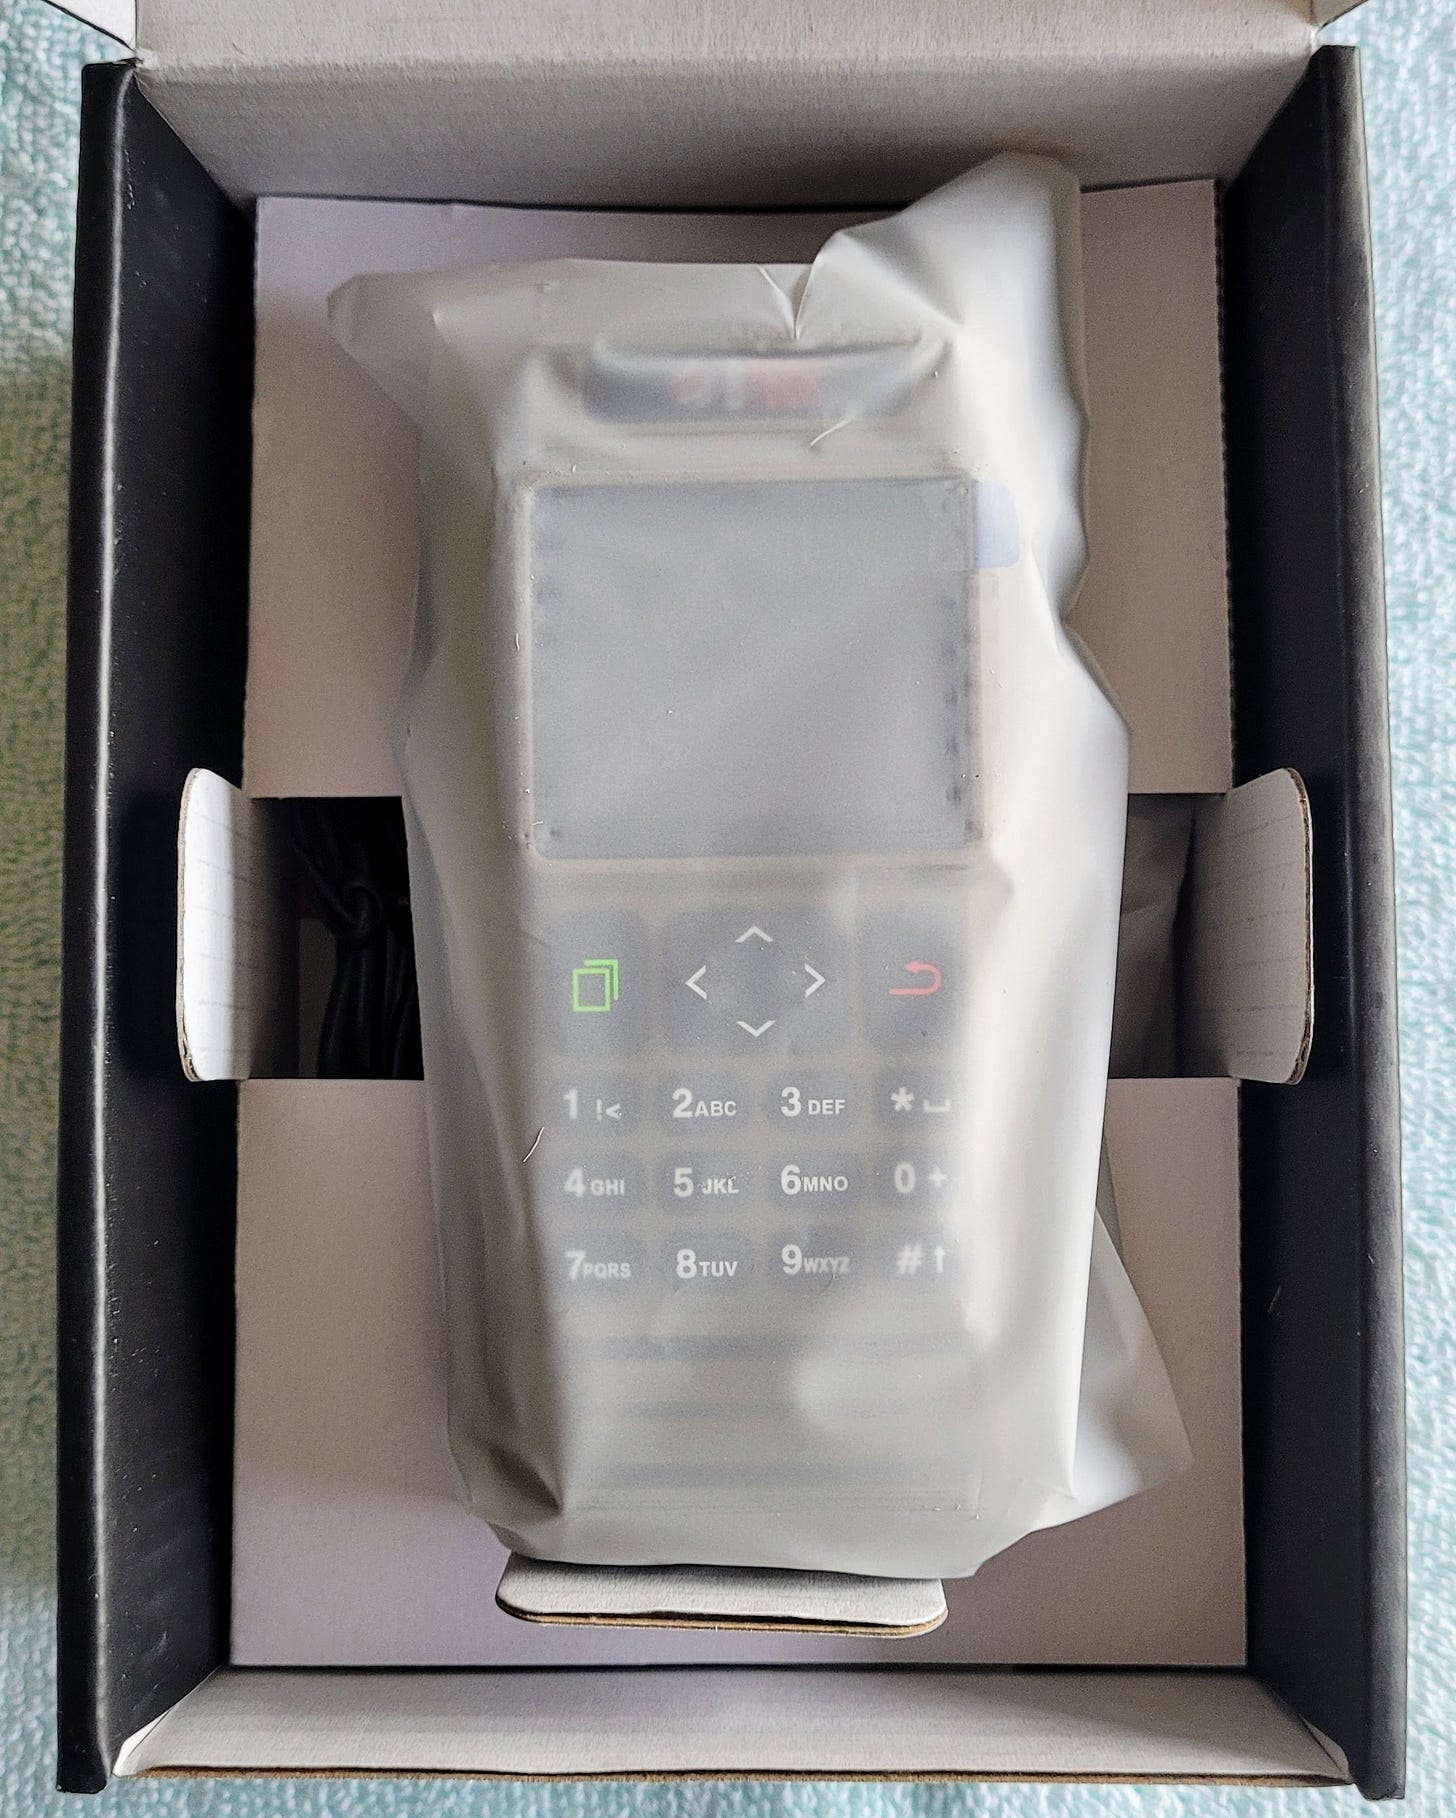
I received the BTECH UV-PRO radio this week and my first thought was: this is a small box! When I opened the box, the contents looked remarkably plain and uncrowded.
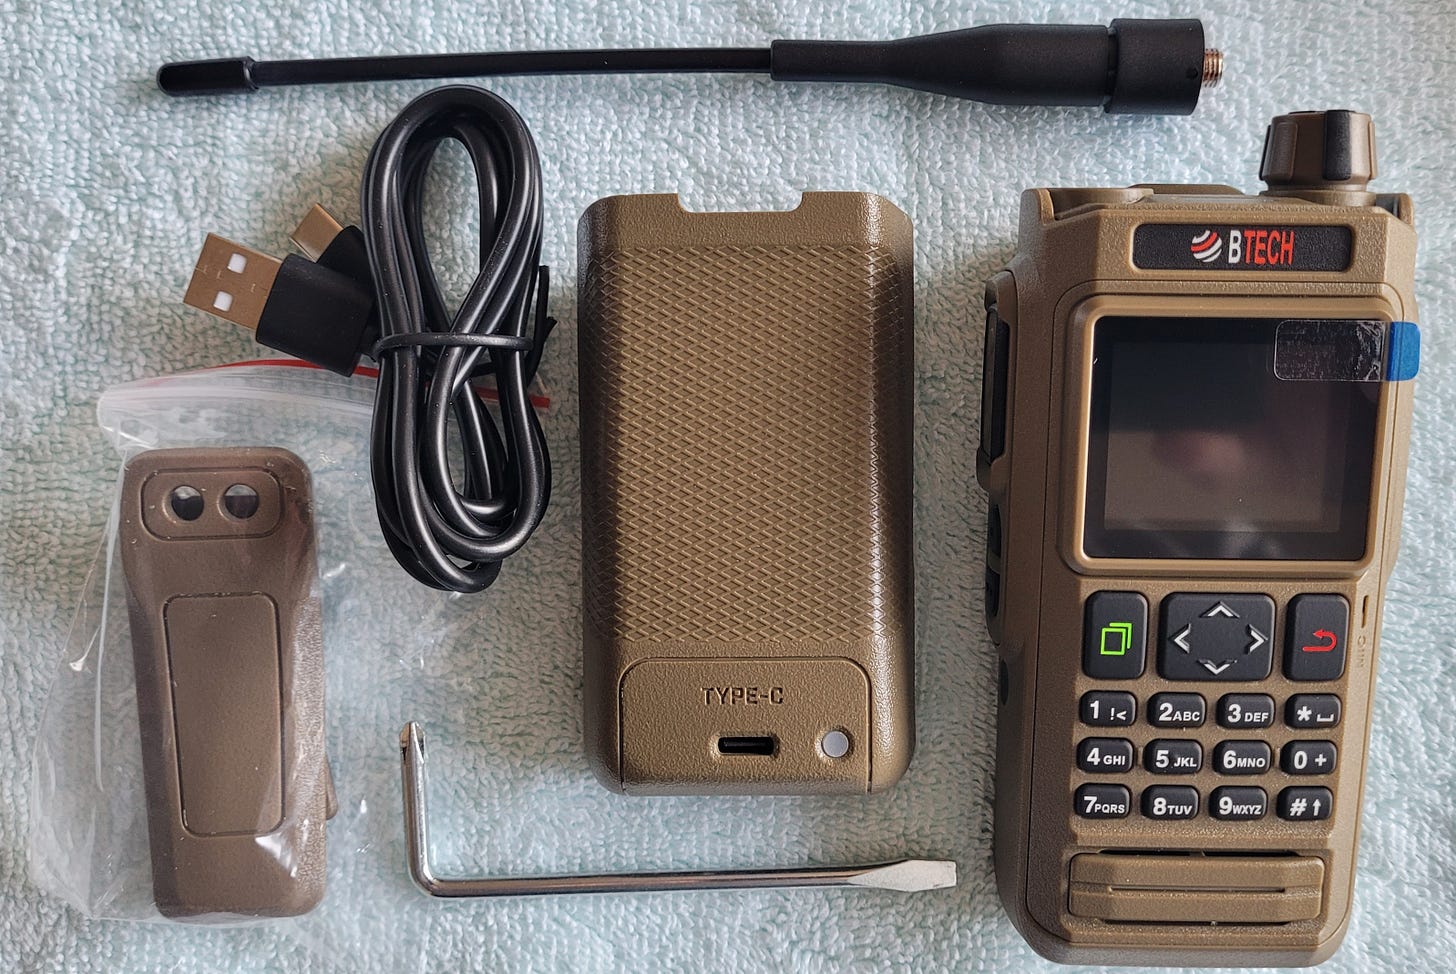
When you open the box, the radio body is front and center. All other items (including the thin manual) are in the compartment underneath the radio.
My mild misgivings began to dispel as I lifted the radio out of the box and removed the protective plastic sleeve. I liked the color, the easy-to-read buttons, and the simplicity of the controls. (Obviously, with so few buttons, this radio will depend on menus).
When I installed the battery and held the radio in my hand, I had an “ahhhh” moment. It felt good in my hand. There is some texture to the case that could be a bit more pronounced, but it is not too smooth. The radio with the battery installed fits perfectly when I hold it. I like the weight, too: not too light and not too heavy. It feels like…well, like a real radio.
Is it a heavy radio?
On the question of weight, one report I read said the radio was so heavy it pulled down the user’s belt. Here are the weights of several popular handheld radios for comparison, each with the stock battery and antenna installed:
12.2 ounces: Kenwood TH-D74A
11.6 ounces: Icom ID-52A
11 ounces: BTECH UV-PRO
9.95 ounces: Yaesu FT-5DR
9.9 ounces: Anytone AT-D878UVII Plus
8.3 ounces: Yaesu FT-70DR
From this comparison, it seems clear that while the BTECH UV-PRO is heavier than some popular radios, it is not as heavy as some others. If weight is important to you, please bear in mind the heft of the UV-PRO.
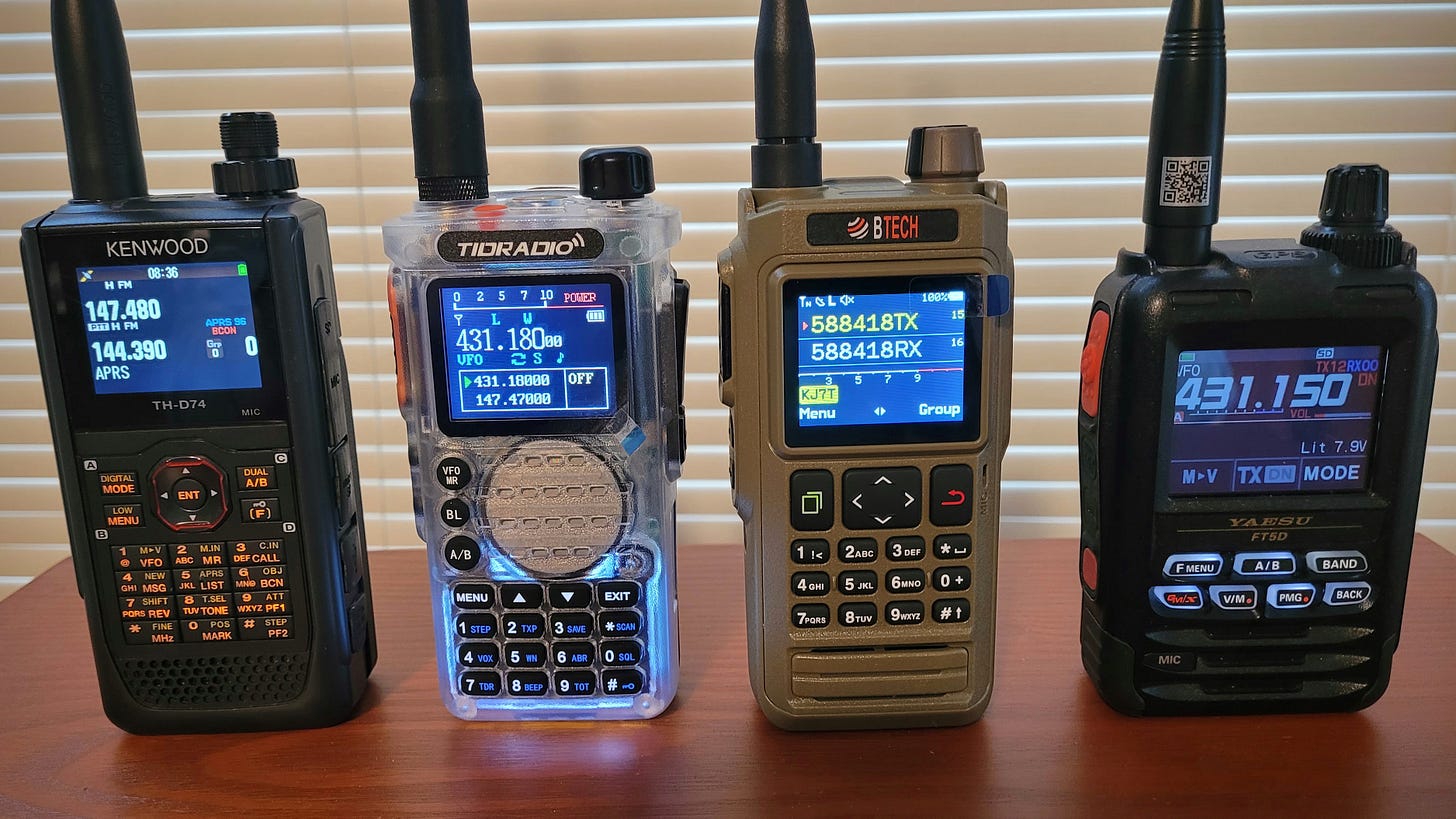
Here is a visual comparison of the UV-PRO size and display alongside a few other radios in my travel box:
My first impressions of the UV-PRO boil down to: I like this radio!
It has a great display
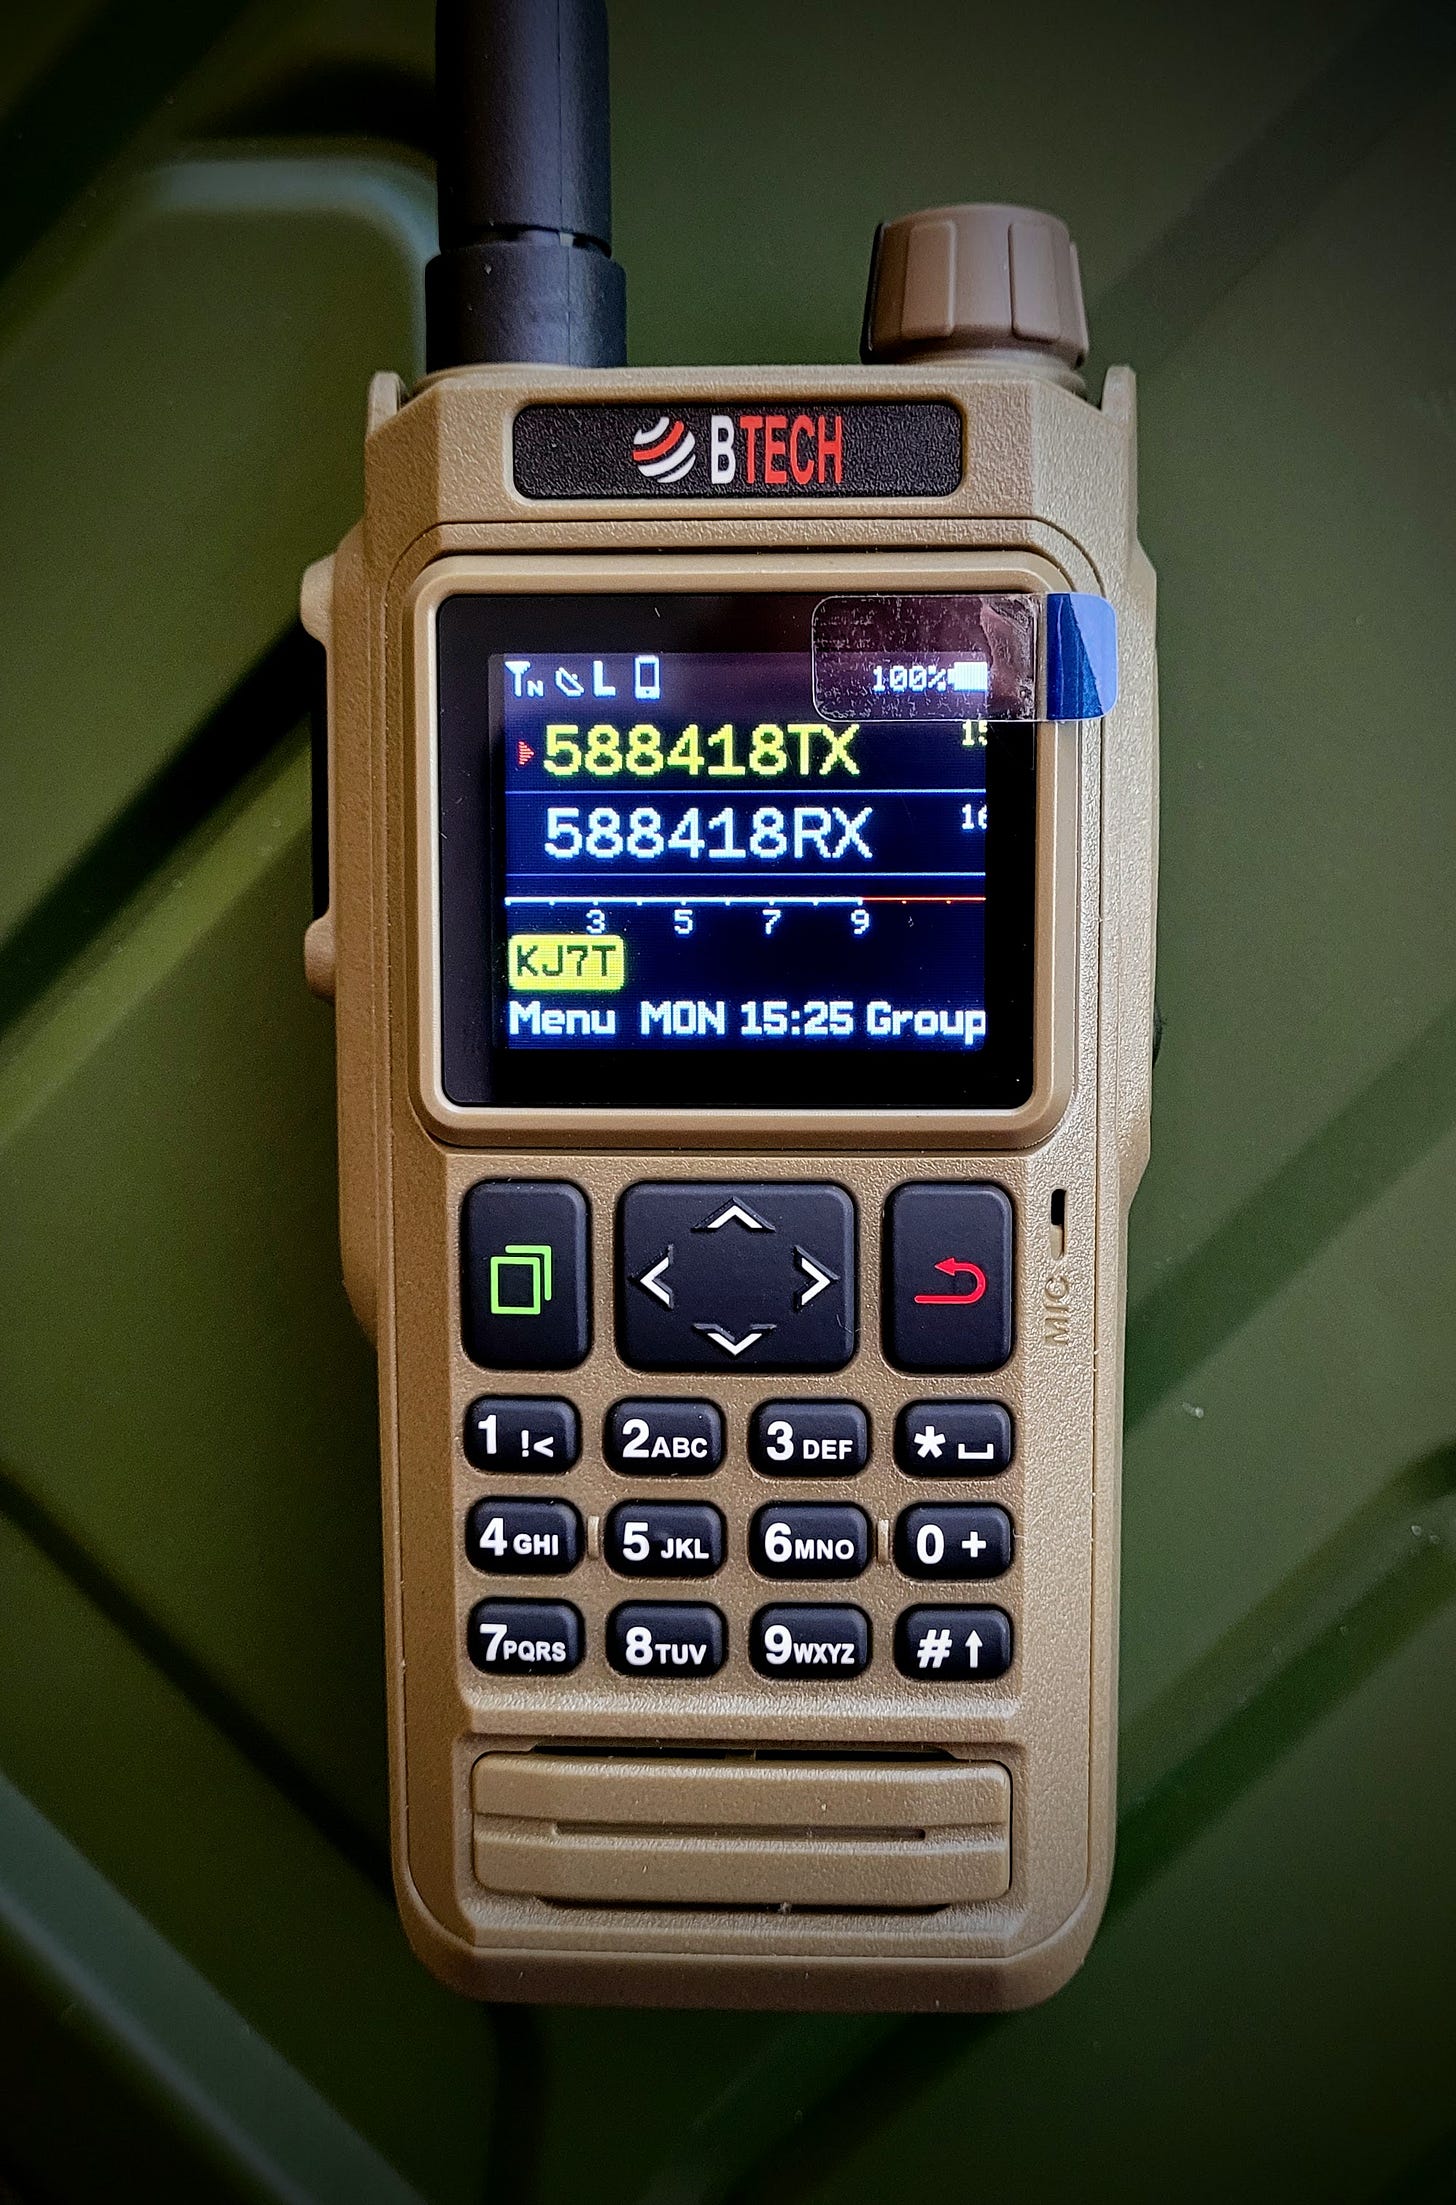
The display is wonderful, with clear, bright, large fonts. I don’t need my reading glasses to operate this radio! In the photo below, my cell phone camera makes the letters and numbers look a bit fuzzy and unfocused. In real life, the information in the display is much clearer and crisper. The camera also sees the background in the radio display as blue but what I see in my hand is a black background. Out of the box, the brightness is set to the maximum (level 15), suitable for viewing outdoors on a sunny day.
UPDATE: I took a few dozen photos and finally got one image that looks more like what I see. The tan body might have a bit more olive green tone than the photo below shows, but the display is closer to the black background I see:
Note that the registration of the screen edges is slightly off, as shown by channels 15 and 16 which appear cut off along the right side of the image. They are fully there and visible, but only if I look at the screen at an angle. The black masking along the edge of the display interferes a bit but doesn’t really detract from the usability of the radio.
There is an app for that
Welcome to the age of amateur radio where Android and iOS applications allow you to configure and modify your radio with your smartphone or tablet. After the app was installed on my phone and the initial configuration completed, the app opens to a map. Apparently, the GPS is working because the location is correct!
I know that having an app for an amateur radio feels like anathema to some. For me, I find it to be a helpful convenience. Configuring directly on the radio is not difficult, but configuring and managing the radio is often even easier with the app.
Without opening the manual for guidance, I added channel 15 and 16 for my AllStar node, with 15 set to the TX frequency of the handheld (transmitted from the handheld and received by the node) and 16 set to the RX frequency (sent from the node and received by the handheld). I named them accordingly to help me remember what they do. You can see those two channels in the two photographs above.
You see this in action in the map photo above where the information box shows the two channels, and in the photo above that where 588418TX is in the top VFO position and 588418RX is in the bottom position. With the radio set to dual watch mode, and 588418RX configured as a receive-only frequency, this setup works perfectly with my AllStar node.
Using the app to edit a channel is a snap. The left half of the photo below shows the channel selection screen. Pressing and holding a channel gives you the option to edit the channel as shown in the right half of the photo.
Upgrading firmware over Bluetooth is easy
Once I had the radio connected to my smartphone over Bluetooth, I found the firmware upgrade option in Device Settings. Clicking on Firmware version starts the process of checking the installed firmware against the latest available. If a newer firmware is found, you are presented with the option of installing it.
The first thing I did when I received the radio was charge the battery. The second thing was to update the firmware. The update took several minutes but the process went very smoothly. That was reassuring.
About the battery
The battery is substantial
Relative to the body of the radio, the battery is fairly large. It is easily attached, sitting on the battery space and sliding into position. It feels like the battery is positioned on rails but it is really the two-level configuration of the battery case that creates that impression.
A latch on the bottom locks it in place. I always make sure the latch is completely closed.
Charging is persnickety
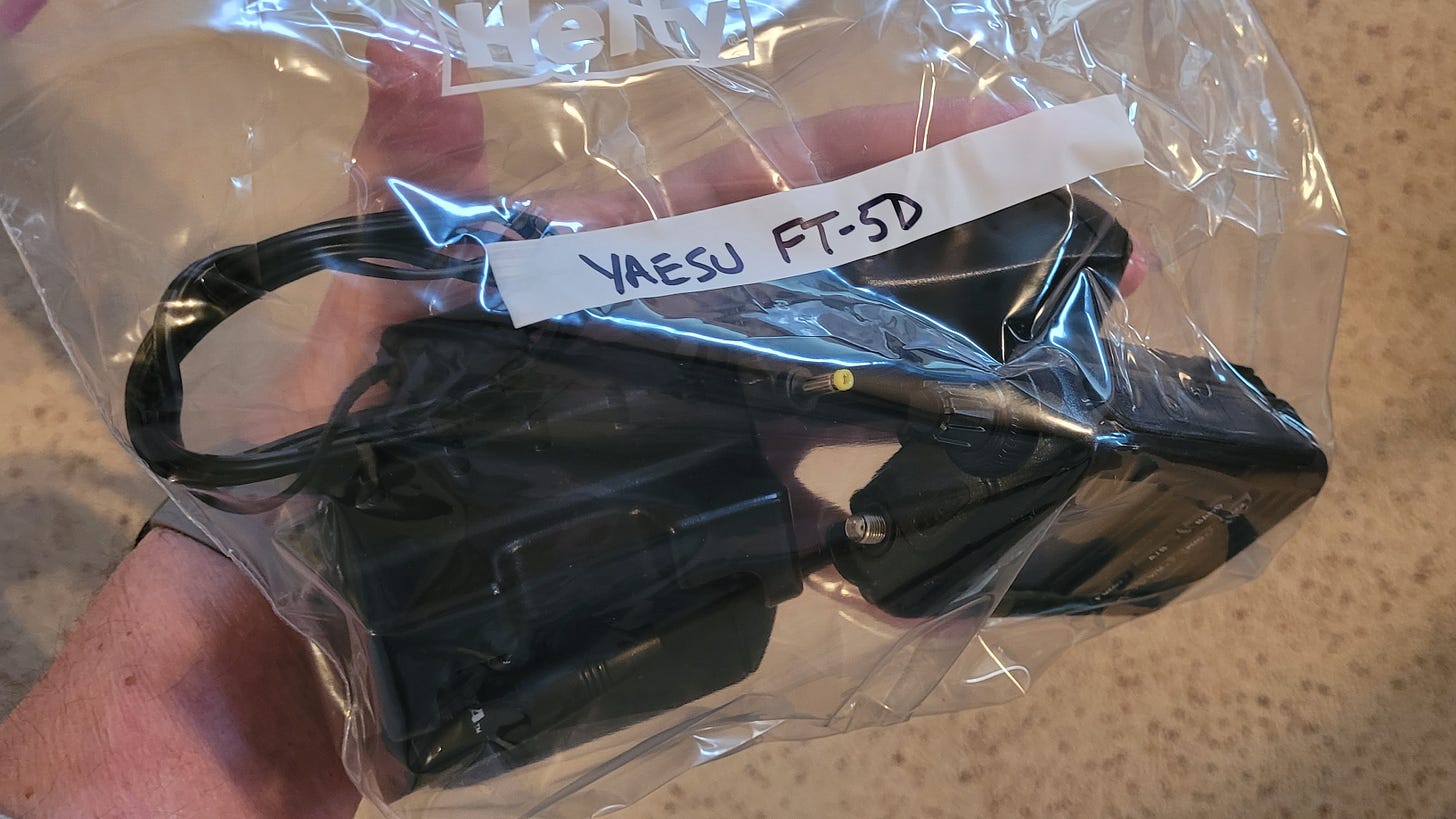
I found that a high-powered USB charger — in my case, a 65-watt Anker-brand charger — did not work to charge the radio. What does work is a low-amperage USB charger like the ones we used to get with a Kindle, something like this:
On the plus side, the USB-C charging port is located on the battery, not on the radio. This means you can charge a spare battery even while you are using the radio. The position of the charging port on the back of the battery, instead of on the bottom, means you can stand the radio on a shelf, table, or desk while it is charging. I confirmed that it will receive while charging but I did not try transmitting with it plugged in.
The LED is red while charging and turns green when charging is complete. With the high-powered charger, the LED remained dark.
Desktop stand from Etsy
I picked up a desktop stand for the BTECH UV-PRO from Mike N3HAK who sells a variety of 3D-printed radio stands through his BlackLodgeCreative Etsy store. (I like to patronize businesses of other radio amateurs whenever possible. I own several stands by Mike.)
Since the USB-C charging port is on the back of the battery and not on the bottom of the radio, Mike also designed a cutout space on the back of the stand so you can charge the battery with the radio in the stand.
If that rear opening looks a little odd — and it might, because the rear view shows a left side that is not the same as the right side — it’s because Mike also recognized that you would want to see the charging LED. His asymmetrical design accomplishes this. Well done, Mike!
Bluetooth speaker-microphone
I also bought the BTECH BS-22 Bluetooth speaker-mic. Unlike the Radtel wireless speaker-mic that requires a second piece plugged into the K-1 speaker-mic sockets, the BTECH requires no other pieces. It is larger than I thought it would be, but it isn’t heavy. I find it comfortable to carry around the house, clipped to my belt, when I want to listen to a net but have other household tasks to do.
The photo above also shows how the radio sits in the stand.
Radio bag
Wanting a bag to protect the radio and keep the bits and pieces associated with it in one place, I found an electronics bag on Amazon that works:
I was gratified when everything fit in the bag, which I bought in a tan color for my tan handheld radio.
The antenna is inside a sleeve made from a coffee stand straw. This isn’t robust protection, but it helps me see the antenna in the bag, protects it from scratches, and helps keep it straight inside the bag.
These electronics organizer bags come in a variety of colors, including black. Some have a lighter-colored interior, making it easier to see dark-colored cables and chargers buried in the bottom of the bag. And with dividers, these bags provide much more protection than keeping your radio in this kind of bag:
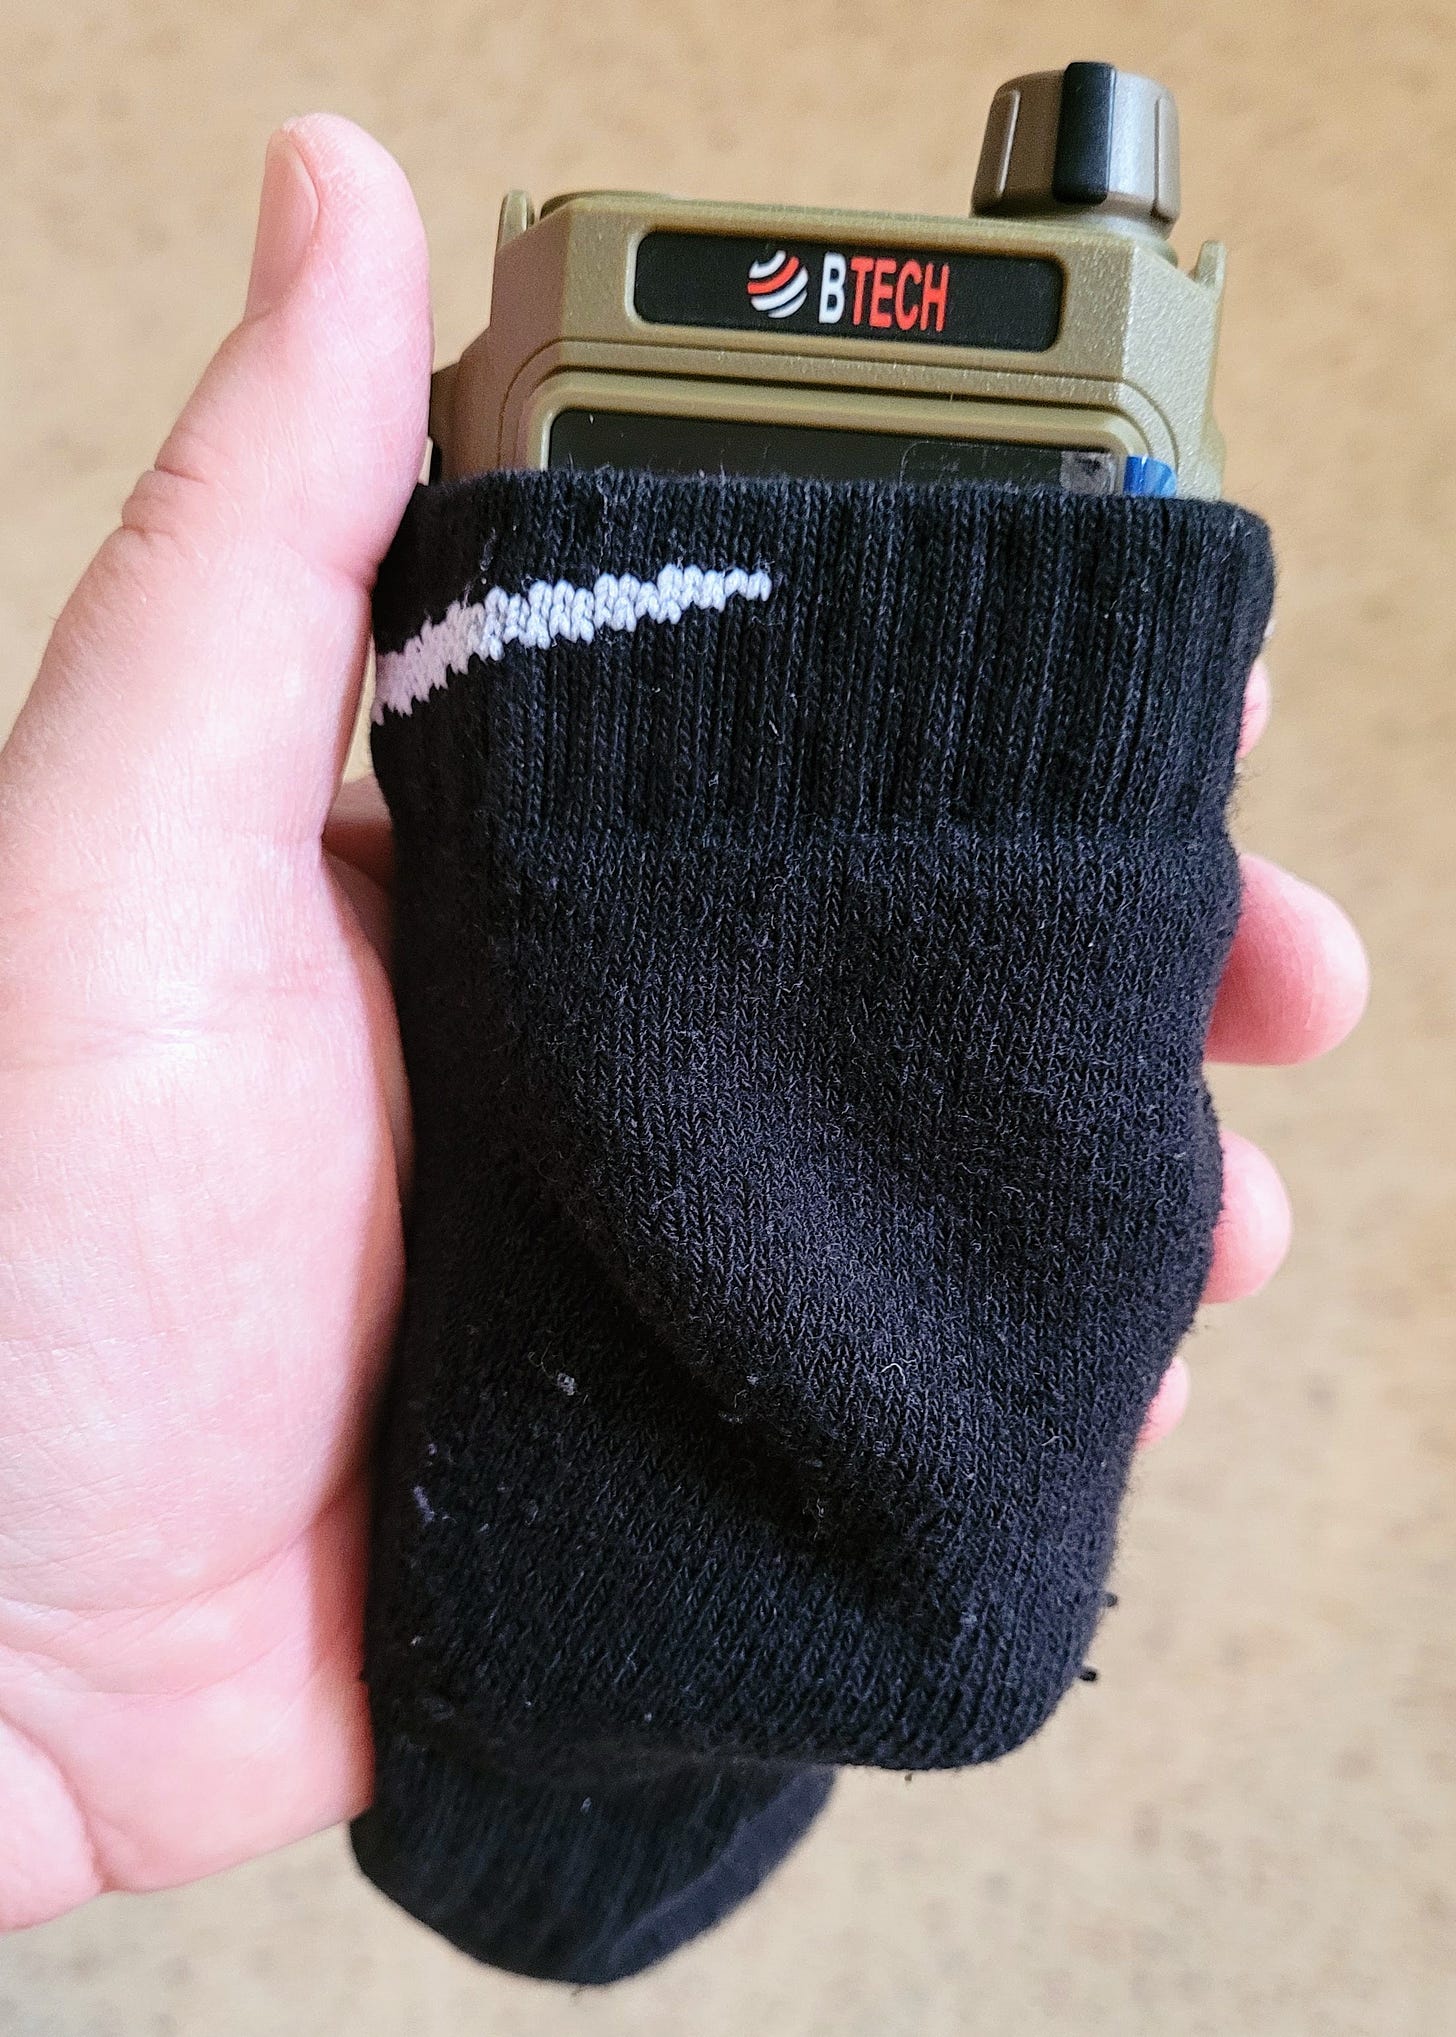
Usually, I also use a short sock as a protective sleeve over the radio, even when I have the radio in a bag or box. It’s a simple and inexpensive way to prevent scratches.
Additional impressions
I’ve noticed a few other things about the radio as I began to get to know how it works:
The receive audio is remarkably clear. This may be the nicest sounding analog handheld radio in my stable of radios.
Using the smartphone app makes managing the radio much easier. It took all of two minutes to program in the TX and RX frequencies for an AllStar node, without looking at the manual. That level of simplicity is very appealing.
APRS functionality on the BTECH UV-PRO is not at the same level as the Kenwood TH-D74A/D75A. However, firmware updates have addressed some weaknesses, so additional firmware updates may bring these two platforms closer together. For me, to most glaring problem is to use APRS on the UV-PRO, you can’t simultaneously use the radio for anything else. I can live with that because I usually have more than one radio with me. See this YouTube video for more: https://www.youtube.com/watch?v=GLvCidEsdos.
It is missing the 1.25 cm band (220 MHz). While I understand this band is underutilized, the crowding of 2 M and 70 cm bands suggests to me that the 1.25 cm band might see a resurgence in usage in the future.
Since the IP67 rating makes this a great choice for a field radio, a good case would be a valuable accessory.
I changed my wireless car adapter
My Motorola MA1 wireless car adapter has been giving me trouble for several months. It would forget how to connect to my Android smartphone and vehicle — usually when I was in the middle of an important trip — and I would spend a couple of hours each time resetting everything and setting it all back up again. Many times, I would do this on the side of a highway.
Since I spend a lot of time behind the wheel, this was very frustrating. Time consuming. And perplexing. The steps to make it work one time wouldn’t work when I repeated them exactly the same way the next time.
Then I saw the advertisement for the Ottocast wireless adapter, and I thought, yeah, right. It can’t be that much better, and it will probably be just like the MA1. However, when I read the reviews and saw the discount on offer, the price didn’t seem out of line, so I made the decision to hit the “buy now” button.
It’s been a good change. The Ottocast has been almost fuss free for the past couple of months, a very nice change indeed. It is available on Amazon:
The Ottocast is smaller than the MA1 and generally pairs with my phone more quickly. The size difference is significant for me because I was always having to move the MA1 around — it is a dongle with a short cable attached that always seemed to be in the way.
I’ve experienced fewer hiccups in music or audio books streaming from my phone through the Ottocast. I’m happy with this purchase.
If my content seems confusing…
If the content in this newsletter seems incomprehensible, please reach out to me at tsalzer@pm.me. I appreciate feedback and want you to get value from my content. Your questions and comments often guide me to new things to learn in this amazing amateur radio hobby, and I appreciate that.
I am a generalist. My college degree is in geology, and geology is really an amalgam of most natural sciences. This means I know a little about a lot, and I recognize that many subscribers know a lot more than I do. I value your experience and knowledge!
The next issue will feature the AllScan UCI90 USB Communications Interface with a Raspberry Pi Zero 2W to make a simple, small AllStar node.
73 to all. Remember to touch a radio every day!









The mobile app feels like the headline, here. Looks way more intuitive and convenient compared to programming through a CHIRP-like app or on the radio directly.
TH-d75 does air band too. I picked up one of these after buying the TH-d75 but haven't done much other than unbox and do some initial tests. It isn't all that clear how to get the TNC into KISS mode, or I'm just missing something. It does feel a lot more "substantial" in the hand compared to the TH-D75 but also weighs heavily on the belt. I had to use a "dumb" charger with it as well, I wish manufacturers would do more than just slap a USB-C connector on what used to be a mini or microUSB connector and actually make it detect PD chargers. And the SMA-RP connector is annoying too. But a good choice if you don't want to scratch up your TH-D75 for sure.