Random Wire Review 102: August 9, 2024
AllStarLink audio interface build progress, BeeStation for backup, WisMesh Pocket device arrived but malfunctioned (photos!)
In this issue of the Random Wire Review, I’m linking the podcast for this content right here. By doing this, I can still offer the podcast version of the newsletter without sending a separate email each week to your inbox.
Find the podcast at https://www.randomwire.us/p/random-wire-reflections-for-issue-731.
The podcast was recorded through a Behringer C-1 condenser microphone and a Behringer MIC500USB pre-amp, straight into Audacity. I adjusted the decibel levels in Audacity to avoid clipping and the audio was exported as a mono .WAV file. That file was then uploaded to Auphonic where the audio was leveled and some constant background static was removed. The file as processed by Auphonic is what you hear in the final production.
While I’m not thrilled that the Behringer C-1/MIC500USB package has a bit of fuzz to it, I think my voice sounds warmer than with any of my other microphones. Since Auphonic removed that very slight background noise, I’m pleased with how the final audio file sounds.
.-. .- -. -.. --- -- / .-- .. .-. . / .-. . ...- .. . .-- / -... -.-- / -.- .--- --... -
CONTENTS
1. AllStarLink Build Progress
1.1 Parts and supplies
1.2 Wiring notes
1.3 Plan
2. Tools & Links
2.1 BeeStation backup and cloud service
2.2 Adding telemetry to a Meshtastic node
2.3 Desk microphone for the Yaesu FTM-300DR
3. WisMesh Pocket (photos)
4. Closing
.-. .- -. -.. --- -- / .-- .. .-. . / .-. . ...- .. . .-- / -... -.-- / -.- .--- --... -
1. AllStarLink Build Progress
1.1 Parts and supplies
Listed below are the parts and supplies for this build. (If there is an asterisk beside a link, that means it is an affiliate link.)
Kenwood PC-1A Phone Patch Controller (this one on eBay looks to be in good condition).
Master Communications RL-20 Radio Adapter board (if you order a board, please tell Kevin you heard about it in The Random Wire newsletter).
I found the 6 Wire quick connector I wanted on a site called The Custom Saber Shop. That sounds a bit odd until you realize the sabers are light sabers with lots of electronics in them (jump to their sabers here if you’re into this kind of thing).
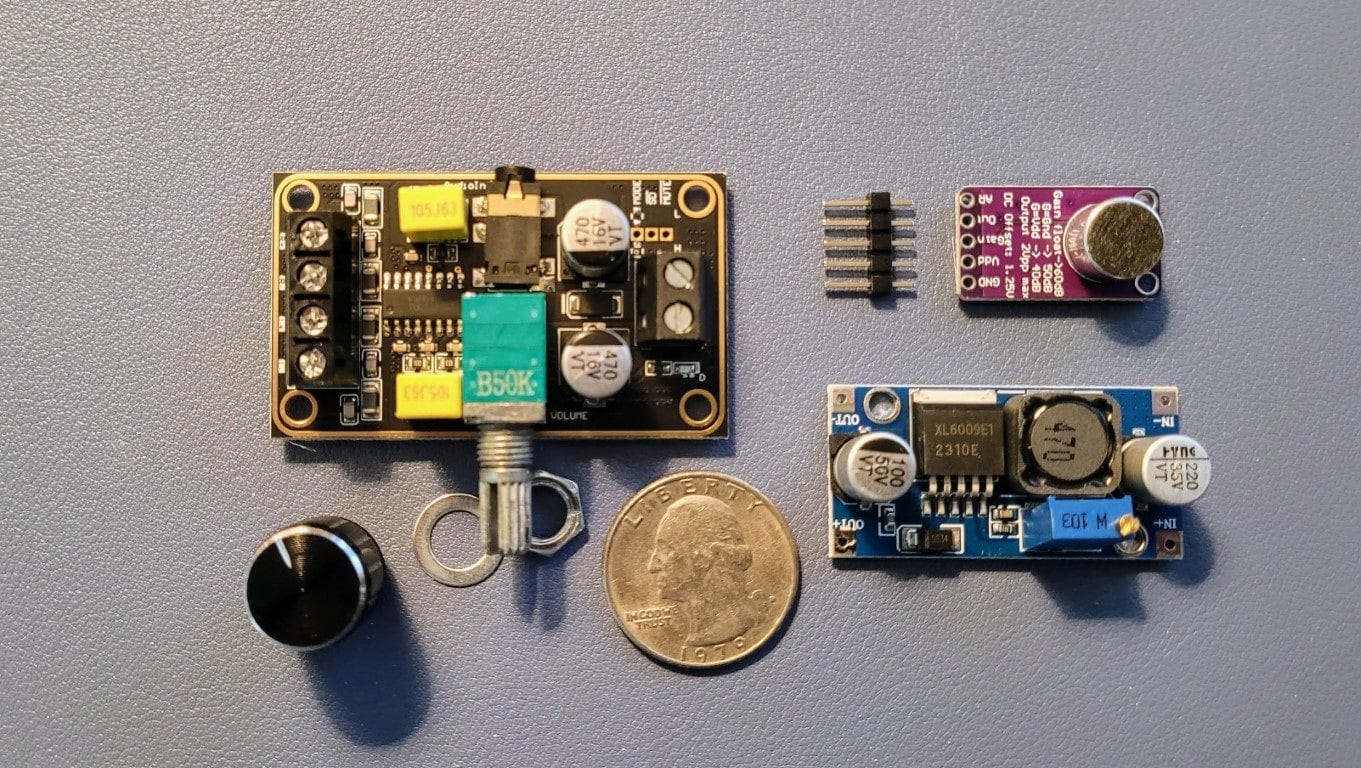
3PCS MAX9814 Electret Microphone Auto Gain Control Amplifier Sensor Module AGC Amplifier Board VGA Low Noise*
2Pcs Audio Amplifier Board, PAM8406 5W+5W Mini Amplifier Board Class D 2.0 Dual Channel DC 5V Digital Stereo Power Amp Module for DIY Sound System*
HiLetgo XL6009 Boost Module DC-DC Adjustable Module DC3.0-30V to DC5-35V Output Voltage Power Converter Circuit Board Module 400KHz*
1.2 Wiring notes
In general, I’m following the thinking demonstrated by David Gleason NR9V in his wiring diagrams at https://allscan.info/docs/radioless-node.php#wiring-diagram. However, since I’m using the Master Communications RL-20 board, I’ll also be digging into the guidance available for that board:
https://www.masterscommunications.com/products/radio-adapter/rl/rl20_docs.html
https://www.masterscommunications.com/products/radio-adapter/rl/pdf/RF-Less-Node.pdf
I’m also looking at this resource:
In the back of my mind is the possibility of putting a Raspberry Pi Zero into the PC-1A case…someday. There will be plenty of room for it, but I don’t really like the idea of the RPi inside the same case as the audio interface. Keeping them separate for now is how I plan to proceed, at least for this phase of the project.
1.3 Plan
RL-20 board
I’ve removed the PC-1A board from the case and the rear panel with screw connections. You can see below that the RL-20 board fits with room to spare in the PC-1A case. I’ve temporarily secured the board with one screw and have short standoffs underneath it to “air gap” it from the metal case.
A USB cable will connect the RL-20 board to the AllStarLink node (either the Dell Wyse 3040 thin client or the Beelink mini PC).
I have no plan for the open rectangle on the back of the case. I could leave it open for cooling or put the screw connector plate back in to fill that space. Or I could pass the USB cable through that nice, big opening.
On the front of the case, I’d like to find a small piece of frosted plexiglass to place there. I think that would allow light from the LEDs to show without being terribly distracting.
Quick disconnect
Then I’ll figure out the wiring for the 8-pin round mic connector on the front panel and where those wires are supposed to go on the RL-20 board. However, I’m going to wire the 8-pin round connector to one-half of the 6-pin quick disconnect. The other half of the quick disconnect will get connected to the RL-20 board and the potentiometer I use for volume control.
You can see the 6-wire disconnect in a build by W07T.
Audio amp for volume
To provide volume control, I’ll use a PAM8406 amp mounted to the front panel next to the meter, and wired to a rear speaker jack on the PC-1A. This device is intended to control audio volume out to an external speaker via a 3.5mm plug. It’s a little confusing to try to visualize this because there is a 3.5mm plug on the PAM8406 board, but that is for audio in, not audio out. The audio out comes off the block of four screw connectors.
I’m picturing the PAM8406 going between the 8-pin microphone jack and the RL-20 board. Can I wire it such that the two channels are combined into a single output channel? I don’t think so. I think the simple approach is to only use one channel. The earphone jack on the board is for audio input. The screw block on the left is for left and right channel stereo output.
In the WO7T build, it looks like audio out is only from the left channel. (The smaller screw block on the right is for power to the board.) He wrote:
The PAM8406 amp is a stereo amp, but only makes use of the left channel input and output since all Allstar audio is mono. The input to this amp, coming from the Pin2 of RL-20 is plugged in via a 3.5mm stereo plug, and wired to the tip of such plug. As always ground is the shield of the plug.
There is a lot of information in a data sheet available from Mouser. I’m also going to have to carefully review the RL-20 pinouts.
I’m not sure how to “lock in” the PAM8406 where it mounts through the front panel. Perhaps some Locktite where it goes through the panel would secure it well enough to keep it stable. I can also mount a few standoffs in the corners of the board to help keep it positioned against the base of the case. I have a feeling that standoffs and hot glue are going to be my friends in this build!
I would love to know how to wire in the front needle display to show volume in some way. If not, I’ll just leave it there because I like how it looks.
I have no clear idea of what to put in the second rheostat space. Perhaps that’s a good location for some frosted plexi as it will be closer to the actual LEDs on the RL-20 board. I should be able to see the TX and RX LEDs through that small window.
Boost for different microphones
If I can figure out what David NR9V did to allow different microphones to function well in his AllStarLink audio adapter device, I’ll use a MAX9814 and a switch to provide this functionality. However, for now, I may skip this and consider wiring it in at a later time. My Kenwood MC-60 desk mic won’t need the MAX9814.
Your ideas are welcome! I don’t do this kind of thing very often so I could use some help thinking this through.
Buck booster
I have no real need for the XL6009 buck booster module but wanted to have a couple in my parts bin. I can see the possibility of using a 12-volt wall wart to power the audio interface. In that scenario, I’d use the buck booster to convert 12VDC to 5VDC. This isn’t in my plan — it’s just a remotely possible scenario.
.-. .- -. -.. --- -- / .-- .. .-. . / .-. . ...- .. . .-- / -... -.-- / -.- .--- --... -
2. Tools & Links
2.1 BeeStation backup and cloud device
I like my older Synology DS-220+ network-attached storage (NAS) device. Synology now makes a more friendly device called the BeeStation. I’ve mentioned this 4-terabyte device before.
Ars Technica recently reviewed the BeeStation and they liked it:
The BeeStation’s best feature is how it makes good backup habits automatic. Within a couple of weeks of setting it up, I had both my and my spouse’s Drive and Dropbox accounts synced and regularly backed up; my older music, movie, and miscellaneous files stashed away; and our photos regularly backed up from our phones. All this was then backed up to Synology’s cloud servers every week (for an add-on cost), and everything was accessible remotely and on the local network.
If you dive into that article and read the comments (203 at the time I wrote this) you’ll find a lot of folks who think of themselves as more knowledgeable and sophisticated than the audience the BeeStation is aimed at: home users.
“If you're not ready for full-on NAS gear, consider this clever little drive.”
Take the pontificating and sense of superiority that comes through in the article with a grain of salt. The best backup can be the one you don’t have to think about. The BeeStation can provide that peace of mind and ease of use.
If you pull the trigger on this, it is available through Amazon but Synology has a better price at $220. The BeeStation is on my want list. An even simpler device is the BeeDrive, available in 1, 2, and 4-terabyte capacities.
2.2 Adding telemetry to a Meshtastic node
An article titled How To Add Telemetry Sensor To Heltec Lora v3 Meshtastic Node With BME280 caught my eye. I first got involved with Meshtastic with the idea that I could report temperature and humidity inside my moored sailboat over LoRa radio.
It doesn’t sound too hard to do:
…adding a Telemetry module to your existing Heltec V3 Lora ESP32 Meshtastic Node is a straightforward process that enhances the functionality of your device. The chosen hardware components, including the BME280 Module and header pins, provide a reliable and readily available solution.
2.3 Desk microphone for the Yaesu FTM-300DR
I wonder if any subscribers have thoughts on whether the Yaesu M-70 Desktop Microphone would work as a desk mic for the Yaesu FTM-300DR. That radio is not one that Yaesu shows as compatible with the M-70 microphone, but it appears the microphone uses the same modular plug. There might be a power issue (as in: power to the microphone) with the FTM-300DR.
Alternatively, I’m also eyeballing this mic: Sharman AV-508 Desktop Microphone. I invite opinions on this!
.-. .- -. -.. --- -- / .-- .. .-. . / .-. . ...- .. . .-- / -... -.-- / -.- .--- --... -
3. WisMesh Pocket
I’ve been excitedly waiting for my new WisMesh Pocket device from Rokland Tech. It arrived a few days ago and setup was quick and easy. However, I seem to be snakebit when it comes to these RAK-based devices as this is the second one (from a different vendor!) that worked for part of a day and then went dark.
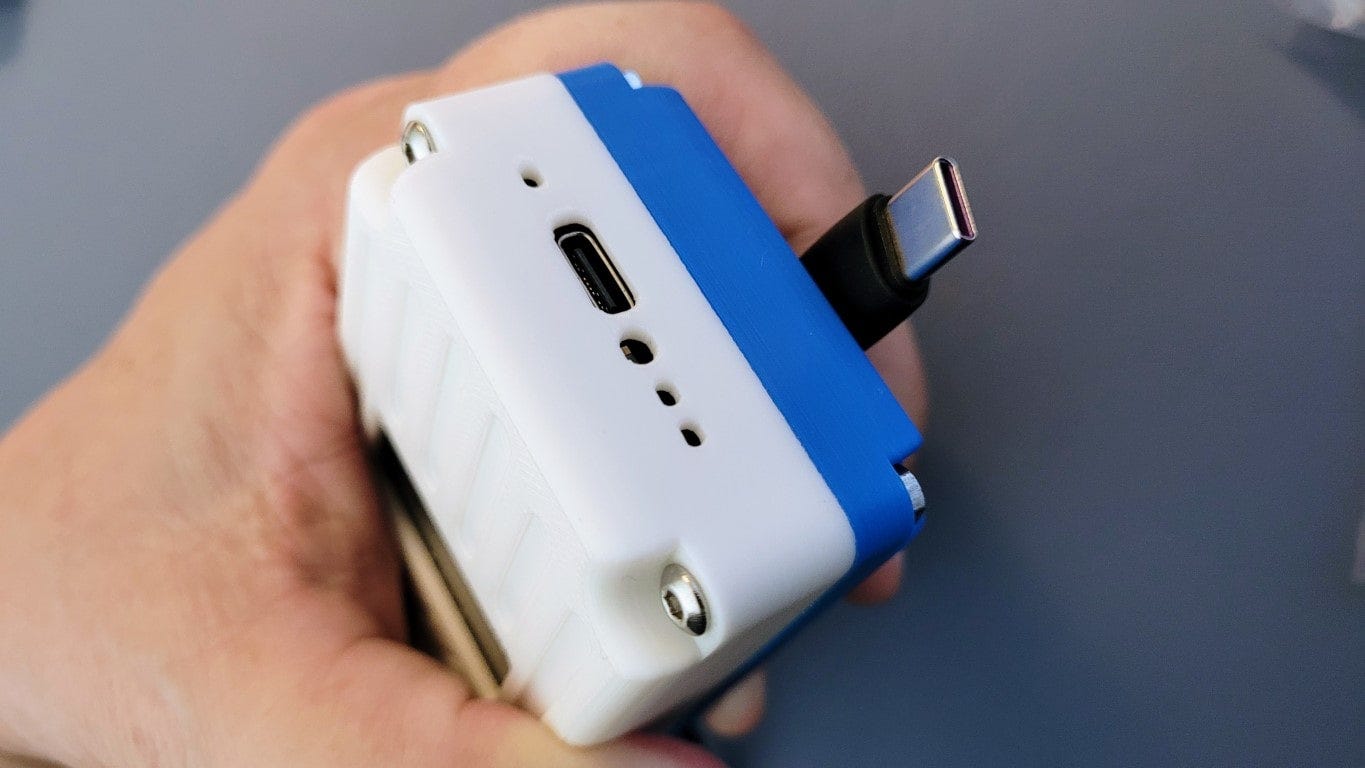
I can access it via a serial connection (USB-C) but I can’t configure it. The bootloader is up to date. I updated the firmware but that did not resolve the problem. The upshot of this is: Rokland Tech is sending me a replacement.
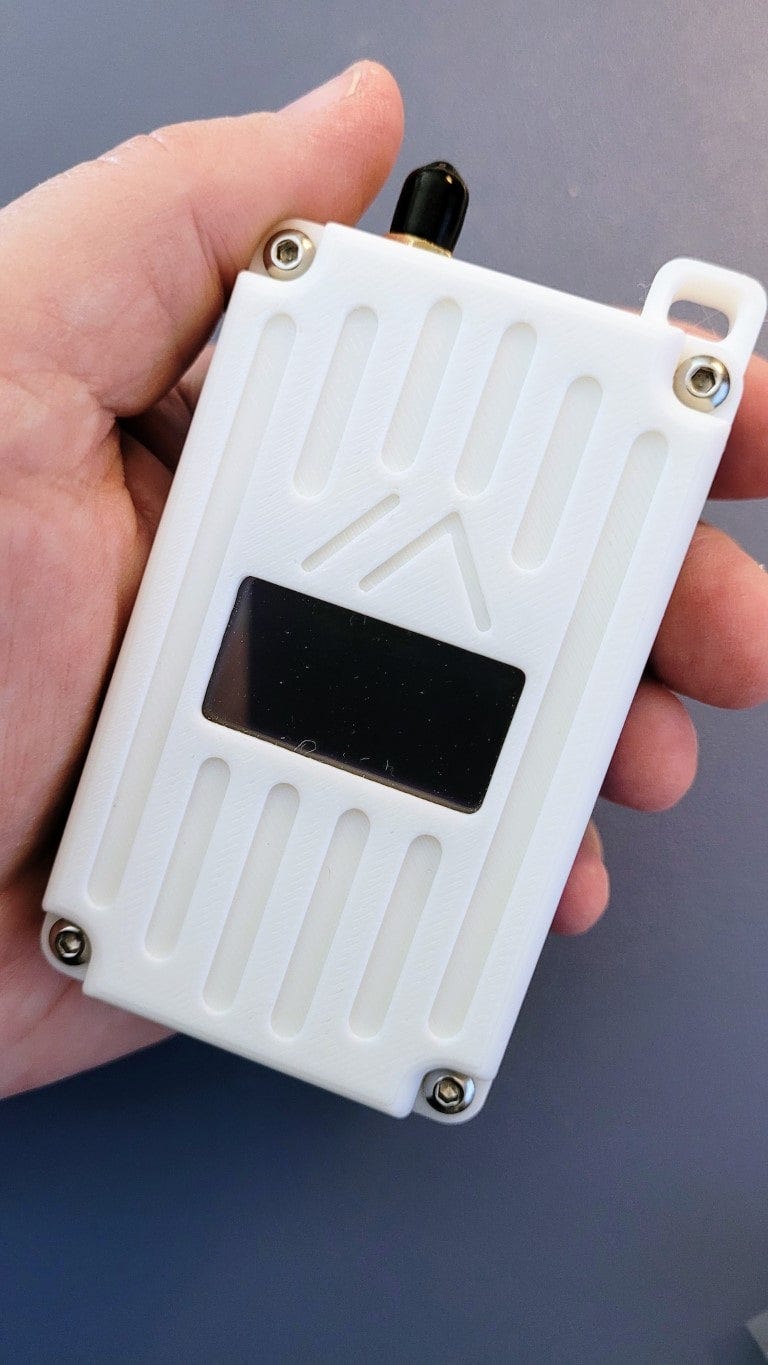
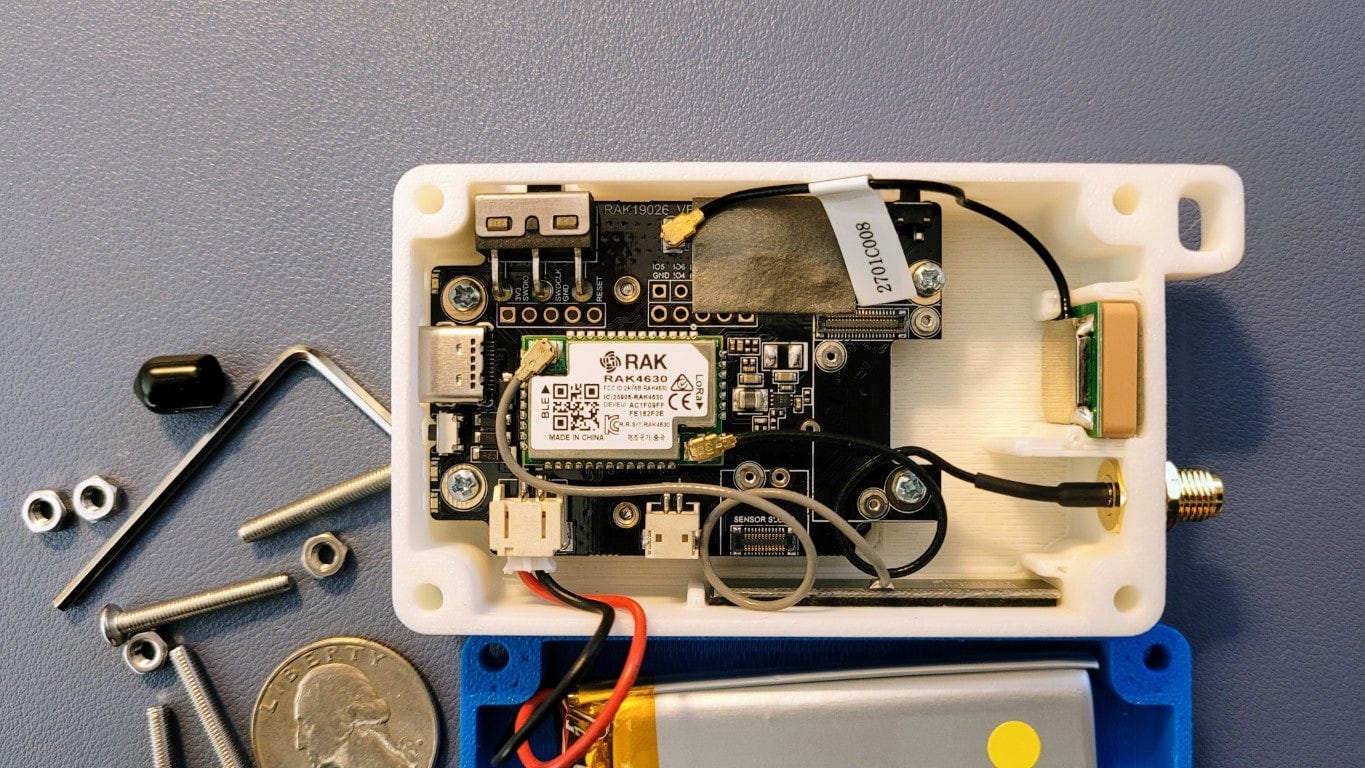
Meanwhile, let’s look at photos of the device. The unit looks good and feels solid. Inside, the interior layout is pretty clean. I think the ten photos below will give you an accurate impression of this Meshtastic device.
I appreciated the very basic instructions on the outside of the package. My other device (from a different vendor) came with no instructions at all, and also had an incorrect part installed. (I’m still working on fixing that device.)
.-. .- -. -.. --- -- / .-- .. .-. . / .-. . ...- .. . .-- / -... -.-- / -.- .--- --... -
Closing
I’m on the reunion planning committee for the 50th anniversary of our high school graduation. I also run the class website and publish the class newsletter. Along the way we decided to incorporate the reunion group so we’d be more likely to retain experienced reunion planners. We formed a 501(c)(7) nonprofit social club and incorporated in Washington State. All this adds up to: Tom has been busy.
Last weekend is when the work of the past year came to fruition with reunion events on Friday, Saturday, and Sunday. Friday was a tour of the high school, a golf tournament, and a no-host social in our old home town. Saturday was the reunion event where I got pressed into service taking photos. I collected more than 800 digital pictures and logged more than 6,600 steps. Sunday was a potluck picnic at a classmate’s country home.
As I write this section, it is Tuesday evening and I’m still tired!
.-. .- -. -.. --- -- / .-- .. .-. . / .-. . ...- .. . .-- / -... -.-- / -.- .--- --... -
I appreciate your interest in The Random Wire newsletter and amateur radio.
73 to all!


Another great read Tom!