

TechNote: Portable WIRES-X on the FT5D
TechNote-5, February 19, 2025: Everything you need to operate a Portable Digital Node on WIRES-X with the Yaesu FT5D handheld transceiver. #technote

TechNotes available
Portable WIRES-X on the FT5D
Here are the things you need and steps to take to use WIRES-X as a Portable Digital Node on your Yaesu FT5D handheld radio. (Note that Portable Digital Node, or PDN, is sometimes called a Personal Digital Node by some operators. They are the same thing.)
Register the radio
I knew I had to register the radio with Yaesu. To do that, I would need the RADIO ID. For the FT5DR handheld radio, find the RADIO ID with these steps:
Hold down the F MENU key until the screen fills with menu choices.
Tap the red GM choice.
You’ll then see two choices: DP-ID LIST and RADIO ID CHECK. Use the tuning knob to choose RADIO ID CHECK and then tap it.
Your RADIO ID should now be displayed.
When you are done, you can hit the PTT button to exit back to normal operation.
Then go to https://www.yaesu.com/jp/en/wires-x/regist/index.php to register your radio. Important note: if you already have a WIRES-X registration, you’ll need to use a different user name. I was unable to use my existing user name when registering.
And then wait. The last time I registered a radio (my Yaesu FTM-300DR mobile radio), it took several weeks. It turned out that my first submission didn’t make it all the way to Yaesu. Eventually, I submitted the identical information and a few days later, received the codes I would need to set up WIRES-X for Portable Digital Node use. (This time it took about three weeks.)
Get the driver and software
Once you receive your registration from Yaesu, the email instructions you to go to the WIRES-X page and click on “Node owner’s page” for the software:
However, this instruction is not complete. You also need to install the Prolific driver on your computer before you install the WIRES-X software. You can get the driver and the WIRES-X software from the main Yaesu website page for “WIRES Internet Linking” at:
At that page, click the Files tab, then scroll to the bottom of the page. Four places up from the bottom of the list is the Prolific driver installer. You’ll need that first. Once the driver is installed, grab the software at the bottom of the list for the WIRES-X Portable Digital Node Function PC Software. The current version at the time this was published was 1.550 dated 4/25/23.
Buy the cables
While waiting for my registration to go through, I purchased the SCU-57 interface kit from DX Engineering:
This was $52.95 with ground shipping. While I don’t think all of the included cables are necessary for what I want to do, I want to be sure I have what I need to make this work. Buying the cable kit is the simplest way to get there.
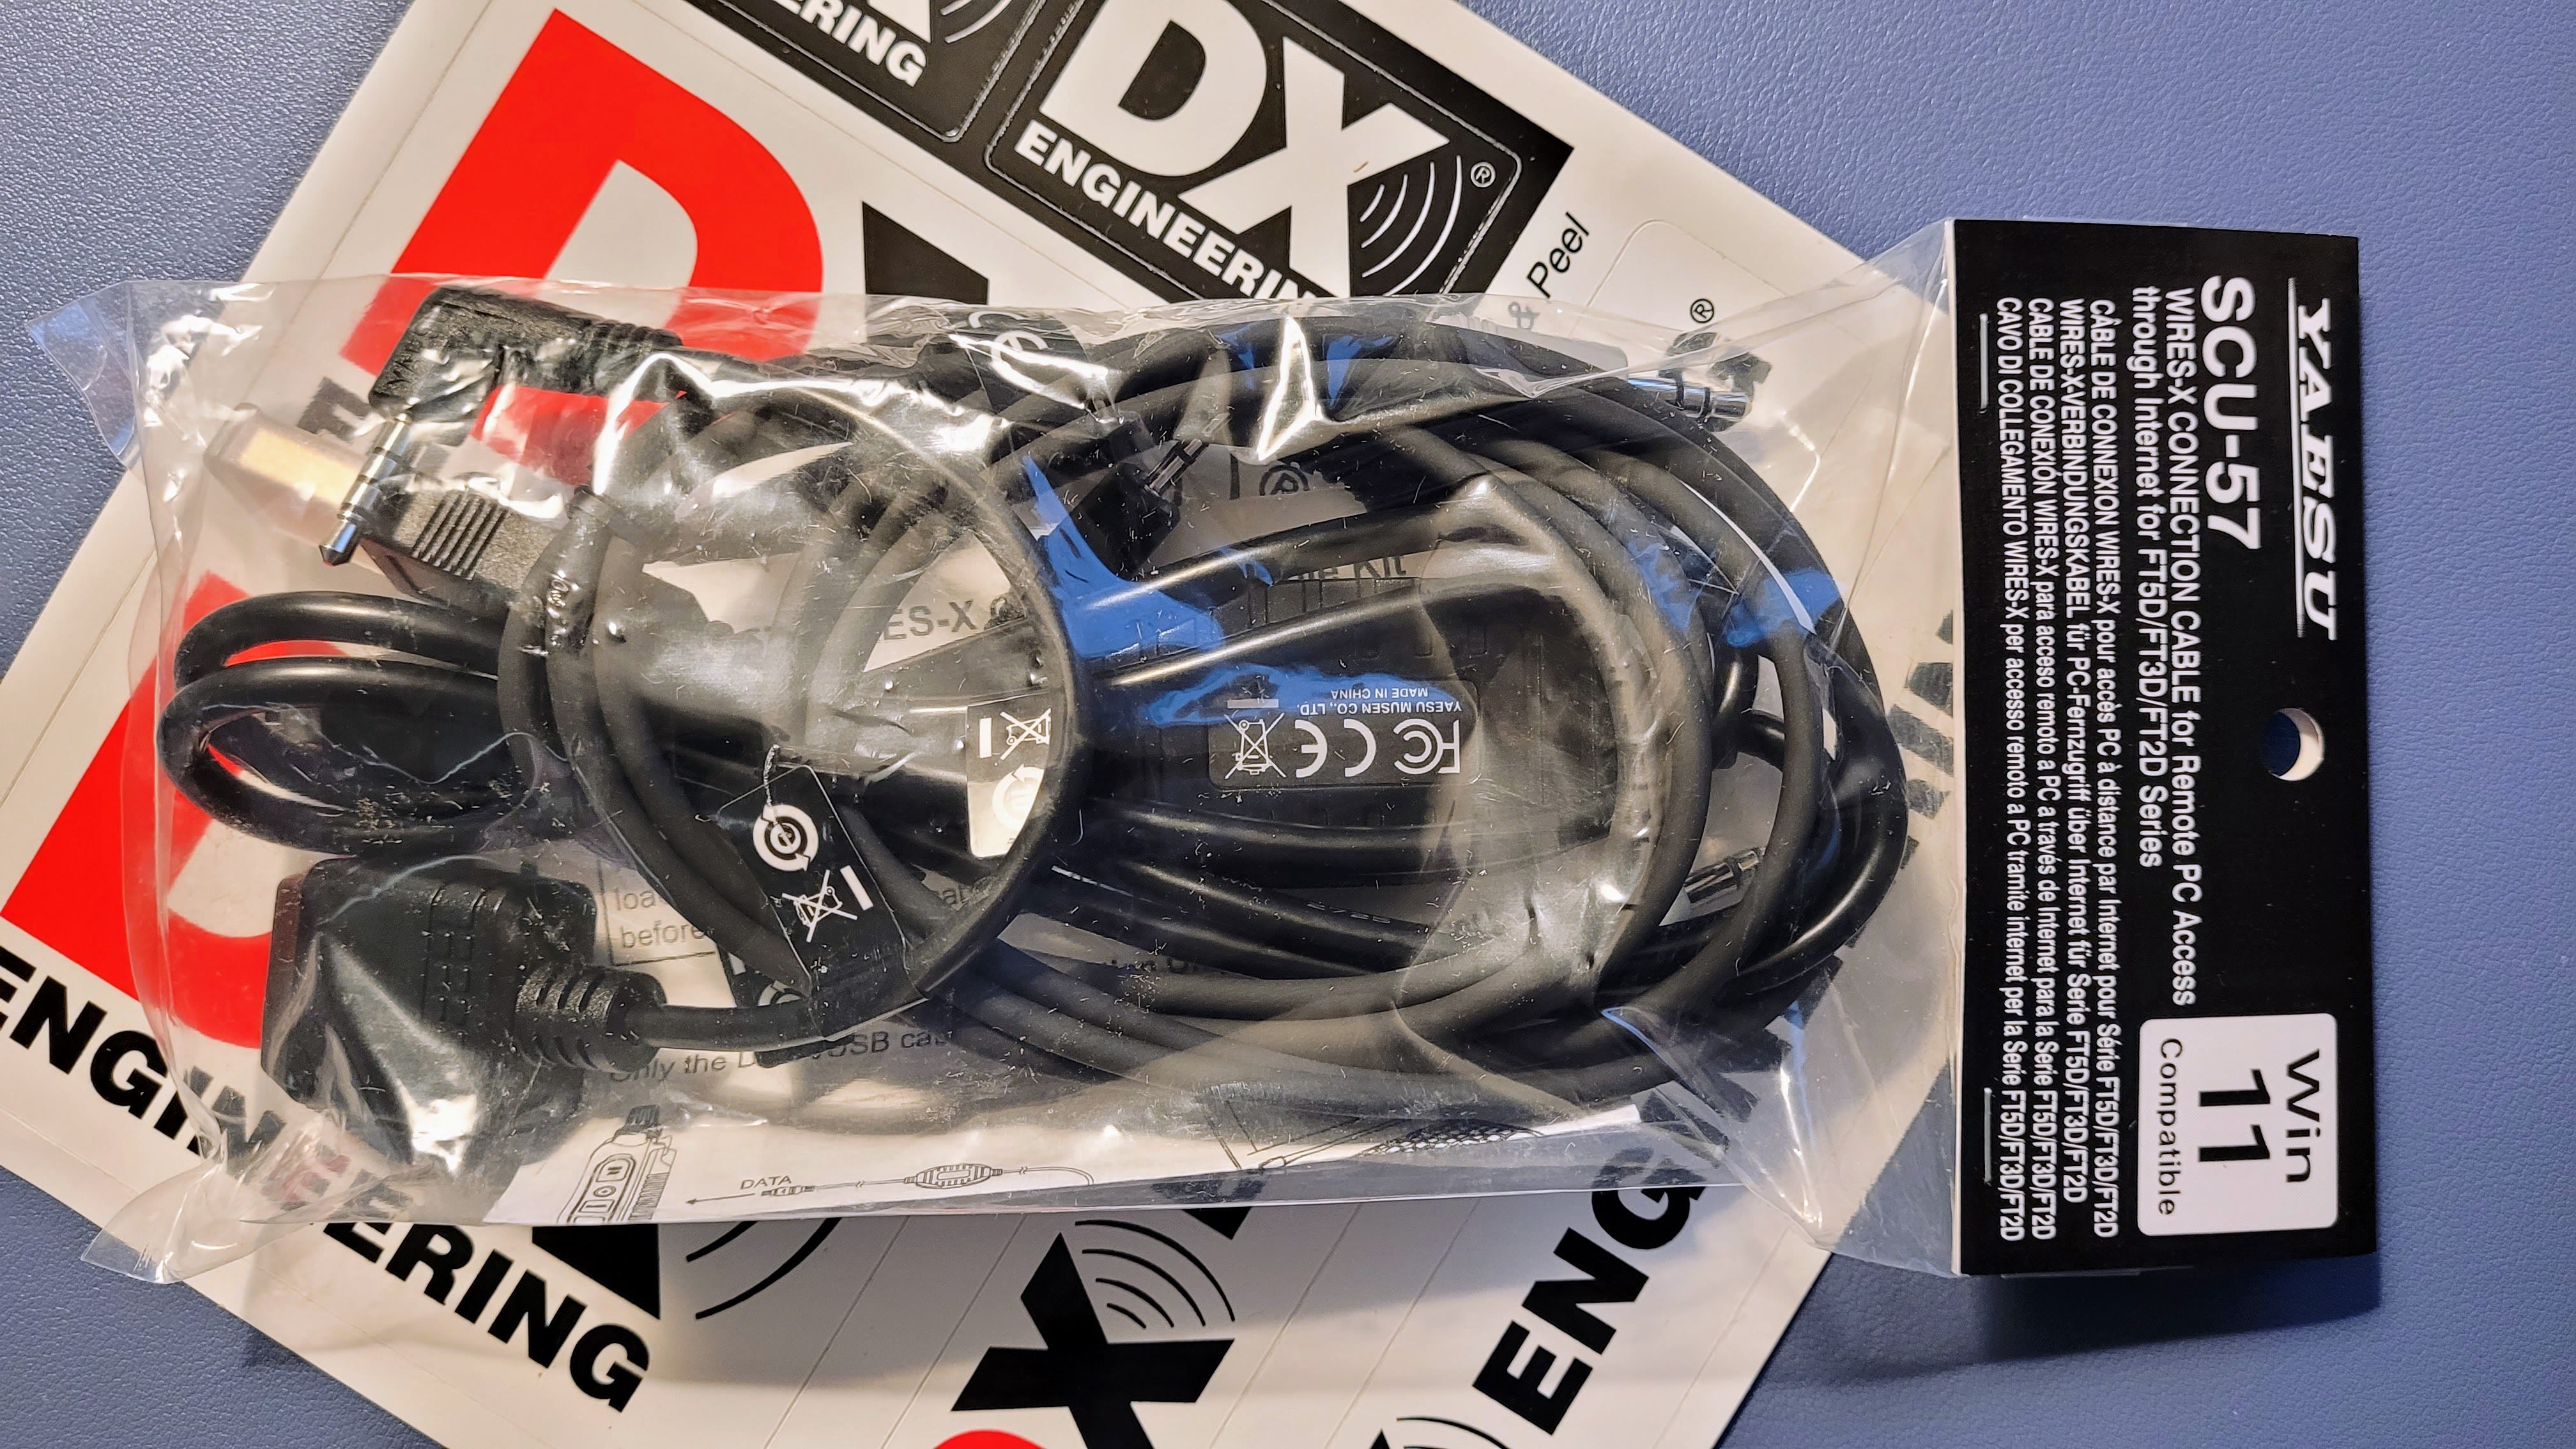
I learned, however, that all you need are two things: the SCU-55 cable (not the complete kit) and a USB External Stereo Sound Adapter. However, I haven’t found the SCU-55 cable available except as part of the SCU-57 connection kit.
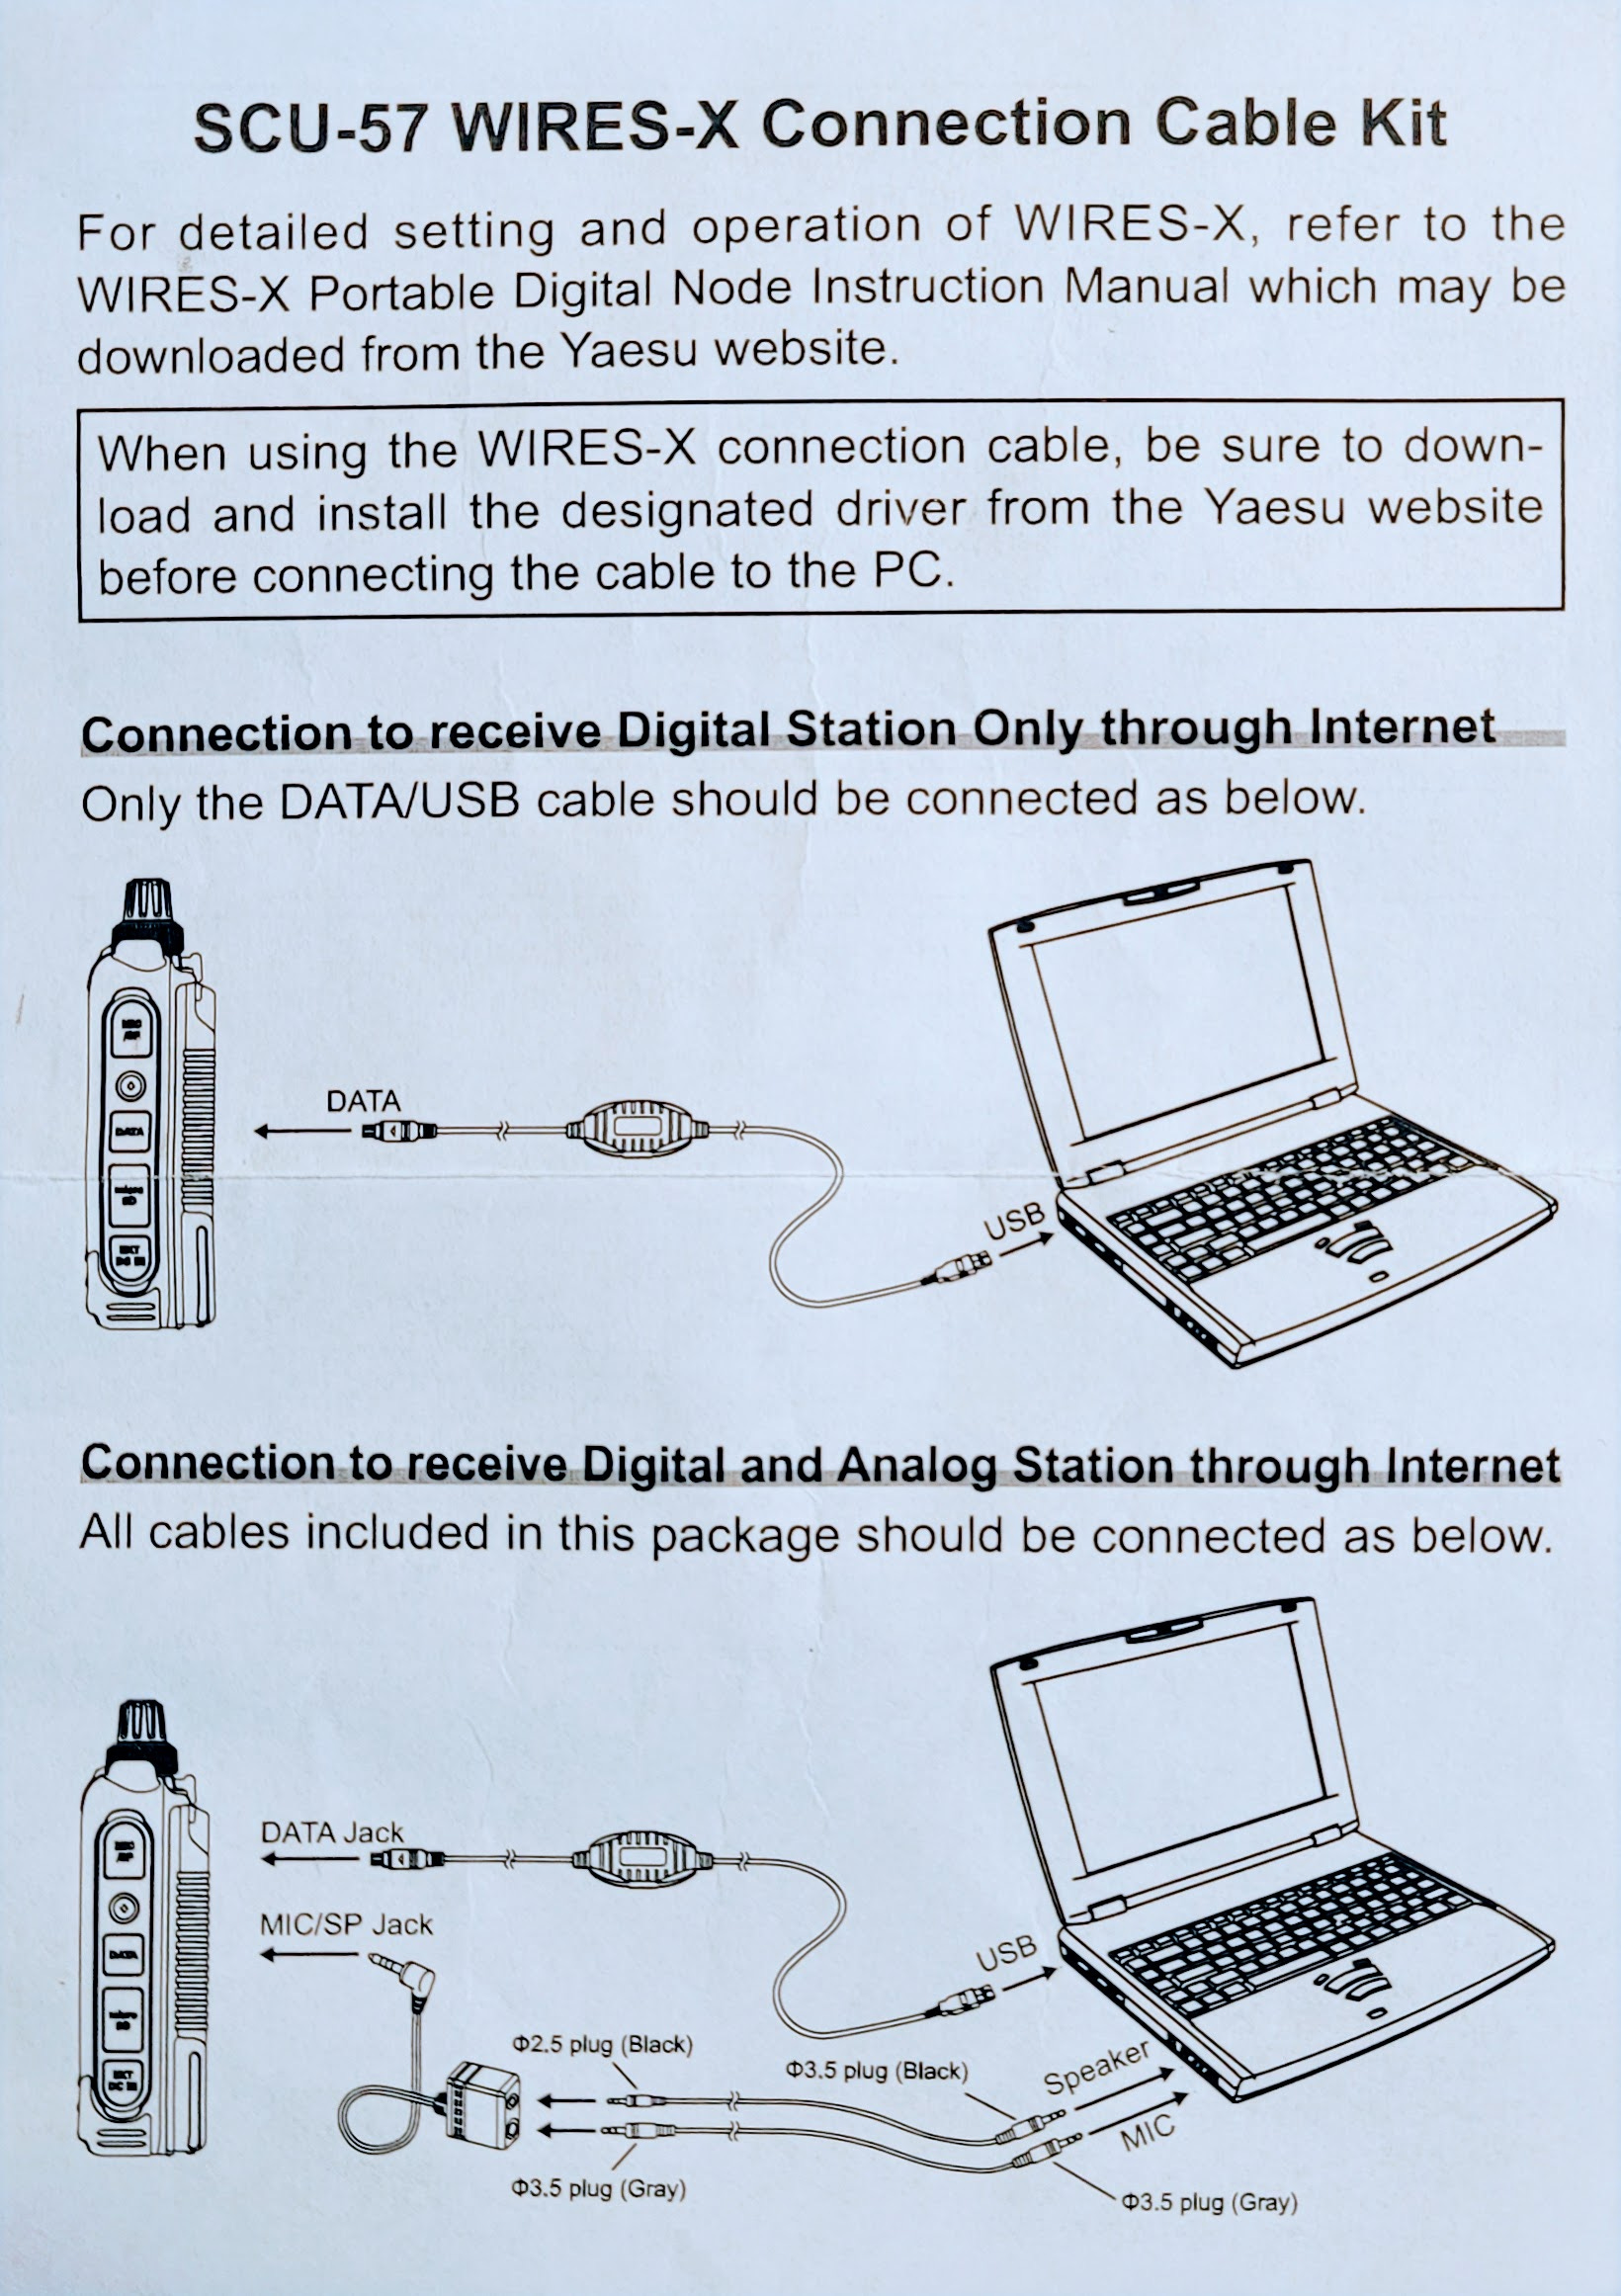
To be more clear, if you want digital-only comms, you only need the SCU-55 cable that connects the computer with the data port on the FT5D radio, and the USB sound adapter dongle. If you want digital and analog comms, you need the full SCU-57 kit.
Install and configure WIRES-X
You are ready for this step when you have:
Received your WIRES-X registration from Yaesu.
Downloaded the Prolific driver installer and the WIRES-X installer from Yaesu.
Purchased and received the Yaesu SCU-57 connection kit.
Installation of the software pieces is a two-step process: install the Prolific driver and then install WIRES-X. Since I’ll be using my laptop rarely as a WIRES-X Portable Digital Node, I did not set the WIRES-X application to automatically start.
I did find a long-but-good video that explains all the steps and it helped me get the system set up and configured:
Much more information is available from Yaesu on their WIRES-X page.
From my memory, here are the steps I followed:
1. Install the Prolific driver
Once the driver is installed, look in the Windows Device Manager to make sure it is listed there. You’ll also find the port number, a piece of information you’ll need when you start the WIRES-X software. (Out of habit, I rebooted after installing the driver.)
2. Install the WIRES-X software
This involves double-clicking the downloaded file to unzip it, then finding the Install.exe file in the resulting folder and double-clicking that.
3. Then connect the cable and adapter
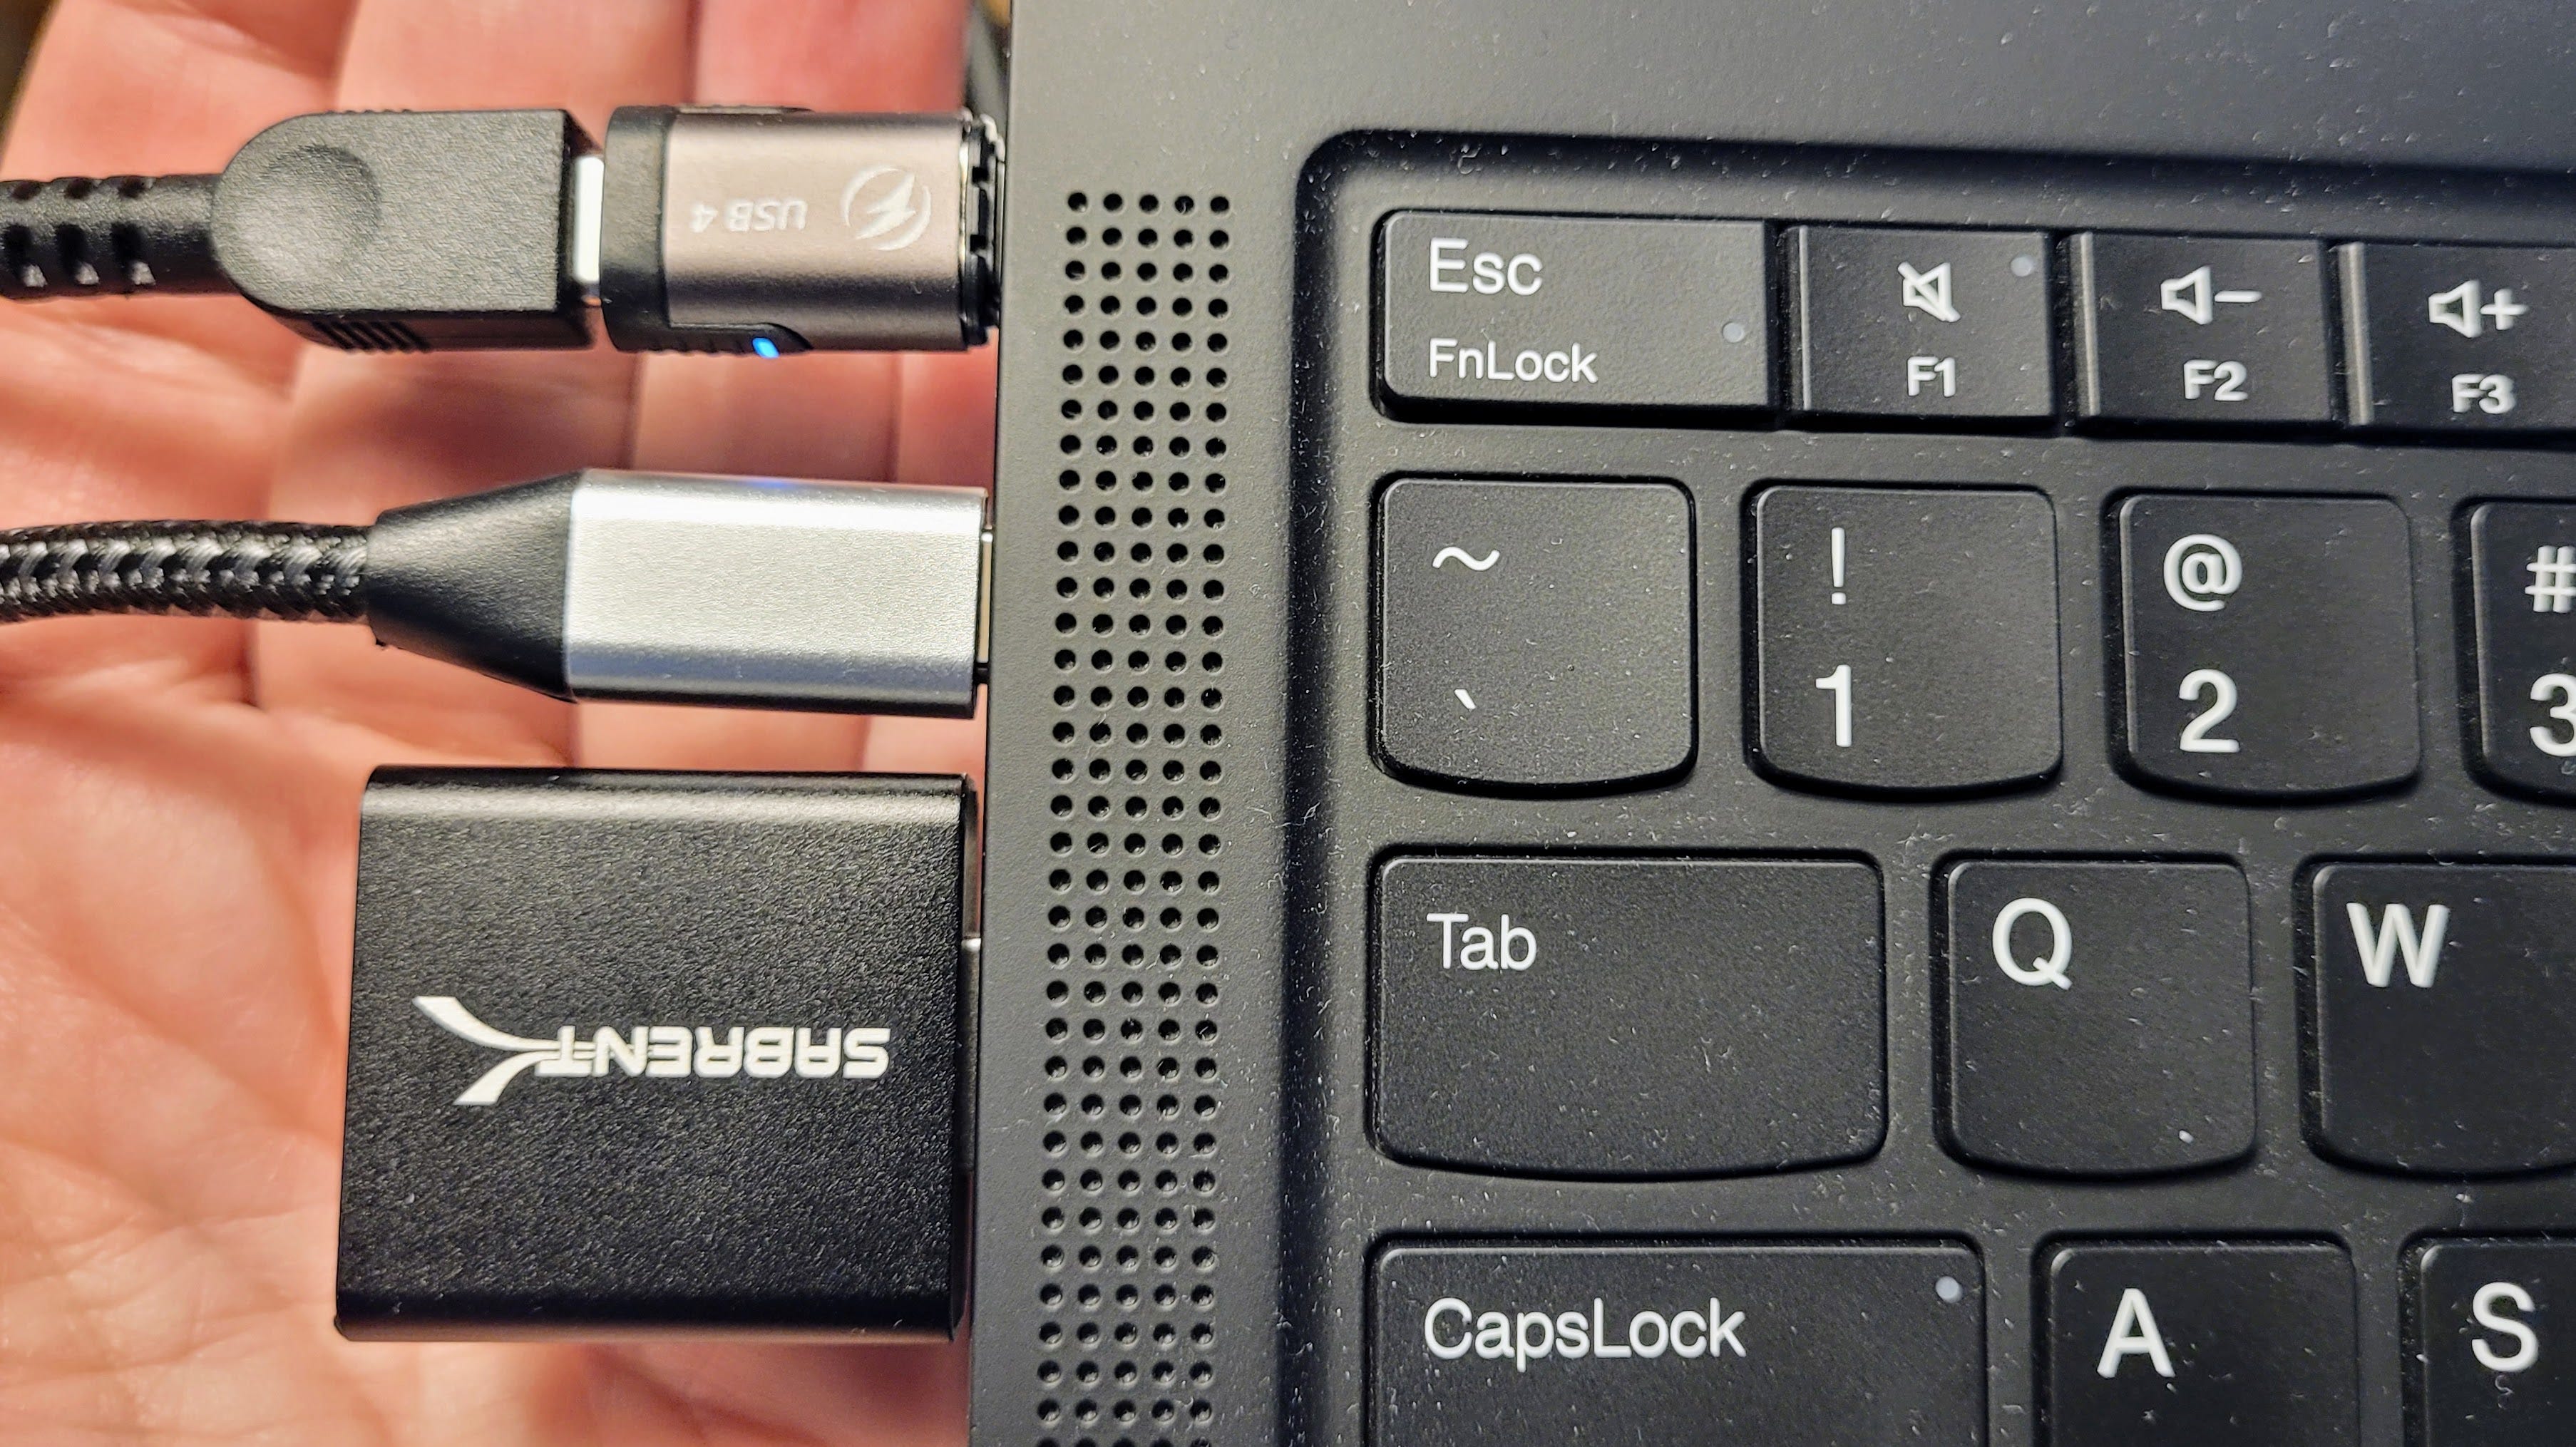
After installing the software — but before starting it — connect the FT5D radio to the computer. This involves placing the audio plug into the MIC port on the FT5D and the USB plug into the appropriate port on the computer.
Also plug in the USB audio adapter. In my kit, this is a Sabrent-brand USB-to-audio adapter.
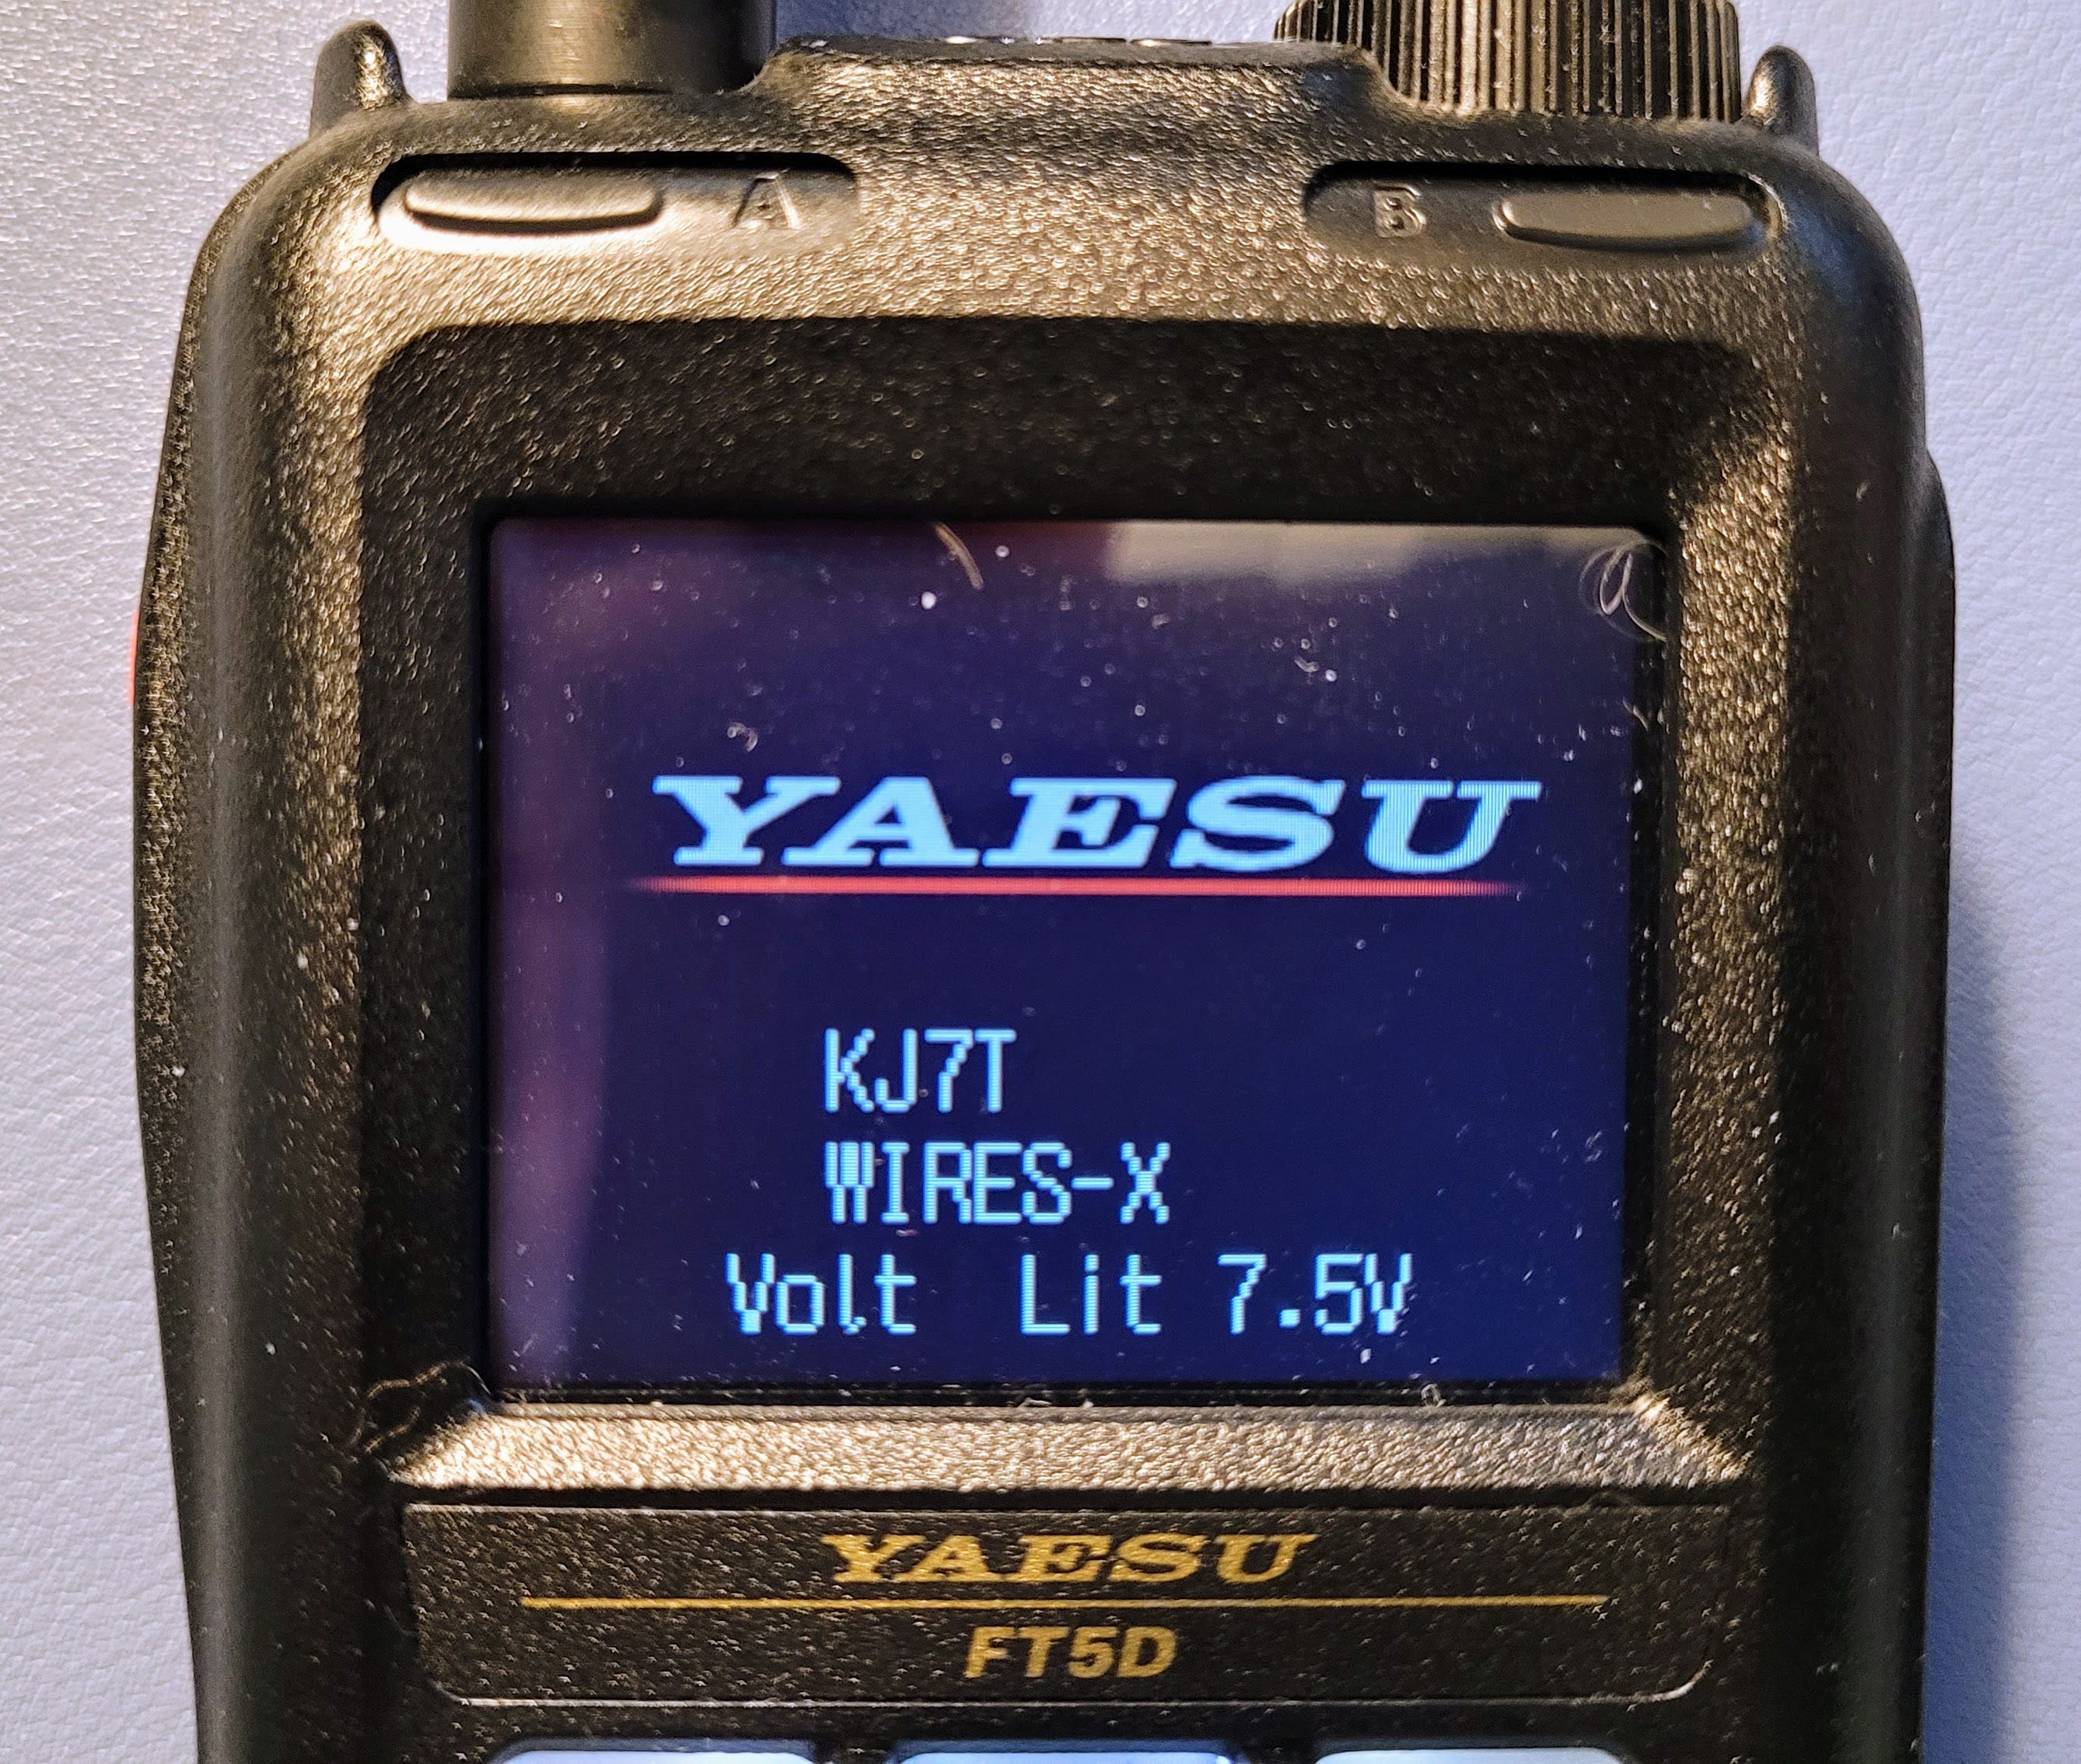
4. Put the FT5D in WIRES-X mode
Started the radio in WIRES-X mode by holding down the F key and the GM/X key while pressing and holding the power button. To be clear: you hold down both the F key and the GM/X key at the same time, and while they are both pressed in, you turn the radio on. (Do the same thing to return the radio to normal use.) You should then see a screen that looks like this:
5. Now start the WIRES-X software
When you start WIRES-X on the computer, you should be prompted select the correct serial port. This will be the one assigned to the Prolific driver. If you don’t see the Prolific driver listed, stop. You’ll need to try reinstalling the driver. Without the driver, the system will not work correctly.

If you see the audio interface not found error, check your computer settings to make sure the audio device in use is the USB sound adapter.

You may need to change this in Windows (Settings, System, Sound):

Once this is set properly, you will probably need to close the WIRES-X application and restart it.
6. Then enter your DTMF codes
In the WIRES-X application interface, select File, Settings. (I don’t recall if you see the “WIRES ID information” screen or if it jumps you straight to the correct settings popup…I think it takes you to the correct place to set up the software.)
You’ll be asked to enter your DTMF Node ID number and your DTMF Room ID number. The boxes for these will be white and you’ll be able to enter your numbers into them. (If they are grayed out, something is wrong and you can’t proceed.) Once you enter those two sets of numbers and click OK, the rest of your registration should automatically populate the set up screen with one exception: your location is not automatically set.
7. Set your location
In the WIRES-X application, click File, Settings, Location settings. There you will see places to enter the latitude and longitude of your node. These are in DMS format (degrees, minutes, seconds). Unfortunately, most online sources will give you your location in decimal format.
Enter your street address at https://www.latlong.net/ to get your decimal location.
Then convert your decimal latitude and longitude to DMS format at https://www.latlong.net/lat-long-dms.html
Manually enter the degrees, minutes, and seconds in the appropriate WIRES-X fields and click OK.

If you choose to click the “Shown position data” box, your position will be reported to the WIRES-X server. (I don’t think this really matters, so do what you feel comfortable doing.)
There is one more “gotcha” to be aware of. If you leave the “Unlimited TOT” box unchecked, your connection will automatically drop after a certain amount of time. Find this in the WIRES-X application under File, Settings, General settings. Check the “Unlimited TOT” box to avoid the problem of your connection getting cut off.

That should do it. You’re now ready to add some bookmarks so you can find your favorite places later. Adding bookmarks is easy. In the WIRES-X application, click View, Bookmark-Info. To add a bookmark, Click the Add button and enter the DTMF ID of the room you wish to add.

